
Desserts
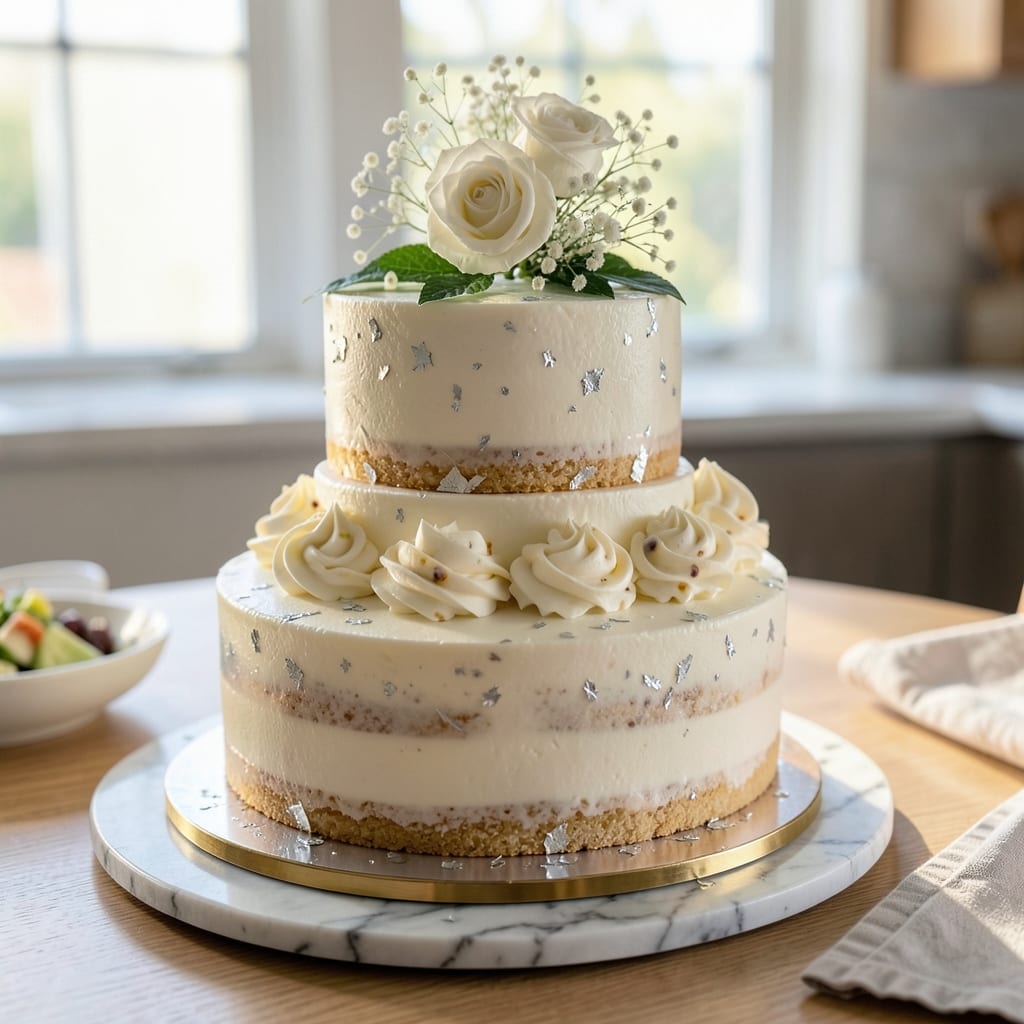
This amazing white cake recipe delivers the perfect balance of tender crumb and buttermilk lightness—no dense, dry slices here. 💛 The secret lies in the right ratio of butter to flour and a touch of cream of tartar for that signature fluffiness, plus a vanilla frosting so smooth it practically sparkles. I've baked this cake for birthdays, weddings, and just-because celebrations, and it never fails to impress. What sets this recipe apart is the foolproof method that guarantees a crack-free top and even rise. We're talking about a cake that's moist for days, with a delicate crumb that melts in your mouth. The buttermilk tenderizes the flour while adding a subtle tang that cuts through the sweetness, and the vanilla frosting—lightly sweetened with just a hint of butter—ties everything together beautifully. Once you've mastered this recipe, you'll want to make it all the time. The frosting is simple but elegant, and the cake itself holds up perfectly for slicing. Whether you're decorating with fresh berries, chocolate shavings, or keeping it classic with powdered sugar, this cake is your go-to for any occasion that calls for something special. Ready in just 1 hour (including cooling time), this recipe is perfect for beginners and experienced bakers alike. Let's get started on creating your showstopper!
Ingredients for amazing white cake
Twelve simple ingredients crafting a showstopper cake with melt-in-your-mouth crumb and buttery vanilla frosting.
| Ingredient | Amount | Notes |
|---|---|---|
| All-Purpose Flour 🌾 | 3 cups | Sifted for even texture |
| Unsalted Butter 🧈 | 1 ½ cups | Room temperature, European style preferred |
| Granulated Sugar 🍚 | 2 cups | Superfine for finer crumb |
| Buttermilk 🥛 | 1 cup | Room temperature, full-fat for best flavor |
| Large Eggs 🥚 | 3 whole | Room temperature, separated for fluffiness |
| Cream of Tartar 🧂 | ½ tsp | Essential for egg white stability |
| Pure Vanilla Extract 🍯 | 2 tsp | Bourbon or Madagascar preferred |
| Baking Powder 🧂 | 2 tsp | Aluminum-free for tender crumb |
| Salt 🧂 | ½ tsp | Fine sea salt preferred |
| Powdered Sugar 🍚 | 3 cups | For frosting, sifted |
| Heavy Whipping Cream 🥛 | 1 cup | Cold, full-fat for best stability |
| Vanilla Bean Paste 🍯 | 1 tbsp | Seeds scraped for extra flavor |
The butter and flour ratio is everything here—European-style unsalted butter has higher fat content, which gives that signature tender crumb. King Arthur or Gold Medal flour are my go-tos for consistent results, but any all-purpose will work. For the buttermilk, if you don't have it on hand, mix 1 cup milk with 1 tbsp vinegar or lemon juice and let it sit for 5 minutes. The cream of tartar is non-negotiable—it stabilizes the egg whites for that cloud-like texture. I always buy mine from Penzeys or the spice aisle at Whole Foods—it's a small investment for big flavor payoff.
No vanilla extract? Vanilla bean paste is my secret weapon—it gives you those little specks of flavor that make all the difference. For the frosting, if you're short on powdered sugar, you can make a quick substitute with 2 cups sifted granulated sugar plus 2 tbsp cornstarch, but it won't be as smooth. The heavy whipping cream needs to be cold and full-fat—none of that light stuff. If you're feeling fancy, infuse the cream with a splash of vanilla extract while it whips. And for the love of cake, don't overmix the batter—just until combined. That's what makes this cake so tender.
Store the cake layers wrapped tightly in plastic at room temperature for up to 3 days—it actually gets better as the flavors meld. The frosting? Keep it refrigerated in an airtight container for up to 5 days, though I've never had any left that long. For make-ahead prep, bake the layers a day ahead, wrap them in plastic, and store at room temperature. The frosting can be made 2 days ahead—just whip it up when you're ready to assemble. Pro tip: if your frosting starts to separate, just give it a quick whip with a hand mixer to bring it back together.
Why You'll Love This Recipe
- Foolproof Mixing: I swear by the creaming method here—just butter and sugar until light and fluffy, then fold in the eggs one at a time. No overmixing, no lumps, just smooth batter that behaves like a dream.
- Buttermilk Magic: That tangy buttermilk? It’s the secret weapon. It keeps the cake moist for days (yes, I’ve tested this) and gives it that signature tender crumb you can’t get with regular milk.
- Birthday to Brunch: Slice it for celebrations or cube it for breakfast—this cake handles it all. Frost it, layer it, or serve it plain with jam. My kids ask for it at 8 AM on weekends, no lie.
- Pantry Staple Power: You already have everything. Butter, sugar, flour, eggs—no specialty ingredients, no last-minute grocery runs. And leftovers? They disappear faster than I can say "second slice."
Step-by-step instructions for buttermilk lightness with vanilla frosting shine
Here's how to create a cloud-light cake with a velvety frosting that shines like a showstopper.
👨🍳 Step 1: Prepare the Cake Batter for Maximum Lightness
Preheat your oven to 350°F and grease two 9-inch round cake pans with butter, then line the bottoms with parchment paper. In a medium bowl, whisk together the 3 cups all-purpose flour, 2 tsp baking powder, and 0.5 tsp salt. Sift this dry mixture directly into a large mixing bowl to aerate it—this prevents dense cake.
In a separate bowl, beat the 1.5 cups unsalted butter and 2 cups granulated sugar on medium speed until light and fluffy, about 3-4 minutes. Add the 3 whole large eggs, one at a time, beating well after each addition. The mixture should nearly double in volume and become pale. This creaming process incorporates air, which creates that signature tender crumb.
Add the 1 cup buttermilk, 2 tsp pure vanilla extract, and 0.5 tsp cream of tartar to the butter mixture. The cream of tartar stabilizes the egg whites later, while the buttermilk adds moisture without making the cake dense. Mix until just combined, then gently fold in the sifted dry ingredients using a spatula. Be careful not to overmix—just until the flour disappears. The batter should be smooth but still slightly streaked.
🍳 Step 2: Bake to Golden Perfection with Even Heat
Divide the batter evenly between the prepared cake pans. Tap each pan gently on the counter to remove any air bubbles. Bake for 25-30 minutes, or until a toothpick inserted into the center comes out clean. The edges should be golden brown, and the top should spring back when touched lightly.
I like to rotate the pans halfway through baking for even heat distribution—this prevents the edges from browning too quickly while the center stays underdone. If your oven runs hot, start checking at the 20-minute mark. Overbaking dries out the cake, so pull it out as soon as it passes the toothpick test.
Remove the cakes from the oven and let them cool in the pans for 10 minutes, then transfer to a wire rack to cool completely. This gradual cooling prevents cracking and ensures the cakes hold their shape when frosting. Patience here makes all the difference—rushing leads to crumbly layers.
🥘 Step 3: Whip the Vanilla Frosting to Mirror Shine
While the cakes cool, prepare the frosting by whipping the 1 cup cold heavy whipping cream to stiff peaks in a chilled bowl. Add the 3 cups powdered sugar and 1 tbsp vanilla bean paste (including the seeds), then whip on medium speed until smooth and glossy. The frosting should hold its shape when spooned—this is your signal it's ready.
Here's the thing—chilling your bowl and beaters is non-negotiable. I always place them in the freezer for 10 minutes before whipping. Cold equipment helps stabilize the frosting and prevents it from becoming grainy. If the frosting looks slightly curdled at first, don't panic—keep whipping until it smooths out.
For that signature mirror shine, spread a thin layer of frosting (called a "crumb coat") over the completely cooled cake layers. This seals in crumbs and creates a smooth surface for the final coat. Then add the remaining frosting, using an offset spatula to create clean, straight sides. The key is to work quickly—warm air makes frosting melt and slide off.
⏰ Step 4: Chill and Serve for Ultimate Texture
Place the frosted cake in the refrigerator for at least 1 hour before serving. This chilling time firms up the frosting and lets the flavors meld. The cake will develop a beautiful sheen as it sets, and the contrast between the light cake and creamy frosting will be stunning.
Slice with a warm, clean knife (run it under hot water between cuts) for clean edges. Each slice should reveal a tender, moist crumb with a glossy frosting that melts slightly on the tongue. Serve at room temperature for the best experience—cold frosting can feel waxy, while room temperature brings out its true richness.
Pro Tips For Making Amazing White Cake
- Sift the Flour Twice: That extra sift removes hidden lumps and aerates the dry ingredients—no, your whisk won’t cut it. I used to skip this and wondered why my cake turned out dense. Do it once before mixing, then sift again after adding baking powder for even distribution. ---
- Cream Butter and Sugar Cold: Take the butter straight from the fridge—room temperature is overrated for this cake. Cold butter creates finer crumbs and prevents overmixing, which means no tough, chewy texture. Let it sit out just until it yields to pressure, then get creaming. ---
- Measure Buttermilk Precisely: That "1 cup" on your measuring cup isn’t exact—use a kitchen scale for 240g. Buttermilk’s acidity reacts with baking soda, and even 10g off throws off the rise. If you’re in a pinch, mix 1 tablespoon vinegar or lemon juice into warm milk and let it sit for 5 minutes. ---
- Rotate the Pan Mid-Bake: Your oven isn’t perfectly even, and that’s why one side of your cake might bake faster. After 20 minutes, swap the pan from top to bottom rack—this evens out the heat and guarantees a uniform crumb. (Yes, even if you’re impatient like me.)
Serving suggestions for this recipe
Classic Elegance
Serve your white cake with a simple yet stunning presentation—stack the layers on a gold-rimmed cake stand or elegant glass cake plate to let the frosting shine. Dust the top with powdered sugar using a fine-mesh sieve for a snowy finish, or add a sprinkle of edible gold leaf for a luxurious touch. 💛
For an effortless yet polished look, arrange fresh strawberries or raspberries in a circular pattern around the base of the cake. The vibrant red contrasts beautifully with the white frosting, making it perfect for summer celebrations. I like to use organic berries from Trader Joe's for their sweetness and bright color.
Fancy Upgrades
Transform your cake into a showstopper with chocolate shavings or white chocolate curls—use a vegetable peeler on a bar of Valrhona chocolate for delicate, elegant curls. For a floral touch, add fresh edible flowers like violets or pansies, which pair beautifully with vanilla flavors. Always remove any bitter stems first!
For a modern twist, create a drip effect using white chocolate ganache—melt ½ cup white chocolate with ¼ cup heavy cream, then let it cool slightly before drizzling over the sides. Use a piping bag with a fine tip for precise control. This adds a professional bakery touch that guests will rave about.
Seasonal Touches
Spring calls for lemon zest sprinkled over the frosting, while summer begs for fresh mint leaves tucked between layers. In fall, swap the berries for candied pecans or caramelized apples—simmer ½ cup apple slices in 2 tbsp brown sugar and 1 tbsp butter until tender, then cool before placing on top. 🍎
Winter celebrations shine with cranberry sauce drizzled between layers or cinnamon-sugar dusting over the frosting. For a festive touch, add candied orange peel or crushed peppermint—just ½ tsp of peppermint extract in the frosting adds a subtle holiday aroma without overpowering the vanilla.
Portion Perfect
Use a sharp serrated knife (like a Japanese pull knife) for clean slices—warm the blade under hot water between cuts to prevent crumbs. For individual servings, cut into 1-inch wedges for elegant finger sandwiches, or use a round cutter to create uniform circles for cake pops. 🌟
Serve with a side of whipped cream or vanilla ice cream for a deconstructed dessert experience. I often pair it with champagne or sparkling apple cider—the bubbles complement the cake's lightness beautifully. For a non-alcoholic option, sparkling lemonade adds a refreshing contrast.
Nutrition facts
Frequently asked questions
Why does this recipe use cream of tartar?
The 0.5 tsp cream of tartar stabilizes the egg whites and helps create that signature cloud-light texture. It also balances the sweetness and adds a subtle tang that enhances the buttermilk flavor. Without it, your cake might be slightly denser and less tender.
Can I substitute buttermilk if I don't have any? Mix 1 cup milk with 1 tbsp vinegar or lemon juice, then let it sit for 5 minutes to curdle. This homemade buttermilk works perfectly and keeps the cake's signature moisture. Just
How do I prevent cracks in the cake?
Cracks usually happen from overmixing or cooling too quickly. Avoid overmixing the batter (just until combined), and let the cakes cool in the pans for 10 minutes before transferring to a wire rack. Also, don't open the oven door too early—rapid temperature changes can cause stress cracks.
Can I make this cake ahead of time?
Yes! Bake the layers 1 day ahead and store them wrapped tightly at room temperature. The frosting can be made 2 days ahead and kept refrigerated in an airtight container. Assemble the cake just before serving for the best texture and presentation.
What's the secret to a smooth frosting?
Chill your mixing bowl and beaters for 10 minutes before whipping, and use cold heavy cream. Sift the powdered sugar first to avoid lumps, and whip the frosting until it holds stiff peaks. If it looks curdled at first, keep whipping—it will smooth out!