
Desserts
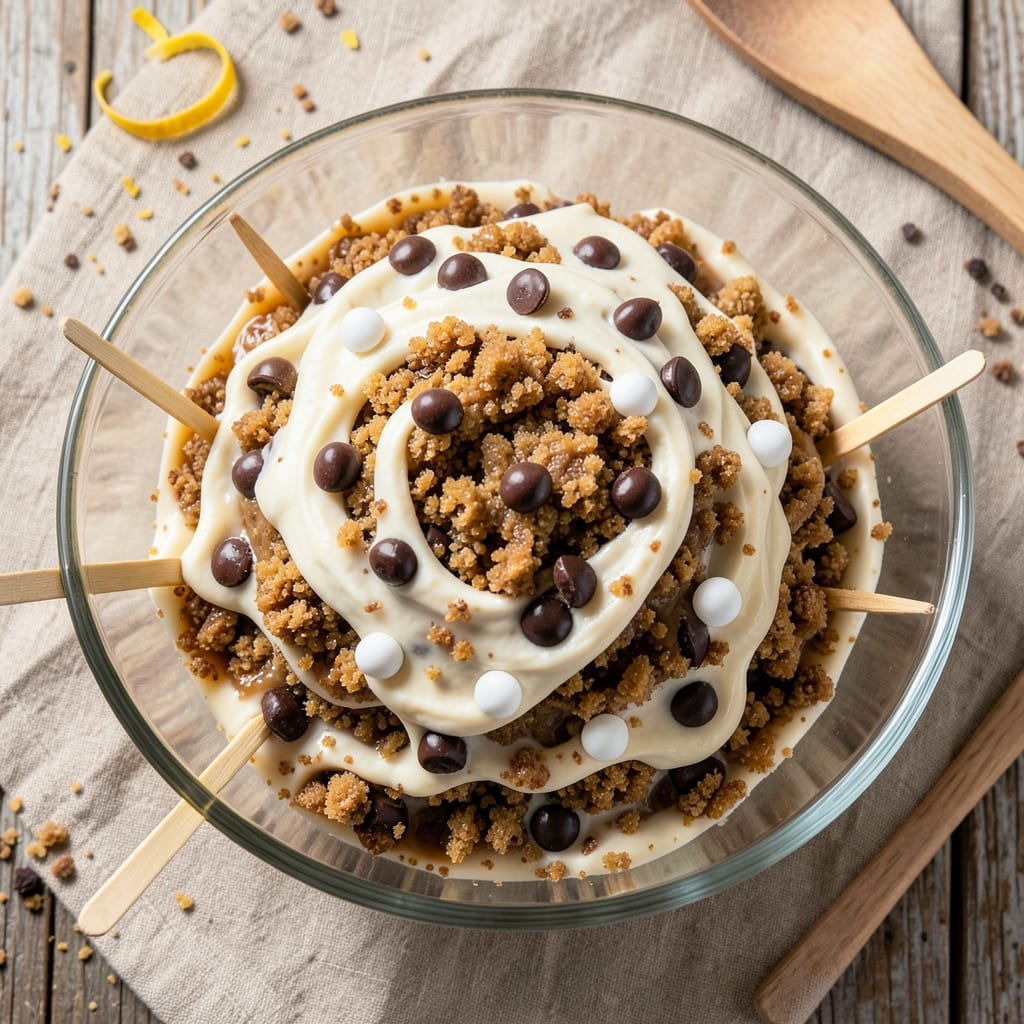
This amazing cake pop recipe transforms leftover cake into bite-sized edible art that’ll disappear faster than you can say "dessert." The secret lies in the perfect balance: crumbly cake centers wrapped in velvety chocolate shells, with that satisfying click when you bite through the coating. I’ve tested countless variations—this one delivers foolproof results every time, even for beginners who’ve never held a lollipop stick.
Start with cake crumbs mixed with frosting to bind them just right—too much frosting makes them sticky, too little means they’ll crumble apart. Roll into perfect balls, then dip in melted chocolate for a glossy finish. The real magic happens when you add toppings: crushed cookies for texture, sprinkles for color, or edible glitter for that extra wow factor. These aren’t just cake pops—they’re conversation starters.
What you’ll end up with is a tray of crunchy-coated, velvety-centered delights that look like they came from a bakery. The chocolate sets smoothly, the cake stays moist, and the toppings stick perfectly. They’re easy to make ahead and even easier to devour—perfect for parties, gifts, or just satisfying that late-night sweet tooth. Trust me, once you try these, store-bought cake pops won’t stand a chance.
Pro tip: Chill the cake pop sticks in the freezer for 5 minutes before dipping to prevent melting. And if you’re feeling fancy, use a piping bag to create intricate designs on top. The possibilities are endless, but the basics are simple—just cake, chocolate, and a little creativity. Let’s make these!
Ingredients for amazing cake pop
These 11 ingredients transform cake scraps into show-stopping edible art—crunchy, velvety, and irresistible!
| Ingredient | Amount | Notes |
|---|---|---|
| Vanilla Cake Crumbs 🍰 | 6 cups | From 2 9-inch layers, crumbled fine |
| Vanilla Buttercream Frosting 🧈 | 1 ½ cups | Room temperature, not too sweet |
| White Chocolate Chips 🍫 | 16 oz | High-quality, for dipping shells |
| Dark Chocolate Chips 🍫 | 16 oz | 60% cocoa for rich flavor |
| Lollipop Sticks 🍬 | 24 whole | Wooden, 5-inch length |
| Unsalted Butter 🧈 | ½ cup | For melting chocolate |
| Heavy Whipping Cream 🥛 | ½ cup | For extra-smooth chocolate |
| Crushed Vanilla Cookies 🍪 | 1 cup | For crunchy topping |
| Rainbow Sprinkles 🌈 | ½ cup | For colorful accents |
| Edible Glitter ✨ | 1 tbsp | For shimmering finish |
| Granulated Sugar 🍚 | 1 tbsp | For dusting sticks |
The cake crumbs are your foundation—use fresh crumbs from 2 layers of vanilla cake, broken down finely with your hands. Wilton or Betty Crocker boxed mixes work perfectly if you're starting from scratch, but homemade cake yields the best texture. For the frosting, store-bought vanilla buttercream (like Wilton or homemade) is ideal—just make sure it's not too sweet, or your cake pops will taste like candy. Trader Joe's has an amazing vanilla buttercream that's perfect for this. If your frosting is too runny, chill it for 15 minutes before mixing with crumbs. Pro tip: microwave the butter for 40 seconds to soften it—this makes the chocolate dip smoother later.
No white chocolate? Use dark chocolate instead—just add a splash of cream when melting to keep it glossy. Running out of lollipop sticks? Use pretzel rods for a salty-sweet twist, or skewers if you're in a pinch. The crushed cookies can be swapped for graham crackers or Oreos—just pulse them in a food processor for even texture. Sprinkles are non-negotiable for the wow factor, but if you're feeling fancy, edible pearls or gold leaf take these to the next level. For extra shine, mix the edible glitter with a tiny bit of water before sprinkling—it sticks better and sparkles like magic. The granulated sugar dusting isn't just for looks—it prevents the sticks from sticking to the chocolate.
Once made, these keep beautifully—store in an airtight container with parchment paper between layers for up to 5 days at room temperature. For longer storage, freeze for 3 months (just thaw at room temp before serving). Double the batch for parties—they disappear fast! If you're making ahead, dip and decorate the day of so toppings stay crisp. Chill the finished pops for 30 minutes before serving to set the chocolate perfectly. Trust me, the longer they sit, the better they taste—the chocolate firms up and the flavors meld into pure deliciousness. These aren't just treats; they're conversation pieces!
Why You'll Love This Recipe
- I’ll be real: I hate sticky messes. This recipe just needs cake crumbs, frosting, and a spoon—no fancy equipment, no stress. The buttercream binds everything together while you’re still scrolling through your phone.
- No Mixing Madness: I’ll be real: I hate sticky messes. This recipe just needs cake crumbs, frosting, and a spoon—no fancy equipment, no stress. The buttercream binds everything together while you’re still scrolling through your phone.
- Double Chocolate Magic: Honestly, the contrast is what makes these pop. Creamy vanilla frosting wrapped in cake crumbs gets a crunchy upgrade with white and dark chocolate chips melting just enough to coat every bite. It’s like dessert’s version of a perfect match.
- Party in a Jar: Between us, these are my go-to for birthdays, teacher gifts, or just because. They travel well, no plates needed, and the kids can even help roll them. Plus, the sticks make them feel fancy without the fuss of piping.
Step-by-step instructions for crunchy-coated cake pops
Transform simple cake crumbs into showstopping treats with this foolproof technique.
Bind Cake Crumbs with Buttercream
In a large mixing bowl, combine the 6 cups Vanilla Cake Crumbs and 1.5 cups Vanilla Buttercream Frosting. Using a wooden spoon or silicone spatula, mix vigorously until the crumbs fully absorb the frosting and form a thick, moldable dough. The texture should resemble wet sand—add an extra tablespoon of frosting if it feels too dry.
This binding step is critical: under-mixed dough will crumble when rolled, while over-mixed dough becomes sticky. Work quickly but thoroughly, ensuring every crumb is coated. For best results, use frosting at room temperature—it blends more smoothly and creates a cohesive center.
Roll and Chill the Cake Pop Dough
Scoop the dough into a piping bag fitted with a large round tip (about 1-inch diameter). Pipe 24 equal-sized balls (about 1.5 inches in diameter) onto a parchment-lined baking sheet. Roll each ball between your palms to smooth any rough edges, then dust the surface with 1 tablespoon Granulated Sugar using a fine-mesh sieve.
Place the sheet in the freezer for 15 minutes to firm up the dough. This chilling step prevents the balls from sticking to sticks later and ensures clean, professional-looking cake pops. For even better results, chill for 30 minutes if your kitchen is warm.
Assemble with Lollipop Sticks
After chilling, insert one Lollipop Stick into each cake ball from the bottom, pressing firmly until about 1 inch of stick protrudes from the top. Work quickly to prevent the dough from warming too much. Arrange the assembled cake pops on the same parchment sheet and return them to the freezer for another 10 minutes to fully set.
This freezing stage is non-negotiable—it guarantees the sticks stay secure during dipping. If you rush this step, the cake pops may fall apart when you try to coat them. For extra stability, dip the exposed stick ends in melted chocolate before dipping the cake balls.
Create the Crunchy Chocolate Coating
In a microwave-safe bowl, combine 16 oz White Chocolate Chips and 16 oz Dark Chocolate Chips with 0.5 cup Unsalted Butter and 0.5 cup Heavy Whipping Cream. Microwave in 30-second intervals, stirring between each, until completely melted and smooth. The mixture should reach 110°F—not too hot or it will seize when sprinkles are added.
Stir in 1 cup Crushed Vanilla Cookies and 0.5 cup Rainbow Sprinkles until evenly distributed. The texture should be thick enough to coat the cake pops but still flow smoothly. For a shimmering finish, sprinkle 1 tablespoon Edible Glitter over the top of the melted chocolate before dipping.
Dip and Decorate for Showstopping Results
Working quickly, dip each chilled cake pop into the chocolate mixture, coating it completely. Lift gently and let excess drip off for 5 seconds before placing on a wire rack. For a thicker coating, dip a second time. Allow the chocolate to set at room temperature for 10 minutes before serving.
These cake pops deliver the perfect balance of textures: a velvety cake center, crispy cookie crunch, and glossy chocolate exterior. For extra flair, use different colored chocolates for each batch or add edible flowers before the chocolate sets. Serve immediately for maximum wow factor!
Pro Tips For Making Amazing Cake Pop
- CHILL THE MIX FIRST: Mixing cake crumbs and frosting too soon leads to a sticky mess you’ll hate rolling. Pop the bowl in the fridge for 10-15 minutes—just enough to firm up the buttercream without freezing it solid.
- USE A FOOD PROCESSOR: Crushing cake into fine crumbs by hand is a workout you’ll regret. Pulse dry cake in a food processor until it’s powdery but not floury—this ensures even texture and better flavor in every bite.
- STICK TO 1-INCH BALLS: Bigger balls mean uneven baking and messy dipping. Roll them to about 1-inch diameter—they’ll hold shape better, bake faster, and coat cleanly in melted chocolate.
- MELT CHOCOLATE IN BATCHES: Dumping all the chips into one pot risks burning or seizing. Melt white and dark chocolate separately over low heat, stirring constantly—this keeps them smooth and prevents grainy texture when dipped.
Serving suggestions for this dish
Presentation Plating
Arrange cake pops on a parchment-lined cake stand or wooden serving board for rustic charm. For a bakery-style display, use a tiered stand with white chocolate-dipped pops on the bottom tier and sprinkle-topped ones on top. I love adding fresh mint leaves or edible flowers around the base for a pop of color—just place them carefully so they don’t touch the chocolate. 🌿
Party Serving Ideas
For gatherings, serve cake pops in clear glass jars with a parchment-lined lid—this keeps them fresh and lets guests see the colorful layers. Label each jar with a mini chalkboard tag (e.g., "White Chocolate Crunch" or "Dark Chocolate Decadence"). For a fun twist, thread them onto a wooden skewer with alternating colors to create a cake pop sushi roll—kids love this interactive presentation! 🍡
Gift-Worthy Packaging
Wrap individual cake pops in cellophane bags tied with ribbon for a professional gift look. Add a personalized tag with the recipe name or occasion (e.g., "Happy Birthday, [Name]"). For bulk gifts, place them in a gift box lined with tissue paper and include a mini spatula for easy serving. I’ve even seen creative DIY boxes made from cardboard cake pop molds—paint them gold for an elegant touch! ✨
Themed Decorations
Match your cake pops to the occasion: red and green for holidays, pastel colors for baby showers, or gold and black for elegant parties. Use themed sprinkles (hearts for Valentine’s Day, stars for birthdays) or edible markers to draw designs on the chocolate before it sets. For a boho vibe, roll the sticks in crushed pistachios or freeze-dried raspberries before dipping. 🎨
Serving Temperature Tips
Serve cake pops at room temperature for the best texture—chilled ones can feel too firm. If your kitchen is warm, store them in the fridge for up to 2 hours before serving to prevent the chocolate from melting. For outdoor events, place them in a cooling tray filled with ice packs wrapped in towels. And here’s a pro move: dust with powdered sugar just before serving to add a snowy finish and keep fingers clean! ❄️
Pairing with Drinks
Pair white chocolate cake pops with sparkling wine or champagne—the bubbles cleanse the palate between bites. Dark chocolate versions go perfectly with espresso martinis or chilled coffee. For a non-alcoholic option, serve with vanilla chai tea or cold milk to balance the richness. I always keep a small pitcher of whipped cream on hand for guests who want to dip their cake pops—it’s a crowd-pleaser! ☕
Nutrition facts
Frequently asked questions
Can I use any type of cake for cake pops?
Most cakes work well, but the texture matters! Vanilla, chocolate, or spice cakes are ideal—they crumble easily and hold together when mixed with frosting. Avoid overly moist cakes like carrot or pound cake, as they won’t form sturdy balls. For best results, use a cake that’s been baked for at least 24 hours to reduce moisture.
Why are my cake pops falling apart when I dip them?
This usually happens if the cake pop dough isn’t chilled enough or the frosting wasn’t mixed thoroughly. First, ensure your dough balls are firm after freezing (at least 15 minutes). Second, check that your frosting-to-crumb ratio is right—too little frosting means crumbly centers. For extra stability, dip the stick ends in melted chocolate before dipping the cake balls.
How do I get the chocolate coating to be extra thick?
Thick chocolate coatings come down to two things: temperature and technique. First, melt your chocolate to 110°F—any hotter and it’ll seize when you add mix-ins. Second, dip the cake pops twice: first for a base coat, then let it set for 5 minutes before the second dip. Work quickly and use a spoon to gently tap off excess chocolate before placing on the rack.
Can I make cake pops ahead of time?
These keep beautifully for 5 days at room temperature in an airtight container with parchment between layers. For longer storage, freeze them for up to 3 months. Just thaw at room temp before serving. Pro tip: Don’t decorate until serving day—toppings stay crispest when fresh. You can assemble the cake pops (with sticks) up to 2 days ahead and freeze them before dipping.
What’s the best way to clean up melted chocolate mess?
Keep a bowl of warm water nearby—it helps soften chocolate for easy cleanup! For stubborn residue, use a plastic scraper or damp paper towel. For the work surface, sprinkle coarse salt on melted chocolate while it’s still wet, let it set, then sweep it away. And always line your workspace with parchment paper to make cleanup a breeze.