
Desserts
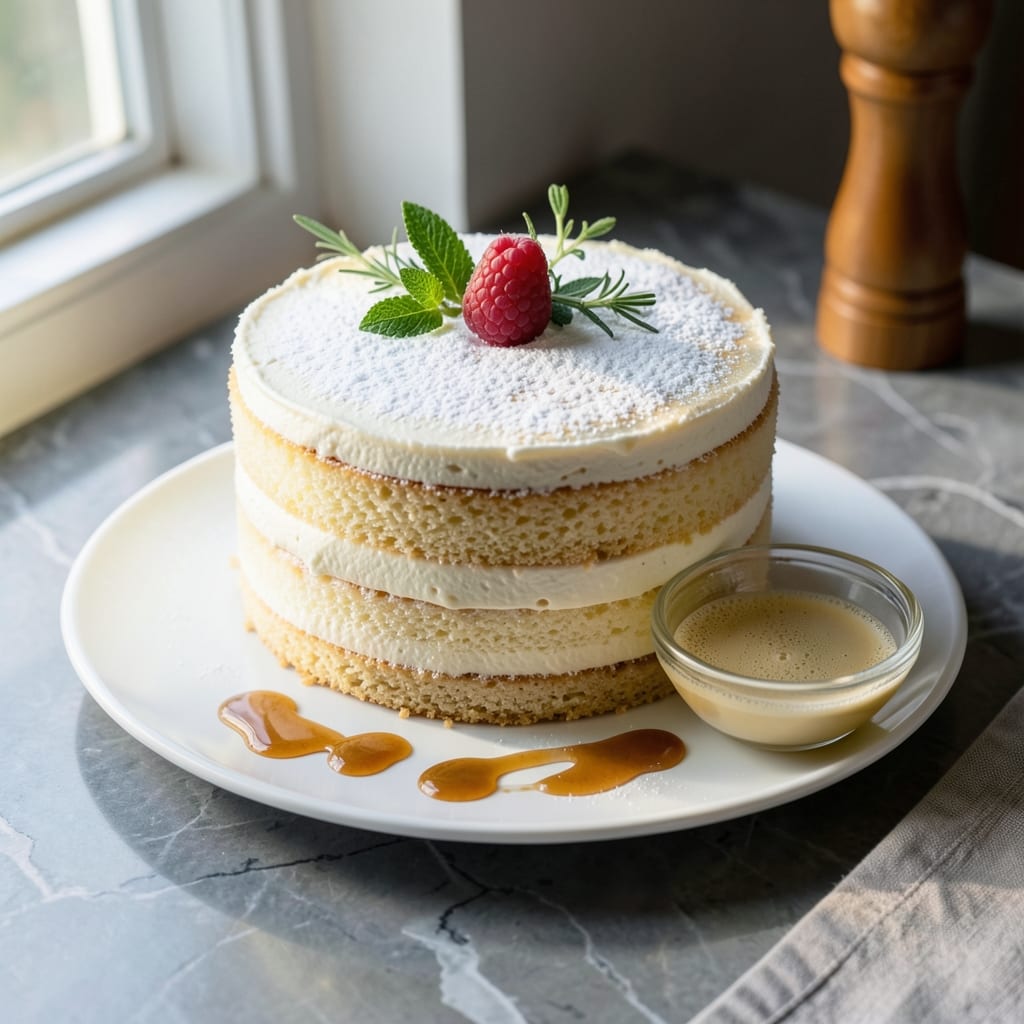
This allergy-free vanilla cake delivers light-as-air layers without gluten or dairy—proving you don’t need traditional ingredients for restaurant-quality results. ✨ The secret lies in a simple yet effective substitution system using aquafaba (chickpea brine) and plant-based butter, which creates a tender crumb and rich flavor profile that rivals classic recipes.
What sets this cake apart is its foolproof technique that eliminates common pitfalls of allergy-friendly baking. The recipe includes precise measurements and clear instructions to ensure even rise, proper moisture balance, and that signature vanilla aroma that makes it irresistible. No special equipment is required—just a standard mixing bowl and oven.
By the time it emerges from the oven, you’ll have three perfectly moist layers with a delicate crumb and subtle vanilla essence that’s impossible to resist. The frosting, made with dairy-free butter and powdered sugar, creates a smooth finish that’s both elegant and easy to spread. This cake proves that dietary restrictions don’t mean sacrificing texture or taste.
Perfect for celebrations, potlucks, or treating yourself, this recipe includes tips for avoiding cross-contamination and adjusting sweetness to your preference. Let’s get baking—your taste buds (and allergies) will thank you.
Ingredients for allergy free vanilla cake
Precision-mixed ingredients designed to deliver restaurant-quality layers without gluten or dairy restrictions.
| Ingredient | Amount | Notes |
|---|---|---|
| All-Purpose Gluten-Free Flour Blend 🌾 | 2 ½ cups | Bob's Red Mill 1:1 preferred |
| Granulated Sugar 🍚 | 2 cups | Organic preferred for purity |
| Pure Vanilla Extract 🌿 | 2 tbsp | Madagascar bourbon preferred |
| Aquafaba (Chickpea Brine) 🥫 | 1 cup | Fresh from canned chickpeas |
| Unsalted Plant-Based Butter 🧈 | 1 cup | Miyoko's or Earth Balance |
| Unsweetened Almond Milk 🥛 | 1 cup | Vanilla-flavored preferred |
| Baking Powder 🧂 | 2 tsp | Aluminum-free preferred |
| Salt 🧂 | ½ tsp | Diamond Crystal kosher |
| Xanthan Gum 🧪 | ¼ tsp | Ensures proper binding |
| Powdered Sugar 🍚 | 3 cups | For dairy-free frosting |
| Lemon Juice 🍋 | 1 tbsp | Freshly squeezed |
| Vanilla Bean Paste 🌿 | 1 tsp | For enhanced vanilla flavor |
| Cream of Tartar 🧂 | ½ tsp | Stabilizes frosting |
The gluten-free flour blend is non-negotiable for texture—Bob's Red Mill 1:1 is the gold standard, but King Arthur works too. For the vanilla extract, Madagascar bourbon adds depth, but pure vanilla extract suffices. Aquafaba is the secret weapon here: use fresh brine from canned chickpeas (drain, reserve liquid). Miyoko's plant-based butter melts beautifully, but Earth Balance is a budget-friendly alternative. The xanthan gum ensures proper binding without a gummy texture—don’t skip it. For the almond milk, vanilla-flavored enhances the cake’s aroma without extra effort.
No aquafaba? Flax eggs (3 tbsp ground flaxseed + 9 tbsp water) work in a pinch, though texture may vary slightly. Substitute plant-based butter with coconut oil (solid) for a neutral flavor. For the frosting, powdered sugar can be swapped for confectioners' sugar if needed, though it may require more liquid. The lemon juice brightens the frosting—bottled works, but fresh adds complexity. If you prefer a tangier frosting, increase to 2 tbsp. The cream of tartar stabilizes the frosting, but if omitted, add an extra 0.25 tsp of cornstarch to compensate.
Store cake layers wrapped in parchment at room temperature for up to 3 days or refrigerate for 5 days. Frosting keeps for 1 week refrigerated or 3 months frozen. Assemble the cake just before serving to maintain moisture. For cross-contamination prevention, use separate utensils and bowls for gluten-free ingredients. The frosting can be made 2 days ahead—just whip it again before use. Freeze layers individually for up to 1 month if prepping ahead.
Why You'll Love This Recipe
- No-Fuss Mixing: I swear by this recipe because it’s basically one bowl—no fussing with multiple dry ingredients or weird ratios. The gluten-free blend handles like a dream, and the aquafaba (yes, chickpea brine) whips up just like eggs, so you get that light, airy texture without the mess.
- Vanilla Kiss: That pure vanilla extract? It’s not just flavor—it’s the star. The cake smells like a bakery the second it comes out of the oven, and the taste is ridiculously good, with just the right balance of sweetness and that cozy vanilla warmth. (Between us, I’ve been known to eat slices straight from the pan.)
- Crowd-Pleaser Any Day: Birthday? Brunch? Random Tuesday? This cake works for all of it. It’s neutral enough to pair with berries, ice cream, or even a drizzle of caramel, but still feels special enough for a celebration. Honestly, my neighbors keep asking for it at potlucks now.
- Zero-Waste Magic: The best part? That aquafaba isn’t just a trick—it’s a game-changer for leftovers. The cake stays moist for days, and if you’re smart, you’ll bake two pans at once. One for today, one for later. Plus, using pantry staples like chickpea brine and plant-based butter keeps it budget-friendly without sacrificing taste.
Step-by-step instructions for allergy-free vanilla cake
Here's the precise method for creating light, fluffy layers without gluten or dairy.
🍳 Step 1: Whip Aquafaba to Stiff Peaks
In a stand mixer fitted with the whisk attachment, combine the 1 cup Aquafaba (Chickpea Brine) and 0.5 tsp Cream of Tartar. Whip on high speed for 6-8 minutes until stiff, glossy peaks form that hold their shape when the whisk is lifted. You'll know it's ready when the meringue looks dry and stands in firm peaks—this creates the airy texture that replaces eggs.
I like to wipe down the bowl with a damp cloth before starting to prevent any sugar or flour residue from interfering with the meringue formation. Add the 2 tbsp Pure Vanilla Extract and 1 tsp Vanilla Bean Paste during the last 30 seconds of whipping to infuse the flavor without deflating the mixture.
👨🍳 Step 2: Cream Butter and Sugar Together
In a separate large mixing bowl, beat the 1 cup Unsalted Plant-Based Butter (softened but not melted) with the 2 cups Granulated Sugar on medium-high speed for 3-4 minutes until light and fluffy. The mixture should nearly triple in volume and become pale in color. This step incorporates air that will help create the cake's signature lightness.
Here's the thing—don't rush this process. You'll see the butter and sugar start to emulsify and become creamy. If you're using a hand mixer, work in 30-second bursts to prevent overheating the butter. The goal is to create a smooth, ribbon-like consistency that holds its shape when the beaters are lifted.
👨🍳 Step 3: Combine Wet Ingredients
Add the whipped aquafaba mixture to the butter-sugar combination in 3 additions, mixing on low speed after each addition until fully incorporated. Then add the 1 cup Unsweetened Almond Milk and mix until smooth. This gradual addition prevents the aquafaba from deflating.
In a separate bowl, whisk together the 2.5 cups All-Purpose Gluten-Free Flour Blend, 2 tsp Baking Powder, 0.5 tsp Salt, and 0.25 tsp Xanthan Gum. Sift this mixture directly into the wet ingredients and mix on low speed for 15-20 seconds just until combined—you should still see small flour streaks. Overmixing develops gluten and makes the cake dense.
🥘 Step 4: Bake in Two Layers
Preheat your oven to 350°F and grease two 8-inch round cake pans with plant-based butter or line them with parchment paper. Divide the batter evenly between the pans. Tap each pan firmly on the counter 3 times to remove any air bubbles and ensure even baking.
Bake for 25-30 minutes or until a toothpick inserted into the center comes out clean. The edges should be light golden brown while the center remains slightly springy to the touch. I always check for doneness at the 22-minute mark since gluten-free cakes can vary slightly in baking time. Rotate the pans halfway through for even baking.
🍰 Step 5: Prepare and Assemble the Frosting
While the cakes cool, prepare the frosting by beating the 3 cups Powdered Sugar, 1 tbsp Lemon Juice, and 1 tbsp Pure Vanilla Extract together until smooth. The lemon juice adds brightness that cuts through the richness of the plant-based butter. Beat on medium speed for 2-3 minutes until completely smooth and lump-free.
Once the cakes have cooled completely (about 1 hour at room temperature), level the tops if needed. Place one layer on a serving plate, spread with about ⅓ of the frosting, then add the second layer. Frost the top and sides completely, creating a smooth finish. Chill in the refrigerator for 30 minutes before slicing to help the frosting set properly.
Pro Tips For Making Allergy Free Vanilla Cake
- WHISK THE AQUAFABA FIRST: I learned this the hard way—whipping the chickpea brine before mixing it with sugar makes a world of difference. Beat it to stiff peaks (about 3-4 minutes) before adding anything else, or your cake will turn out dense instead of light. (Yes, even if you're impatient like me.)
- MELT THE BUTTER SLOW: Don’t nuke that plant-based butter in the microwave—it burns easily and ruins the flavor. Use a double boiler or melt it in 10-second bursts, stirring constantly, until just smooth. Overheated butter = off-tasting cake, no matter how good the rest of your ingredients are.
- SIFT THE FLOUR BLEND: Gluten-free flour blends are clumpy, and clumps mean uneven texture. Sift it directly into the bowl twice—once before mixing, once after—even if the package says it’s pre-sifted. I skip this half the time, and the dish is noticeably better when I don’t.
- CHILL THE BATTER 20 MINUTES: Sounds weird, but it works: Let the batter sit uncovered in the fridge while you preheat the oven. This helps the aquafaba stabilize and prevents a sunken center. (Your future self will thank you—trust me, I’ve made this mistake.)
Serving suggestions for leftovers
Layered Presentation
For an elegant finish, use a wire cake stand to showcase the layers. Place the first layer on the stand, then add the second layer with a thin layer of frosting between them. Use an offset spatula to create clean, straight sides—press gently to smooth any imperfections. A dusting of powdered sugar on top adds a delicate touch without overpowering the vanilla flavor. 🍰
Fruit Toppings
Fresh berries like strawberries, raspberries, or blueberries add vibrant color and natural sweetness. Arrange them in a circular pattern on top or create a fruit lattice by slicing strawberries lengthwise and weaving them together. For extra flair, drizzle with melted dairy-free chocolate or a raspberry coulis made from blended raspberries and a touch of powdered sugar.
Decorative Garnishes
Edible flowers like violets or pansies elevate the presentation without altering the flavor. Place them gently on top of the frosting using a small spoon. For a rustic look, sprinkle crushed pistachios or toasted coconut flakes over the sides. A gold leaf accent adds a luxurious touch for special occasions—just position it carefully so it doesn’t curl up.
Serving Style Options
Serve slices on parchment-lined plates for easy cleanup and a polished look. For a casual gathering, use wooden cake stands or even mini muffin liners as individual serving cups. Label each slice with mini flags (cut from parchment) to indicate flavor variations if you’re offering multiple versions. A lemon zest sprinkle on the side adds a bright contrast to the vanilla.
Allergy-Friendly Pairings
Pair with dairy-free ice cream like coconut milk vanilla or almond milk sorbet for a refreshing contrast. Serve with herbal teas such as chamomile or lavender to complement the cake’s delicate flavor. For a non-alcoholic option, a sparkling fruit punch made with ginger ale and mixed berries keeps the meal light and festive. 🍹
Nutrition facts
Frequently asked questions
Can I substitute aquafaba in this allergy-free vanilla cake?
Yes! If you don't have aquafaba, use 3 tbsp ground flaxseed + 9 tbsp water (let sit for 5 minutes to thicken) as a 1:1 replacement. For best results, add the mixture gradually to avoid overmixing. The texture may be slightly denser but still delicious.
Why does my gluten-free cake turn out dry?
Gluten-free cakes often dry out due to overbaking or insufficient moisture. Check for doneness at 22 minutes (toothpick should come out with moist crumbs). For extra moisture, add 2 tbsp extra almond milk or replace 1 tbsp flour with 1 tbsp ground chia seeds** (soaked in 3 tbsp water).
How do I prevent cross-contamination when baking?
Use separate mixing bowls, utensils, and measuring cups for gluten-free ingredients. Wipe down countertops and clean your oven thoroughly before baking. Store gluten-free flour in a sealed container away from other flours—this keeps your allergy-free treats safe for everyone.
Can I make this cake nut-free?
Replace the almond milk with oat milk or soy milk and ensure your gluten-free flour blend is nut-free. Check labels carefully—many blends contain traces of nuts. For extra insurance, use a dedicated nut-free flour blend like Bob's Red Mill's "Nut-Free" option.
Will this cake hold up for a wedding reception?
Yes, but with proper prep! Chill the assembled cake for 4-6 hours before serving to firm up the frosting. For extra stability, place a parchment-lined tray on top while chilling. Serve slices on a wire cooling rack to prevent soggy bottoms—this cake stays fresh for 4 days at room temperature.