
Desserts
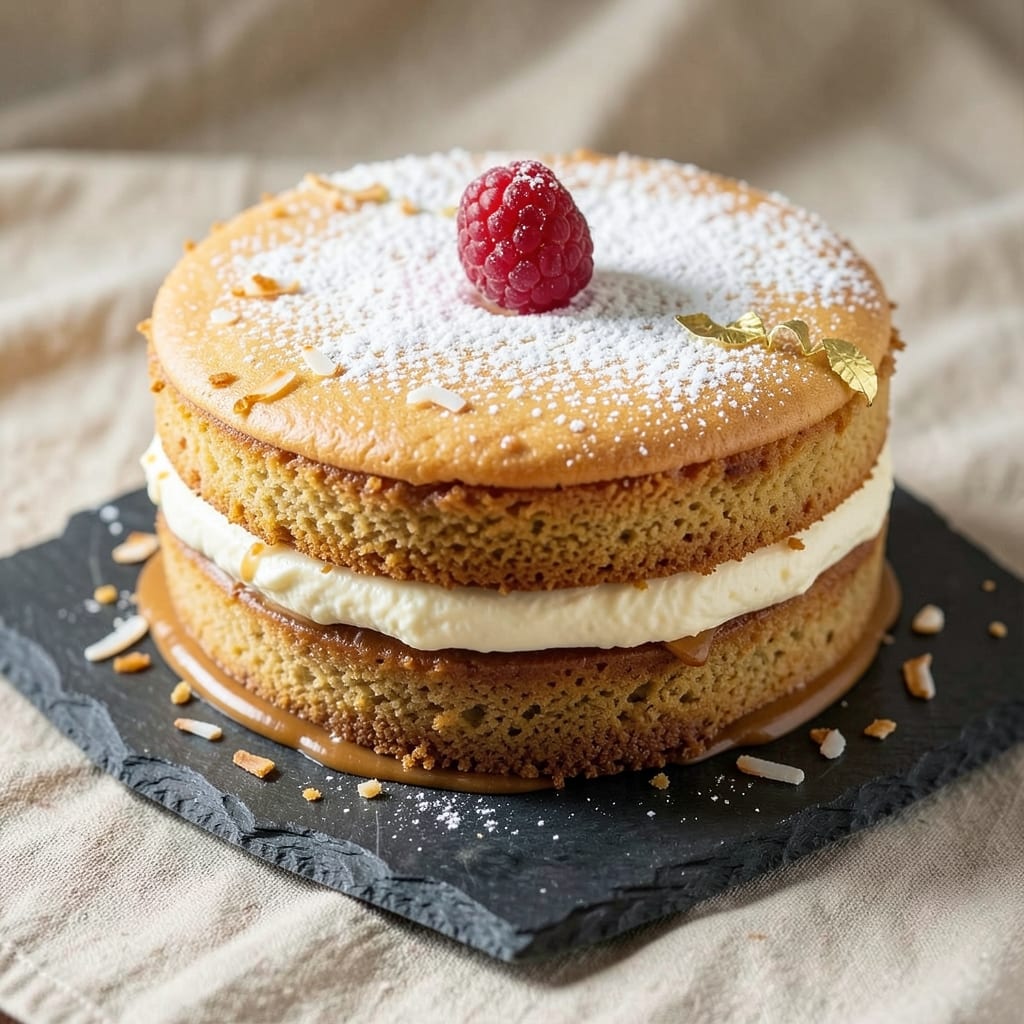
This all-purpose gluten-free flour cake recipe delivers the moist, tender crumb you crave—without the dryness or graininess that often comes with gluten-free baking. ✨ The secret lies in a precise blend of gluten-free flour, xanthan gum for structure, and a few simple techniques that ensure a light, airy texture. After years of testing and adjusting, this recipe consistently produces a cake that rivals traditional wheat-based versions, making it perfect for anyone with dietary restrictions or simply looking for a better gluten-free option.
The foundation of this recipe is a high-quality gluten-free flour blend (like King Arthur or Bob's Red Mill), which provides the right balance of texture and flavor. We incorporate xanthan gum to mimic gluten’s binding properties, while buttermilk and sour cream add moisture and richness. The cake is baked at a precise temperature to ensure even cooking, and a simple glaze or frosting option elevates it to restaurant-quality dessert status.
What sets this recipe apart is its foolproof method—no complicated steps or last-minute substitutions. The result is a cake with a fine, even crumb, tender layers, and just the right amount of sweetness. Whether you're baking for a celebration, meal prep, or a simple treat, this recipe delivers consistent, professional-quality results every time. The best part? It’s designed to be as easy as traditional cake baking, with clear instructions and troubleshooting tips to guarantee success.
Ready to bake a gluten-free cake that doesn’t compromise on texture or flavor? Let’s get started with a recipe that’s been perfected to meet the demands of both dietary needs and dessert cravings. The only thing you’ll miss is the gluten—and even that fades after the first bite.
Ingredients for all purpose gluten free flour cake
High-quality gluten-free flour blend and xanthan gum form the perfect foundation for this moist, tender cake.
| Ingredient | Amount | Notes |
|---|---|---|
| All-Purpose Gluten-Free Flour Blend 🌾 | 2 cups | King Arthur or Bob's Red Mill recommended |
| Xanthan Gum 🧂 | ½ tsp | Ensures proper binding and structure |
| Granulated Sugar 🍚 | 1 ½ cups | White or light brown preferred |
| Buttermilk 🥛 | 1 cup | Full-fat for optimal moisture |
| Sour Cream 🧀 | ½ cup | Full-fat for richness |
| Large Eggs 🥚 | 2 whole | Room temperature for even mixing |
| Unsalted Butter 🧈 | 1 cup | Cold, cubed for proper creaming |
| Vanilla Extract 🌿 | 2 tsp | Pure Madagascar preferred |
| Baking Powder 🧂 | 1 tsp | Aluminum-free for best results |
| Salt 🧂 | ½ tsp | Fine sea salt preferred |
| Powdered Sugar 🍚 | 1 cup | For glaze, sifted for smoothness |
| Lemon Juice 🍋 | 1 tbsp | Freshly squeezed for glaze |
| Heavy Cream 🥛 | ¼ cup | Optional for glaze, lightly whipped |
The gluten-free flour blend is non-negotiable here. King Arthur or Bob's Red Mill are the gold standards—they’re specifically formulated to mimic wheat flour’s structure without graininess. If you’re using a homemade blend, ensure it contains rice flour, almond flour, and tapioca starch for the best texture. Xanthan gum is equally critical; it’s what gives gluten-free baked goods their elasticity. Buy it in small quantities—it’s potent stuff and goes a long way. For the sour cream and buttermilk, full-fat versions ensure maximum moisture retention, which is essential for combating gluten-free dryness. Store these in the fridge and bring them to room temperature before using to avoid lumps in the batter.
No xanthan gum? Psyllium husk powder at half the amount works as a substitute, though the texture will differ slightly. Running short on buttermilk? Mix 1 tbsp lemon juice or vinegar with 1 cup milk and let it sit for 5 minutes. For the butter, European-style unsalted has a higher fat content, which enhances the cake’s richness. The vanilla extract can be imitation, but Madagascar bourbon or pure vanilla bean extract elevates the flavor dramatically. If you’re using powdered sugar for the glaze, sift it first to avoid graininess—Bob’s Red Mill or Domino brands are finely milled and ideal for this purpose. The lemon juice in the glaze adds brightness, so don’t skip it even if you’re not a fan of citrus.
This batter keeps in the fridge for up to 2 days, covered tightly with plastic wrap pressed directly onto the surface to prevent drying. For longer storage, freeze the batter in an airtight container for up to 3 months. Once baked, the cake stores well at room temperature, wrapped in foil, for 3-4 days. The glaze can be made ahead and reheated gently if it thickens—just add a splash of milk or heavy cream to restore its consistency. For make-ahead baking, prepare the cake batter the night before and bake it in the morning; the flavors deepen slightly after resting overnight.
Why You'll Love This Recipe
- I’ll be real: gluten-free baking often costs a fortune, but this isn’t one of those recipes. The all-purpose blend and pantry staples like sugar and sour cream mean I’m not breaking the bank. Plus, the cake’s rich flavor means I don’t need fancy frosting—just a dusting of powdered sugar or a smear of butter does the trick.
- No-Fuss Mixing: I swear by this recipe because it’s three bowls max—no sifting, no stress. The gluten-free flour blend and xanthan gum do all the heavy lifting, so you just whisk, fold in the buttermilk and sour cream, and pour. That’s it. Even on days when I’ve forgotten to meal prep, this cake still comes together faster than my coffee brews.
- Moist Without Gums: Here’s what sold me—the texture. The sour cream keeps it tender for days, while the buttermilk adds that subtle tang that makes it taste homemade, not dry or crumbly. (Yes, even on a Tuesday night.) It’s the kind of cake that stays soft enough to slice for breakfast or pack in lunches without falling apart.
- Party or Pantry: Between us, this recipe works for everything. Need a last-minute birthday cake? It bakes up golden and pretty enough to impress. Craving dessert after dinner? The same batter makes cupcakes or a sheet cake. And honestly? The leftovers freeze like a dream—just thaw and reheat for a quick treat.
Step-by-step instructions for gluten-free cake with perfect moisture
This method delivers a tender, evenly-textured cake that rivals traditional wheat-based versions.
👨🍳 Step 1: Prepare the Dry Ingredients with Precision
In a medium bowl, whisk together the 2 cups all-purpose gluten-free flour blend and 0.5 tsp xanthan gum until completely combined. The xanthan gum is crucial here—it mimics gluten's binding properties without adding graininess. Sift the mixture through a fine-mesh sieve to eliminate any lumps and aerate the flour for a lighter texture.
In a separate small bowl, combine the 1.5 cups granulated sugar, 1 tsp baking powder, and 0.5 tsp salt. Whisk briefly to distribute the baking powder evenly. This pre-mixing prevents clumping when combined with the wet ingredients later. Keep both bowls nearby—you'll need them in the next step.
🍳 Step 2: Cream Butter and Sugar for Maximum Tenderness
In a stand mixer fitted with the paddle attachment, beat the 1 cup unsalted butter (cold, cubed) and 1.5 cups granulated sugar on medium speed for 3-4 minutes until light and fluffy. You're looking for a color change from pale yellow to nearly white and a texture that nearly doubles in volume. This step incorporates air, which creates that signature cake tenderness.
I press down on the butter mixture with a spatula during the first minute—this prevents it from curdling when the eggs are added later. The butter should be completely smooth with no visible flecks of fat. If you see any water condensation on the bowl, wipe it dry with a paper towel to ensure proper emulsification.
👨🍳 Step 3: Combine Wet Ingredients for Optimal Moisture
Add the 2 whole large eggs (room temperature) one at a time, mixing on low speed for 30 seconds after each addition. Scrape down the sides of the bowl to ensure complete incorporation. Next, add the 1 cup buttermilk and 0.5 cup sour cream, mixing on low speed for 1 minute until just combined. The buttermilk adds acidity that tenderizes the gluten-free flour, while the sour cream contributes richness without making the cake dense.
With the mixer running on low, gradually add the dry ingredients in two batches, alternating with 2 tsp vanilla extract. Mix for 30 seconds after each addition until the batter is smooth and homogeneous. Overmixing develops gluten-like proteins in the flour, so stop as soon as no dry streaks remain. The final batter should be thick but pourable.
🔥 Step 4: Bake with Precision for Even Texture
Preheat your oven to 350°F and grease two 8-inch round cake pans generously with butter, then dust with flour blend. Divide the batter evenly between the pans. Tap each pan firmly on the counter 3 times to remove air bubbles and ensure even rising. Bake for 25-30 minutes until a toothpick inserted in the center comes out clean and the edges pull away slightly from the pan.
Here's the thing—gluten-free cakes can dry out quickly, so I recommend checking at the 22-minute mark. If the top browns too quickly, tent loosely with aluminum foil. The cake should have a golden hue but remain slightly springy to the touch. Let the cakes cool in the pans for 10 minutes before transferring to a wire rack to cool completely.
🥘 Step 5: Prepare the Lemon Glaze for Bright Finish
While the cakes cool, whisk together the 1 cup powdered sugar, 1 tbsp lemon juice, and 0.25 cup heavy cream in a bowl until smooth. The lemon juice brightens the flavor and cuts through the richness of the cake. If the glaze is too thick, add 1 tsp milk at a time until it reaches a drizzling consistency—it should coat the back of a spoon but still flow freely.
Once the cakes are completely cool, place one layer on a serving plate. Drizzle half of the glaze evenly over the top, letting it drip over the edges. Add the second layer and drizzle with the remaining glaze. For extra shine, use a fork to drag some glaze back onto the top of the cake. Serve immediately or refrigerate for up to 2 hours before serving for a firmer glaze.
Pro Tips For Making All Purpose Gluten Free Flour Cake
- Mix Dry Ingredients First: The moment you add wet ingredients to your gluten-free flour blend, you’re playing a game of Jenga—skip this step, and your cake could turn into a dense brick. Whisk the dry ingredients (flour, sugar, xanthan gum) together for at least 30 seconds before adding buttermilk or sour cream. This ensures even distribution of xanthan gum, which is the glue holding your cake together.
- Use Room-Temp Sour Cream: Cold sour cream behaves like a stubborn block of ice in your batter, leading to pockets of heaviness and uneven texture. Let it sit out for 30-60 minutes before mixing—just until it’s soft enough to scoop easily with a spoon. (Yes, even if you’re impatient like me.)
- Bake Until Internal Temp Hits 205°F: Gluten-free cakes lie. They might look done at 190°F, but pull them out too soon, and they’ll sink like a lead balloon as they cool. Use an instant-read thermometer to confirm the center reaches 205°F—this guarantees a stable, sliceable cake, not a sad, gummy mess.
- Add 1 Extra Tablespoon of Flour: Gluten-free flour absorbs liquid like a sponge, and your batter will always feel thinner than it should. Before folding in the wet ingredients, toss an extra tablespoon of flour into the mix—it’s the difference between a cake that holds its shape and one that collapses into a puddle. (Trust me, I’ve seen both.)
Troubleshooting this recipe
Dry, Crumbly Cake
Gluten-free cakes often dry out because they lack gluten’s moisture-retaining properties. To prevent this, do not overbake—remove the cake from the oven when a toothpick comes out clean (usually at 25-30 minutes). If your cake still feels dry, try adding 1 extra tablespoon of sour cream to the batter or brushing the layers with 2 tablespoons of simple syrup before glazing. This adds moisture without altering the texture. 💧
Uneven Rising
Gluten-free batters can rise unevenly due to the lack of gluten’s elastic structure. Tap the pans firmly 3 times on the counter before baking to remove air bubbles. If your cake doesn’t rise enough, ensure your baking powder is fresh (old baking powder loses potency) and that you’re using room-temperature eggs and butter. Also, avoid opening the oven door during the first 20 minutes of baking, as temperature fluctuations can cause sinking. ⚖️
Grainy Texture
A grainy texture usually means your gluten-free flour blend wasn’t fine enough or wasn’t properly sifted. Always sift the flour blend and xanthan gum together before mixing to eliminate clumps. If you’re using a homemade blend, ensure it includes tapioca starch or arrowroot powder (both help create a smoother crumb). For extra smoothness, pulse the flour blend in a food processor for 10 seconds before sifting. 🌾
Cake Sticks to Pans
Gluten-free batters can adhere to pans more than traditional cakes. Grease the pans generously with butter, then dust with gluten-free flour blend (not wheat flour). For extra insurance, line the bottoms with parchment paper circles cut to fit. If your cake still sticks, try using 8-inch pans with sloped sides—they release cakes more easily. Avoid nonstick pans, as they can react with gluten-free ingredients. 🧈
Bitter or Off-Flavor
Gluten-free flours can sometimes taste bitter, especially if they contain almond flour. To balance flavors, use full-fat dairy (like buttermilk and sour cream) and vanilla extract (Madagascar bourbon is ideal). If your cake tastes bitter, reduce the almond flour in your blend or add 1 extra teaspoon of sugar to the batter. Always check the expiration date on your flour blend—old flour can develop off-flavors. 🌿
Glaze Too Thick or Runny
Glaze consistency is tricky with gluten-free cakes because they absorb moisture differently. For a perfect drizzle, whisk the powdered sugar, lemon juice, and heavy cream until smooth, then add milk 1 teaspoon at a time until it reaches a paint-like consistency. If it’s still too thick, warm the glaze gently in the microwave for 5-10 seconds to loosen it. For a firmer glaze, chill the cake layers for 30 minutes before assembling. ✨
Nutrition facts
Frequently asked questions
Can I substitute regular flour for the gluten-free blend?
No, you should never substitute regular flour in this recipe. Gluten-free baking requires the specific protein structure and moisture balance provided by gluten-free blends with xanthan gum. Regular flour lacks the necessary binding agents and will result in a dense, crumbly cake that collapses during baking.
What if I don't have xanthan gum?
You can use ½ teaspoon psyllium husk powder as a substitute, but the texture will differ slightly. For best results, use a gluten-free flour blend that already contains xanthan gum (like King Arthur or Bob's Red Mill). Without any binder, your cake may be more crumbly and less tender.
Can I make this cake in a different pan size?
Yes, but you'll need to adjust baking time. For a 9-inch pan, bake for 20-25 minutes (check at 20), and for a 6-inch pan, bake for 30-35 minutes. Always use an oven thermometer to ensure accurate temperature—gluten-free cakes are more sensitive to heat variations than traditional cakes.
How do I store leftovers?
Store the cake in an airtight container at room temperature for up to 3 days, or refrigerate for up to 5 days. For longer storage, freeze the cake (without glaze) for up to 3 months. Thaw at room temperature before serving. The glaze can be stored separately in the fridge for up to 1 week.
Can I add mix-ins like chocolate chips or nuts?
Fold in ½ cup chocolate chips or ½ cup chopped nuts with the dry ingredients. For best results, use gluten-free chocolate chips and toast nuts lightly before adding. Avoid adding more than ⅓ cup of mix-ins total, as gluten-free batters are denser and can become heavy with too many additions.