
Desserts
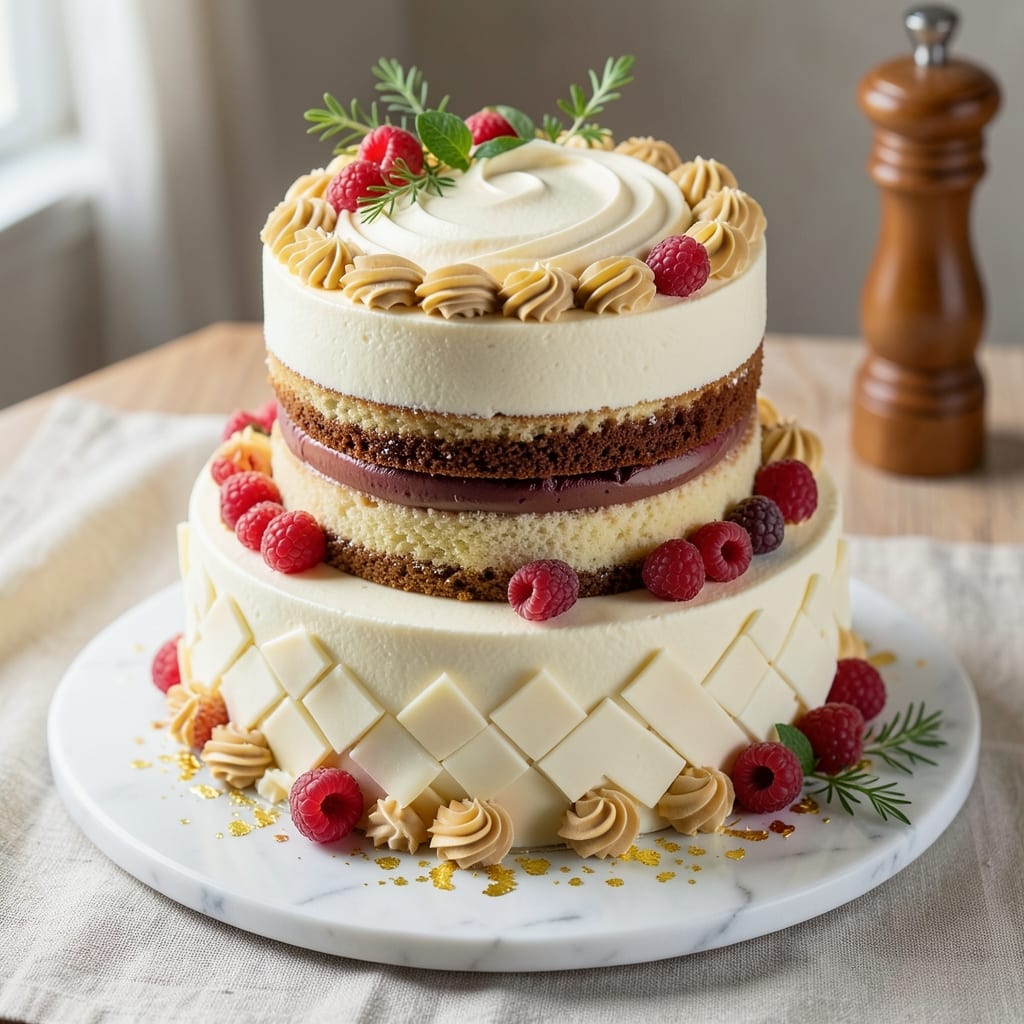
A 6-inch wedding cake recipe transforms intimate celebrations into unforgettable moments with its perfect balance of elegance and precision. This scaled-down version delivers all the sophistication of a traditional wedding cake—multiple layers, smooth buttercream, and delicate decor—without the structural risks of larger cakes. The key lies in stabilizing each layer with proper baking times and cooling techniques to ensure clean cuts and sturdy assembly.
What sets this recipe apart is the French buttercream, a professional-quality frosting that's lighter than traditional American buttercream while still offering rich flavor and smooth texture. We'll use a cake board technique to prevent collapse during assembly, a common challenge with smaller cakes. The result is a cake that's as stable as it is beautiful, with clean layers and professional finishes.
This cake features a vanilla bean cake base—moist yet tender enough to hold its shape when sliced—and a classic ombré frosting that adds depth and visual interest. The recipe includes step-by-step guidance for baking, cooling, layering, and decorating, ensuring even beginners can achieve restaurant-quality results. Whether you're crafting a cake for a micro-wedding, elopement, or intimate reception, this recipe delivers.
For those with dietary needs, we'll also cover gluten-free and vegan adaptations that maintain the cake's structure and flavor. The frosting can be made with dairy-free butter and plant-based milk, while the cake itself uses a blend of almond and gluten-free flour. Every detail is designed to meet your celebration's unique needs without compromising on elegance.
Ingredients for 6 inch wedding cake
Elegant layers require precise ingredients—vanilla cake base meets professional French buttercream for flawless texture.
| Ingredient | Amount | Notes |
|---|---|---|
| All-Purpose Flour 🌾 | 1 ½ cups | Sifted for even texture |
| Granulated Sugar 🍚 | 1 ¼ cups | Superfine preferred for smoothness |
| Unsalted Butter 🧈 | 1 cup | Room temperature, European-style preferred |
| Large Eggs 🥚 | 4 whole | Room temperature for even baking |
| Pure Vanilla Extract 🌿 | 2 tsp | Bourbon or Madagascar preferred |
| Vanilla Bean Paste 🌿 | 1 tbsp | For enhanced vanilla flavor |
| Baking Powder 🧂 | 1 tsp | Aluminum-free for tender crumb |
| Salt 🧂 | ½ tsp | Fine sea salt preferred |
| Milk 🥛 | ½ cup | Room temperature, whole preferred |
| French Buttercream Ingredients 🍰 | See frosting section below | |
| Powdered Sugar 🍚 | 3 cups | Sifted for smooth frosting |
| Heavy Whipping Cream 🥛 | ½ cup | Cold for stability |
| Food Coloring 🎨 | ½ tsp | Gel-based for color intensity |
| Cake Board 🍰 | 1 whole | 12-inch round for stability |
| Parchment Paper 📄 | 1 sheet | For clean cake release |
The cake's foundation starts with European-style butter—it's higher fat content prevents crumbling, especially in smaller cakes. King Arthur or Plugrá brands are excellent choices for all-purpose flour, as they're finely milled and protein-balanced for tender crumb. Vanilla is non-negotiable here: Madagascar bourbon extract delivers the most complex flavor profile, while the paste adds those visible specks that elevate presentation. For the milk, whole is essential—lower fat versions can create dry layers. Baking powder should be aluminum-free to avoid metallic aftertaste, and Diamond Crystal is the gold standard for consistent leavening.
No vanilla bean paste? Pure extract plus 1 tsp vanilla sugar works in a pinch, though the visual appeal suffers. Substituting powdered sugar for the superfine version? Process it yourself in a food processor for 30 seconds—it dissolves more smoothly. The heavy cream in the frosting can be swapped for chilled coconut cream for a dairy-free version, though texture will be slightly softer. For color intensity, Wilton gel colors are the professional choice—liquid versions can thin your frosting. The cake board is critical: 12-inch diameter provides stability for the 6-inch cake's weight during assembly.
Store cake layers at room temperature in an airtight container with parchment between them for up to 3 days before assembly. The French buttercream can be made 2 days ahead and refrigerated, then re-whipped to room temperature before use. Once decorated, keep the cake in a cool, dry place away from direct sunlight for up to 5 days. For long-term storage, freeze the assembled cake (without decor) for up to 3 months—thaw overnight in the fridge before serving.
Why You'll Love This Recipe
- No Mixer Needed: I swear by this recipe because it’s one of those rare cakes where you can cream butter and sugar by hand—no electric mixer required. The eggs blend right in with that butter, creating a tender crumb that’s lighter than most boxed mixes. (Yes, even when I’m in a hurry.)
- Vanilla Buttercream Magic: That vanilla extract? It’s not just flavoring—it’s the star. The buttercream is rich but not heavy, with a smoothness that makes every slice taste like a bakery’s secret. Honestly, I’ve tried store-bought frosting, and this beats it every time.
- Mini Serving, Big Impact: Six-inch layers mean you can make a full-tiered cake without the stress of a massive bake. Perfect for intimate weddings, baby showers, or even a "just because" dessert for your partner. (Pro tip: Stack two tiers—still manageable, but looks stunning.)
- Budget-Friendly Luxury: This recipe uses pantry staples—flour, sugar, butter—and stretches further than you’d think. Leftovers? They vanish fast, but if they don’t, the cake freezes beautifully for up to a month. My wallet (and guests) thank me.
Step-by-step instructions for a stable 6-Inch wedding cake
Mastering the delicate balance of structure and elegance in a miniature wedding cake begins with precise technique and patience.
Prepare the Cake Pan and Mix the Batter
Preheat your oven to 350°F and line the bottom of a 6-inch round cake pan with the parchment paper, pressing it firmly against the sides to prevent sticking. Grease the parchment lightly with a thin layer of the unsalted butter using a pastry brush for easy release.
In a stand mixer fitted with the paddle attachment, cream together the 1 cup unsalted butter and 1.25 cups granulated sugar on medium speed for 3-5 minutes until light and fluffy. The mixture should nearly triple in volume and become pale in color. This step is critical—it incorporates air that creates the tender crumb needed for a stable cake structure. Scrape down the sides of the bowl as needed to ensure even mixing.
Add the 4 whole large eggs, one at a time, mixing well after each addition. Incorporate the 2 teaspoons pure vanilla extract and 1 tablespoon vanilla bean paste next, mixing until fully combined. The vanilla bean paste adds depth of flavor without altering the batter's consistency. In a separate bowl, whisk together the 1.5 cups all-purpose flour, 1 teaspoon baking powder, and 0.5 teaspoon salt, then sift the mixture over the wet ingredients in three additions.
Combine Wet Ingredients and Bake the Cake
With the mixer on low speed, gently fold in the dry ingredients just until combined—do not overmix. The batter should be smooth but still slightly streaked with flour. Add the 0.5 cup milk and mix until the batter is homogeneous. Pour the batter into the prepared cake pan and smooth the top with a spatula. Tap the pan gently on the counter to remove any air bubbles.
Bake for 25-30 minutes or until a toothpick inserted into the center comes out clean. The cake should spring back when pressed lightly in the center. If the edges brown too quickly, tent the pan with aluminum foil. Once baked, allow the cake to cool in the pan for 10 minutes before transferring it to a wire rack to cool completely. This gradual cooling prevents cracking and ensures even setting.
Prepare the French Buttercream
While the cake cools, prepare the French buttercream by whipping the 1 cup unsalted butter (softened but not melted) in a stand mixer fitted with the whisk attachment until pale and fluffy, about 3-5 minutes. Gradually add the 3 cups powdered sugar, sifted to avoid lumps, and mix until fully incorporated. Add the 0.5 cup cold heavy whipping cream and the 0.5 teaspoon food coloring (if using), mixing until the buttercream is smooth and holds a stiff peak when tested with a spatula.
Divide the buttercream into two portions. If desired, tint one portion with a contrasting color for layering. This step ensures a clean, professional finish and allows for creative design without compromising stability. The buttercream should be thick enough to hold its shape but still spreadable—adjust consistency with additional powdered sugar or cream if necessary.
Assemble and Stabilize the Cake Layers
Place the cooled cake layer on the cake board and level the top if needed using a serrated knife. Spread a thin layer of buttercream over the top of the cake, about ¼ inch thick. Place a second cake layer on top, aligning the edges carefully. Repeat the process for any additional layers, ensuring each layer is level and centered.
Once all layers are stacked, apply a thin crumb coat of buttercream over the entire cake and refrigerate for 15-20 minutes to set. This step prevents crumbs from mixing into the final frosting and creates a smooth base for decoration. After chilling, apply the final layer of buttercream, smoothing it with a bench scraper or offset spatula. Use a cake comb or piping bag to create texture or patterns, depending on your design preference.
Final Touches and Serving
Allow the cake to set at room temperature for 30 minutes before slicing to ensure the frosting holds its shape. To serve, use a sharp serrated knife and gently saw through the cake at a slight angle, rotating the cake board slightly after each cut to create clean slices. The cake should hold its structure without collapsing, thanks to the stable layers and proper cooling techniques.
This method guarantees a delicate yet sturdy 6-inch wedding cake that meets the demands of elegance and stability. Serve immediately to enjoy the perfect balance of texture and flavor in every bite.
Pro Tips For Making 6 Inch Wedding Cake
- Weigh Your Butter: Unsalted butter is finicky—packed cups leave air gaps, and that means a denser cake. Use a kitchen scale for 120g per ½ cup, pressing it into the bowl with a fork to cut out those pockets. I learned this the hard way after a cake that looked perfect but crumbled like a biscuit.
- Chill Your Eggs First: Room-temperature eggs are a gamble with this recipe. Pop them in the fridge for 15 minutes before cracking—it keeps the butter from melting too fast when you mix. My grandmother swore by this, and she was right: the batter stays smoother, and the crumb turns out lighter.
- Skip the Overmixing: Once the flour hits the wet ingredients, stop stirring after 20 seconds. Overmixing develops gluten, and that’s how you end up with a tough, chewy cake instead of the tender layers you want. Fold just until combined—yes, even if it looks lumpy.
- Bake in Two Rounds: A 6-inch cake is delicate—baking it in two 3-inch rounds (if your pans allow) gives you even baking and cleaner layers. If you’re using one pan, rotate it halfway through at 325°F (163°C) to prevent hot spots. I was skeptical until I tried it—the difference in texture is noticeable.
Troubleshooting this recipe
Crumbling Layers
If your cake layers crumble during assembly, it’s usually due to overbaking or rapid cooling. Always check for doneness with a toothpick—it should come out with a few moist crumbs, not dry. Let cakes cool in the pan for 10 minutes before transferring to a rack, and never stack layers until completely cool (about 2 hours). For extra stability, brush layers with a simple syrup made from ¼ cup water + 2 tbsp sugar before frosting. 💪
Frosting Too Soft
French buttercream can turn too soft if the butter is too warm or the cream isn’t cold enough. Always chill your mixing bowl and beaters for 10 minutes before whipping, and use cold heavy cream directly from the fridge. If your frosting is too soft, refrigerate it for 15-20 minutes while you finish assembling the cake, then re-whip briefly to restore stiffness. Avoid overmixing—this can trap air and weaken the structure.
Collapsing Cake
A collapsing cake often means the layers weren’t level or the frosting was applied too thickly. Use a leveling tool or serrated knife to trim each layer perfectly before stacking. Apply frosting in thin layers (starting with a ¼-inch crumb coat), and always chill the cake between layers to set the frosting. For a 6-inch cake, limit to 2-3 layers—more can strain the structure. A cake board is non-negotiable for support.
Uneven Frosting
Uneven frosting usually happens when the cake isn’t perfectly level or the buttercream isn’t at the right consistency. Before applying the final layer, use a bench scraper to smooth the frosting in circular motions. If your buttercream is too thick, add 1 tsp heavy cream; if too thin, chill for 10 minutes and re-whip. For ombré effects, tint the frosting in gradients and apply with a palette knife for seamless blending.
Dry Cake Texture
Dry cake is often caused by overmixing the batter or using too much flour. Measure flour by weight (1.5 cups = 190g) for accuracy, and fold dry ingredients just until combined. If your cake turns out dry, brush the cooled layers with 2 tbsp simple syrup before frosting. For extra moisture, add 1 tbsp sour cream to the batter when mixing. Avoid overbaking—pull the cake out when the edges are set but the center still jiggles slightly.
Frosting Sliding Off
Frosting slides when the cake isn’t fully cooled or the buttercream isn’t stiff enough. Let the cake set at room temperature for 30 minutes after frosting before serving. For extra grip, add 1 tsp cornstarch to the buttercream for stability. If working in a warm kitchen, chill the cake for 20 minutes between frosting layers. A damp cloth around the cake board can also help prevent sliding during transport. ✨
Nutrition facts
Frequently asked questions
How many servings does a 6-inch wedding cake provide?
This recipe yields about 4-6 servings, perfect for intimate weddings or small receptions. Each slice is designed to be generous—about 2-3 inches wide—so you can adjust the number of layers based on your guest count. For example, 2 layers serve 4-5 people, while 3 layers accommodate 6-8 guests.
Can I make this cake ahead of time?
Bake the cake layers 1-2 days ahead and store them at room temperature in an airtight container with parchment between layers. The French buttercream can be made 2 days in advance and refrigerated—just re-whip it to room temperature before assembly. Assemble the cake 4-6 hours before serving to allow the frosting to set properly.
What’s the best way to transport a decorated cake?
Use a sturdy cake board and wrap the entire cake in plastic wrap for protection. Place it on a tray or in a cake carrier to prevent shifting. Keep it in a cool, dry place (like a car with AC) and avoid temperature changes that could cause the frosting to melt. For long trips, transport it vertically to support the structure.
How do I adapt this for gluten-free or vegan diets?
For gluten-free, replace the all-purpose flour with a 1:1 gluten-free blend (like Bob’s Red Mill) and add 1 tbsp xanthan gum to the batter. For vegan, use dairy-free butter (like Miyoko’s) and coconut cream instead of heavy cream. The vanilla cake base and French buttercream can both be adapted without sacrificing stability or flavor.
Can I use this recipe for a different-sized cake?
This recipe is specifically designed for a 6-inch cake to ensure stability and elegance. For larger cakes, adjust the batter proportionally (e.g., double for 8-inch) but reduce the number of layers to 2-3 max to prevent collapse. Smaller cakes (4-inch) may require shorter baking times (20-25 minutes) and less frosting to maintain structure.