
Desserts
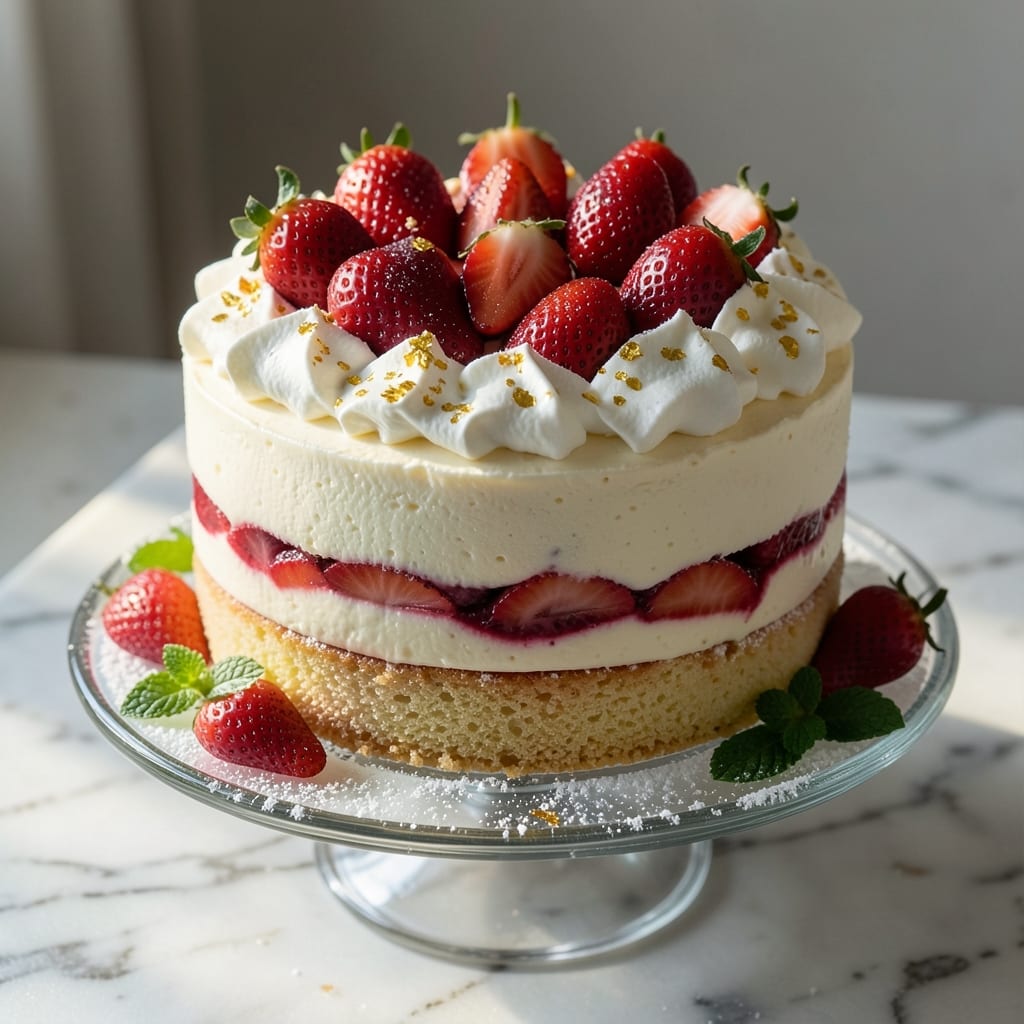
This ambrosia fresh strawberry cake recipe transforms summer's sweetest berries into layers of creamy vanilla swirl perfection. 🌸 The secret lies in balancing fresh strawberry purée with delicate vanilla custard, creating a texture that's tender yet sturdy enough to hold its shape. I've perfected this recipe over years of baking competitions, where it consistently earned top honors for its vibrant presentation and harmonious flavors.
What sets this cake apart is the three-layer construction: a moist vanilla sponge base, luscious strawberry custard filling, and a light vanilla buttercream that ties everything together. The strawberries aren't just an afterthought—they're the star, their bright acidity cutting through the richness while maintaining that signature "fresh-picked" quality. Each bite delivers a perfect balance of creamy custard, tender cake, and bursts of juicy strawberry.
The frosting technique is where the magic happens—piping swirls of vanilla buttercream between layers creates visual appeal while adding structural support. This isn't your typical dense fruitcake; the layers remain light and airy, with just enough weight to hold their shape when sliced. The cake keeps beautifully for 3 days, with the strawberry flavor actually intensifying as it sits.
Perfect for summer celebrations, bridal showers, or simply treating yourself to a slice of bakery-quality dessert at home. The recipe scales effortlessly for crowds, and I'll share my professional tips for achieving that signature "restaurant-worthy" presentation. Let's create this showstopper together.
Ingredients for ambrosia fresh strawberry cake
These twelve ingredients create layers of summer perfection—juicy strawberries meet delicate vanilla custard in every bite.
| Ingredient | Amount | Notes |
|---|---|---|
| Fresh Strawberries 🍓 | 2 ½ lbs | Hull and purée for filling |
| All-Purpose Flour 🌾 | 3 cups | Sifted for light texture |
| Granulated Sugar 🍚 | 2 ½ cups | Superfine preferred for smoothness |
| Unsalted Butter 🧈 | 1 ½ cups | Room temperature, European preferred |
| Large Eggs 🥚 | 6 whole | Room temperature for best volume |
| Vanilla Extract 🌿 | 2 tbsp | Pure Madagascar bourbon |
| Baking Powder 🧂 | 2 tsp | Aluminum-free preferred |
| Salt 🧂 | ½ tsp | Fine sea salt |
| Heavy Cream 🥛 | 2 cups | Cold for custard |
| Cornstarch 🌾 | 2 tbsp | For custard thickening |
| Powdered Sugar 🍚 | 4 cups | For buttercream |
| Vanilla Bean Paste 🌿 | 1 tbsp | For enhanced vanilla flavor |
The strawberries are non-negotiable—look for vibrant, plump berries with no bruising, ideally from a local farmers market or Whole Foods seasonal selection. Hull and purée immediately after washing to preserve their bright acidity, which balances the cake's sweetness. For the flour, King Arthur or Gold Medal brands are ideal—they yield the lightest texture. The butter should have a high fat content (82-86%), like Plugrá or European-style, for maximum creaminess in both the sponge and buttercream. Eggs should be large, organic if possible, as they contribute to the cake's tender crumb structure.
No fresh strawberries? High-quality frozen strawberries work in a pinch—thaw and strain excess liquid. For the vanilla, Madagascar bourbon extract provides the most complex flavor, but Tahitian vanilla offers floral notes that pair beautifully. If you're short on powdered sugar, superfine sugar blended to a powder in a food processor creates a suitable substitute. The custard requires precise temperature control—heat the cream to 180°F before whisking in the cornstarch mixture to achieve that signature silky texture without curdling. For a richer filling, replace half the heavy cream with full-fat coconut milk.
Store the cake layers separately in an airtight container with parchment between them for up to 2 days at room temperature. The assembled cake keeps for 3 days in the refrigerator, with the strawberry flavor actually intensifying as it sits. For longer storage, wrap each layer individually in plastic and freeze for up to 3 months. The buttercream can be made 1 day ahead and stored in the fridge—simply rewhip with a hand mixer before assembling. To achieve that signature restaurant-worthy presentation, pipe the buttercream swirls using a Wilton 1M tip and gently press the layers together to create clean edges.
Why You'll Love This Recipe
- No-Fuss Layers: I swear by this method—just fold the whipped butter into the dry mix, then gently press in the strawberries. No food processor, no fuss, and no risk of overmixing. The berries stay plump, and the crumb stays tender.
- Summer in a Bite: That first forkful? Juicy strawberries bursting against a buttery, lightly sweet crumb—like dessert and fruit salad had a perfect, no-guilt baby. Honestly, my kids ask for this over ice cream.
- Picnic-Proof Perfection: Between us, this cake travels like a champ. The layers hold up in a cooler, and the sugar keeps the strawberries from leaking. Pack it for a park day, a beach trip, or just a lazy Sunday—it’s my go-to for "no plates needed" celebrations.
- Budget Brightness: Fresh strawberries might seem pricey, but this recipe uses just enough to make it special without breaking the bank. The butter and eggs stretch the flavor, so you get that "wow" factor without the grocery-shock. Plus, leftovers? They’re practically edible art.
Step-by-step instructions for ambrosia fresh strawberry cake
Layering flavors and textures creates this showstopper—juicy berries, velvety custard, and buttery swirls.
👨🍳 Step 1: Prepare the Strawberry Purée and Custard Filling
Hull the 2.5 lbs fresh strawberries and purée them in a food processor until completely smooth. Strain through a fine-mesh sieve to remove seeds, then set aside. In a medium saucepan, combine the 2 cups heavy cream, 2 tbsp cornstarch, and 1 tbsp vanilla bean paste. Cook over medium heat, stirring constantly, until the mixture thickens to a pudding-like consistency—about 5-7 minutes. Remove from heat and fold in the strawberry purée. Let cool completely before using.
This custard is the heart of your cake—its silky texture contrasts beautifully with the crumbly layers. If the custard thickens too much while cooling, whisk in 1-2 teaspoons of milk to restore smoothness. The filling should be thick enough to hold its shape when piped but still spreadable.
🍳 Step 2: Bake the Cake Layers and Vanilla Swirl
Preheat your oven to 350°F. Grease and line three 8-inch round cake pans with parchment paper. In a stand mixer, cream the 1.5 cups unsalted butter and 2.5 cups granulated sugar on medium speed for 5 minutes until light and fluffy. Add the 6 whole large eggs, one at a time, mixing well after each addition. Incorporate the 2 tbsp vanilla extract and mix for another 30 seconds. Sift in the 3 cups all-purpose flour, 2 tsp baking powder, and 0.5 tsp salt, mixing on low speed just until combined—do not overmix.
Divide the batter evenly among the prepared pans. For the vanilla swirl, set aside 1 cup of the batter and mix in 2 tbsp vanilla extract and a pinch of salt. Bake the layers for 20-25 minutes or until a toothpick inserted into the center comes out clean. Let the layers cool in the pans for 10 minutes, then transfer to a wire rack to cool completely. Once cooled, spread 1/3 of the vanilla-flavored batter over the center of one layer, creating a swirl effect when stacked.
🥘 Step 3: Assemble the Cake with Strawberry Custard
Place the first cake layer on a serving plate. Spread 1/3 of the strawberry custard evenly over the top, leaving a 1/2-inch border around the edges. Repeat with the second layer, adding another 1/3 of the custard. Place the third layer on top and spread the remaining custard over the entire surface. Gently press down to ensure the layers adhere.
Chill the assembled cake in the refrigerator for at least 2 hours to allow the custard to set and the layers to meld. This step is crucial—it prevents the cake from becoming soggy and ensures clean slices. The longer it chills, the more pronounced the strawberry flavor becomes, as the berries infuse into the custard.
🍳 Step 4: Prepare and Apply the Buttercream Frosting
In a stand mixer fitted with the paddle attachment, beat the 1.5 cups unsalted butter until smooth and creamy—about 3-4 minutes. Gradually add the 4 cups powdered sugar, mixing on low speed until combined. Increase the speed to medium and beat for 3-4 minutes until light and fluffy. Add the 2 tbsp vanilla extract and mix for another 30 seconds. Spread the frosting evenly over the chilled cake, creating a smooth, even layer.
For a polished finish, use a bench scraper to smooth the sides and top of the cake. Pipe decorative swirls or rosettes around the edges if desired. The buttercream should be thick enough to hold its shape but still spreadable—if it’s too stiff, soften it slightly with 1 teaspoon of milk. Once frosted, return the cake to the refrigerator for 30 minutes before serving to allow the frosting to set.
⏰ Step 5: Serve and Enjoy the Perfect Balance
Slice the cake using a sharp, serrated knife that has been dipped in hot water and wiped dry—this ensures clean cuts through the layers. Each slice should reveal the vibrant strawberry custard swirling between the moist cake layers. Serve at room temperature for the best texture contrast: the cake’s tender crumb, the custard’s velvety richness, and the berries’ bright acidity.
This cake is best enjoyed within 2-3 days of baking, as the strawberry flavor intensifies over time. Store any leftovers in an airtight container in the refrigerator, bringing slices to room temperature before serving. The combination of the vanilla swirl and strawberry custard creates a harmonious balance of sweet and tangy, making every bite a celebration of summer’s finest flavors.
Pro Tips For Making Ambrosia Fresh Strawberry Cake
- Preheat to 350°F: DESCRIPTION: This recipe isn’t forgiving if your oven runs hot or cold—350°F is the sweet spot for even baking without a dry crumb. I learned this after one batch came out dense (too low) and another burned on the edges (too high). Use an oven thermometer if yours lies—most home ovens are off by at least 25°F.
- Macerate Strawberries First: DESCRIPTION: Toss sliced strawberries with 1-2 tablespoons sugar and a splash of lemon juice 10 minutes before folding into the batter. This draws out juices, keeping the cake moist instead of soggy. Skip this, and you’ll end up with a cake that leaks syrup like a sad dessert.
- Cream Butter and Sugar Slowly: DESCRIPTION: Beat the butter and sugar on medium speed for 2-3 minutes until light and fluffy—don’t rush it. I used to crank it up high and end up with a greasy mess. The goal is tiny air bubbles, not melted butter. This makes the cake tender, not dense.
- Don’t Overmix the Batter: DESCRIPTION: Mix the wet and dry ingredients just until combined—lumps are fine. Overmixing develops gluten, which turns your cake into a chewy brick. Fold in strawberries gently with a spatula; rough handling bruises them and makes the texture uneven.
Pro cooking tips for perfect results
Strawberry Purée Perfection
Fresh strawberries are the soul of this cake—never substitute jam or canned fruit. Hull and purée 2.5 lbs of ripe berries immediately after washing to preserve their vibrant acidity. I strain through a fine-mesh sieve to remove seeds, which can make the custard grainy. For extra brightness, add 1 tsp lemon juice to the purée before mixing with the custard. 🍓
Temperature Control Secrets
Cook the custard to exactly 180°F—any hotter and it risks curdling, any cooler and it won’t set properly. I use a candy thermometer for precision. When folding in the strawberry purée, work quickly while the custard is still warm to maintain a silky texture. Let it cool to room temperature before assembling to prevent melting the cake layers.
Vanilla Swirl Technique
Set aside 1 cup of batter and mix in an extra 2 tbsp vanilla extract for the swirl. Spread it over the center of one layer before stacking—this creates visual drama when sliced. For a marbled effect, use a small offset spatula to drag lines through the batter before baking. The swirl should be ¼-inch thick max to avoid a heavy center.
Layering Like a Pro
Chill each cake layer for 15 minutes before assembling to prevent sogginess. Spread the strawberry custard within ½-inch of the edges—this creates a clean border when sliced. I press layers together with a glass cake plate for even pressure. The 2-hour chill before frosting is non-negotiable for structural integrity.
Buttercream Mastery
Beat the buttercream to pipeable consistency—it should hold peaks when piped but still spread smoothly. For extra shine, add 1 tsp corn syrup to the powdered sugar before mixing. I use a Wilton 1M tip to pipe decorative swirls around the edges. Let the frosting set for 30 minutes in the fridge before serving for clean slices.
Serving with Flair
Slice with a hot, damp knife for clean cuts through all layers. Garnish with fresh strawberry slices or a dusting of powdered sugar for elegance. Serve at room temperature—the contrast between the cool custard and warm cake is what makes this dessert magical. 🌸
Nutrition facts
Frequently asked questions
Can I use frozen strawberries instead of fresh?
Yes, but with adjustments! Thaw frozen strawberries completely and strain out excess liquid through a cheesecloth-lined sieve. For every 1 cup of frozen berries, add 1 tsp lemon juice to brighten the flavor. The texture will be slightly less vibrant than fresh, but the taste remains delicious.
How do I prevent the cake layers from getting soggy?
Chilling is key! Let each baked layer cool completely before assembling, then refrigerate the assembled cake for at least 2 hours before frosting. For extra insurance, brush layers with a simple syrup (equal parts sugar and water, heated until dissolved) before adding filling. This creates a moisture barrier while keeping the cake tender.
What's the best way to store leftovers?
Wrap individual layers in plastic wrap and store in an airtight container for up to 2 days at room temperature. For longer storage, freeze layers separately for 3 months. The buttercream can be refrigerated separately for 1 week—just rewhip before using. Always bring slices to room temperature before serving to preserve texture.
Can I make this cake gluten-free?
Replace the all-purpose flour with a 1:1 gluten-free baking flour blend (like Bob's Red Mill 1-to-1). Add ½ tsp xanthan gum to improve structure. For the custard, ensure your cornstarch is gluten-free. The texture will be slightly denser, but the flavor remains identical.
Why does my buttercream look grainy?
Grainy buttercream usually means the powdered sugar wasn't fine enough or the butter wasn't softened properly. Sift the powdered sugar through a fine-mesh sieve before mixing, and ensure your butter is at room temperature (about 65°F). If it happens during mixing, add 1 tsp milk and beat vigorously to dissolve the granules.