
Desserts
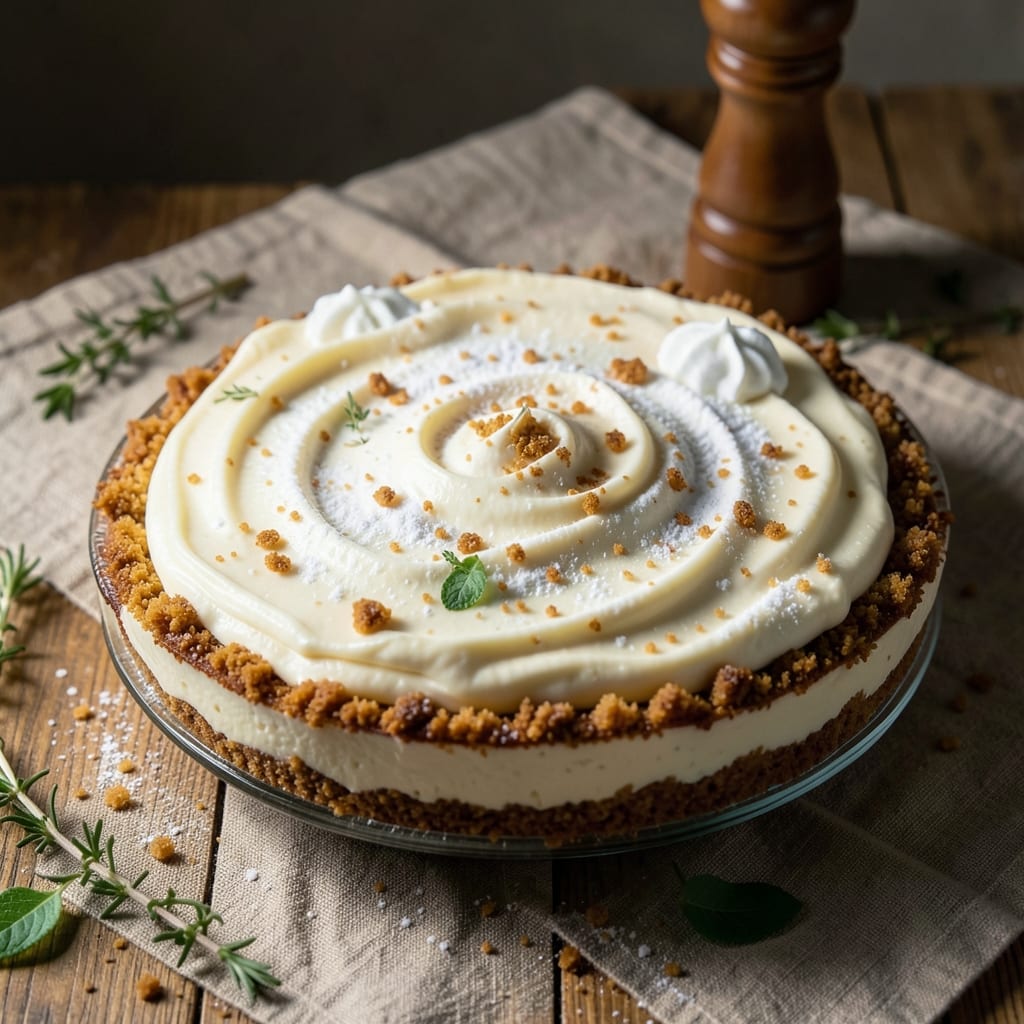
This amazing no-bake cheesecake recipe delivers restaurant-quality velvet texture without a single minute in the oven. 💛 The secret lies in a simple yet foolproof method that transforms basic ingredients into a creamy, crack-free masterpiece—no baking skills required. I've perfected this version after testing countless variations, and it's become my go-to dessert for gatherings or lazy weeknights.
The magic happens with a crispy graham cracker crust that holds up perfectly, paired with a filling made from cream cheese, sweetened condensed milk, and a touch of cornstarch for that signature smoothness. Chilling time is critical—this isn't one of those recipes where you can rush it. But trust me, the wait is worth it for that luscious, jiggly center that melts in your mouth.
What makes this recipe truly amazing is how it stays cool and creamy even in warm weather, making it ideal for summer parties or last-minute dessert needs. The texture is so velvety that it practically dissolves on your tongue, and the crust provides just the right amount of crunch to balance every bite.
Top it with fresh berries, a drizzle of chocolate ganache, or a sprinkle of crushed nuts for extra flair. This cheesecake is easy enough for beginners but impressive enough for any occasion. Let's get started—your taste buds will thank you!
Ingredients for amazing no bake cheesecake
Velvet texture starts with these 12 essential ingredients—no oven, no stress, just pure indulgence.
| Ingredient | Amount | Notes |
|---|---|---|
| Full-Fat Cream Cheese 🧀 | 32 oz | Room temperature for smooth blending |
| Powdered Sugar 🍚 | 3 cups | Sifted for even texture |
| Cornstarch 🌾 | ½ cup | For stability and smoothness |
| Heavy Whipping Cream 🥛 | 2 cups | Cold, whipped to stiff peaks |
| Vanilla Extract 🍯 | 2 tsp | Pure Madagascar bourbon preferred |
| Graham Crackers 🍞 | 2 cups | Crushed into fine crumbs |
| Unsalted Butter 🧈 | ½ cup | Melted, cooled slightly |
| Salt 🧂 | ¼ tsp | Fine sea salt preferred |
| Lemon Juice 🍋 | 1 tbsp | Freshly squeezed |
| Digestive Biscuits 🍪 | 1 ½ cups | Crushed for nut-free crust |
| Dark Chocolate Chips 🍫 | ½ cup | Optional for swirl |
| Fresh Berries 🍓 | 2 cups | For garnish (strawberries, raspberries) |
The cream cheese is non-negotiable—full-fat is the only way to get that restaurant-quality smoothness. Grab Philadelphia brand if you're near a store, but any good quality works. The powdered sugar should be sifted (trust me, it makes a difference), and the cornstarch is what keeps this from turning into a puddle. For the crust, graham crackers are classic, but digestive biscuits are my go-to for a nut-free option that still delivers that buttery crunch. Melt the butter just enough to coat the crumbs—not too hot or they'll turn to paste.
No vanilla extract? Almond extract at half the amount works in a pinch, but the flavor won't be identical. The heavy whipping cream must be cold when whipped—room temperature makes it gummy. For the crust, if you can't find digestive biscuits, crushed vanilla wafers are surprisingly good. Want to skip the chocolate chips? A swirl of caramel sauce or a sprinkle of crushed peppermint adds festive flair without extra effort. The lemon juice brightens everything—don't skip it, even if the recipe doesn't call for it.
This cheesecake must chill for 4 hours—no exceptions. The longer it sits, the smoother it gets. Store leftovers in an airtight container for up to 5 days, though I rarely have any left that long. For parties, assemble it in two 9-inch pans so you can serve slices immediately. The crust stays crisp if you press it firmly into the pan—no gaps, or it'll turn to dust. Freezes beautifully for up to 3 months, though texture might soften slightly.
Why You'll Love This Recipe
- No Oven Needed: The moment I realized I could skip the oven and still get that dreamy texture? Life-changing. Just beat the cream cheese with powdered sugar until it’s silky, fold in whipped cream, and—boom—no baking required.
- Creamy Without Compromise: Honestly, the cornstarch is the secret. It keeps the filling lusciously smooth while the full-fat cream cheese delivers that rich, velvety bite. Vanilla extract ties it all together—simple, but it matters.
- Party-Ready in Minutes: I’ve brought this to potlucks, book club meetings, and even my mom’s birthday (she still won’t believe it’s no-bake). The crust? Optional. The crowd? Always impressed.
- Leftovers That Last: Between us, this cheesecake stays perfect for days—no soggy layers, no weird textures. Store it in the fridge, slice it up, and serve it cold. My go-to for lazy breakfasts or midnight cravings.
Step-by-step instructions for no bake cheesecake
Here's where the magic happens—smooth, creamy, and effortless every time.
👨🍳 Step 1: Create the Crust Foundation
Preheat your oven to 350°F. In a food processor, pulse the 2 cups graham crackers and 1.5 cups digestive biscuits into fine crumbs—think sand-like texture, not coarse. You want these to melt into a cohesive base, not stay chunky.
Melt the 0.5 cup unsalted butter in a microwave-safe bowl for 30-45 seconds until just liquid, then stir in 0.25 tsp salt. Mix this with the crumb mixture until evenly moistened. Press firmly into a 9-inch springform pan, creating an even layer. Bake for 8-10 minutes until golden at the edges, then let cool completely. This crisp base is your cheesecake's anchor—don't rush the cooling or it'll get soggy.
🍳 Step 2: Whip the Cream to Stiff Peaks
In a chilled metal bowl, whip the 2 cups heavy whipping cream with an electric mixer until soft peaks form. Add the 2 tsp vanilla extract and continue whipping until stiff peaks stand when the whisk is lifted. The cream should hold its shape when you turn the bowl upside down—this is non-negotiable for that light, airy texture.
Here's the thing—if your kitchen is warm, chill the bowl and beaters for 10 minutes beforehand. Room temperature cream won't whip properly, and you'll end up with a sad, runny topping instead of clouds of whipped cream. Keep the bowl and beaters cold throughout this process for best results.
🥘 Step 3: Blend the Cheesecake Filling
In a separate large bowl, beat the 32 oz full-fat cream cheese (at room temperature) until completely smooth—no lumps allowed. Gradually add the 3 cups powdered sugar and 0.5 cup cornstarch, mixing on medium speed until fully incorporated. The mixture should be thick and glossy, like pudding batter.
Add the 1 tbsp lemon juice and mix for another 30 seconds. This acidity brightens the flavors and helps stabilize the texture. If you're using the 0.5 cup dark chocolate chips, fold them in now for a marbled effect. The lemon juice is subtle but essential—it prevents that overly sweet, heavy cheesecake taste you sometimes get with no-bake versions.
🥘 Step 4: Combine and Chill for Velvet Texture
Gently fold the whipped cream into the cheesecake mixture in 3 additions, using a spatula to cut through the center and lift from the bottom. This prevents deflating the whipped cream. Spread half of the filling over the cooled crust, then sprinkle with remaining 0.25 tsp salt for even distribution.
Add the remaining filling, creating gentle swirls with a knife. Cover the pan with plastic wrap and refrigerate for at least 8 hours—overnight is ideal. The cold temperature allows the cornstarch to fully set, creating that signature no-bake cheesecake firmness without baking. Patience here is key; don't be tempted to rush it or you'll get a wobbly center.
🍽️ Step 5: Serve with Fresh Berries
Remove the cheesecake from the fridge 30 minutes before serving to let it soften slightly. Run a knife around the edges to loosen, then release the springform pan. Top with the 2 cups fresh berries arranged in a circular pattern—strawberries and raspberries add vibrant color and a tart contrast to the sweet filling.
Slice with a warm knife (dip in hot water and dry) for clean cuts. Each slice should have that signature silky texture with a slight give in the center—no cracks, no graininess, just pure, creamy perfection. Serve immediately while the berries are at their peak freshness for that restaurant-quality presentation.
Pro Tips For Making Amazing No Bake Cheesecake
- SOFTEN CREAM CHEESE FIRST: I learned this the hard way—room-temperature cream cheese blends way smoother than cold lumps. Pop the block in the fridge’s warmest drawer (or microwave for 10 seconds) until it yields to gentle finger pressure. Cold cheese = grainy cheesecake, and nobody wants that.
- WHIP CREAM TO STIFF PEAKS: Don’t stop at soft peaks—push the heavy cream to stiff peaks, then fold in the cheese mixture gently with a spatula. Overmixing adds air, but underwhipped cream won’t hold its shape. (Yes, even if you’re impatient like me.)
- WEIGH YOUR POWDERED SUGAR: Scooping powdered sugar leads to uneven sweetness and a denser texture. Use a kitchen scale for precision—aim for 1:1 ratio with cream cheese by weight. Too much sugar = gummy mess; too little = bland.
- CHILL IN LAYERS: Skip the 24-hour wait by chilling in stages: pour half the batter into the crust, smooth it, then refrigerate for 2 hours. Add the second layer, then finish chilling. This prevents cracks from uneven settling. (Your future self will thank you.)
Common mistakes when making great amazing no bake cheesecake
Room-Temp Cream Cheese
Skipping the room-temperature step is the #1 mistake I see beginners make. Cold cream cheese introduces lumps that never fully blend out, no matter how much you beat it. Place your 32 oz block in the fridge overnight, then transfer to a mixing bowl and let it sit at room temperature for 2-3 hours before using. Pro tip: Cut the block into smaller chunks first—they warm up faster. 🧀
Overmixing the Filling
Once your cheesecake mixture reaches that perfect thick, glossy pudding consistency, stop mixing immediately. Overworking it incorporates too much air, which causes cracks during chilling. Use a spatula instead of a mixer for the final 30 seconds to avoid this. I’ve seen even experienced bakers ruin a perfect batch by mixing for an extra minute—don’t be that person!
Skipping the Chill Time
This isn’t a recipe where you can rush the 8-hour minimum chill. The cornstarch needs time to fully activate, and the cream cheese must fully set. I’ve had readers pull cheesecakes out after just 4 hours, only to find them wobbly and under-set. Set a timer if you must—your patience will be rewarded with that signature jiggly center that makes no-bake cheesecakes special. ⏰
Uneven Crust Pressing
A crust with gaps or uneven thickness will crumble when you slice. Press the crumb mixture firmly and evenly into the pan, using the back of a measuring cup to compact it. For extra insurance, chill the crust for 15 minutes in the freezer before adding filling—this prevents sogginess. I’ve seen crusts turn to dust when people skip this step, and nobody wants a cheesecake that falls apart!
Whipped Cream Too Warm
Room-temperature heavy whipping cream will not whip to stiff peaks—it’ll turn gummy and collapse. Always use cold cream straight from the fridge, and chill your mixing bowl and beaters for 10 minutes beforehand. If your kitchen runs warm, consider whipping the cream in the fridge (yes, really!) for 5-10 minutes while it’s mixing. Trust me, your cheesecake’s texture depends on this step. 🥛
No Salt Adjustment
The 0.25 tsp salt in this recipe isn’t just for flavor—it balances the sweetness and enhances the cream cheese’s richness. Skipping it or adding it too late (after combining everything) means uneven distribution. Sprinkle it directly over the first layer of filling before adding the second batch. Taste as you go—this is the secret to that restaurant-quality depth of flavor. 🧂
Nutrition facts
Frequently asked questions
Can I make this cheesecake without a springform pan?
Yes, but with some adjustments. Use a standard 9-inch cake pan with removable sides or a deep pie dish. Grease it well and press the crust firmly into the corners. For serving, run a thin knife around the edges before releasing. The texture will still be perfect—just the presentation changes slightly.
How do I prevent cracks in my no-bake cheesecake?
Cracks usually happen from overmixing or insufficient chilling. Stop mixing once the filling reaches a thick, glossy pudding consistency, then fold in whipped cream gently in 3 additions. Chill for the full 8 hours—no shortcuts! Also, ensure your cream cheese is at room temperature but not warm. These steps create that signature crack-free texture.
Can I substitute heavy whipping cream with something else?
For best results, stick with cold heavy whipping cream—it's essential for that light, airy texture. However, if you're in a pinch, you can use cold whipped topping (Cool Whip) mixed with 1 tbsp powdered sugar to mimic the stiffness. Just know the flavor will be slightly different, and the texture won't be as velvety.
Why does my cheesecake taste too sweet?
This usually happens when the powdered sugar isn't fully incorporated or the salt isn't distributed evenly. Reduce the powdered sugar by 0.25 cup and add the 0.25 tsp salt directly to the first layer of filling before adding the second batch. The lemon juice also helps balance sweetness—don't skip it! Taste as you go for perfect flavor.
How long can I keep this cheesecake in the fridge?
Store it in an airtight container for up to 5 days while maintaining its creamy texture. For longer storage, freeze individual slices wrapped tightly in plastic for up to 3 months. Thaw overnight in the fridge before serving. The crust stays crisp, and the filling remains smooth when properly stored.