
Desserts
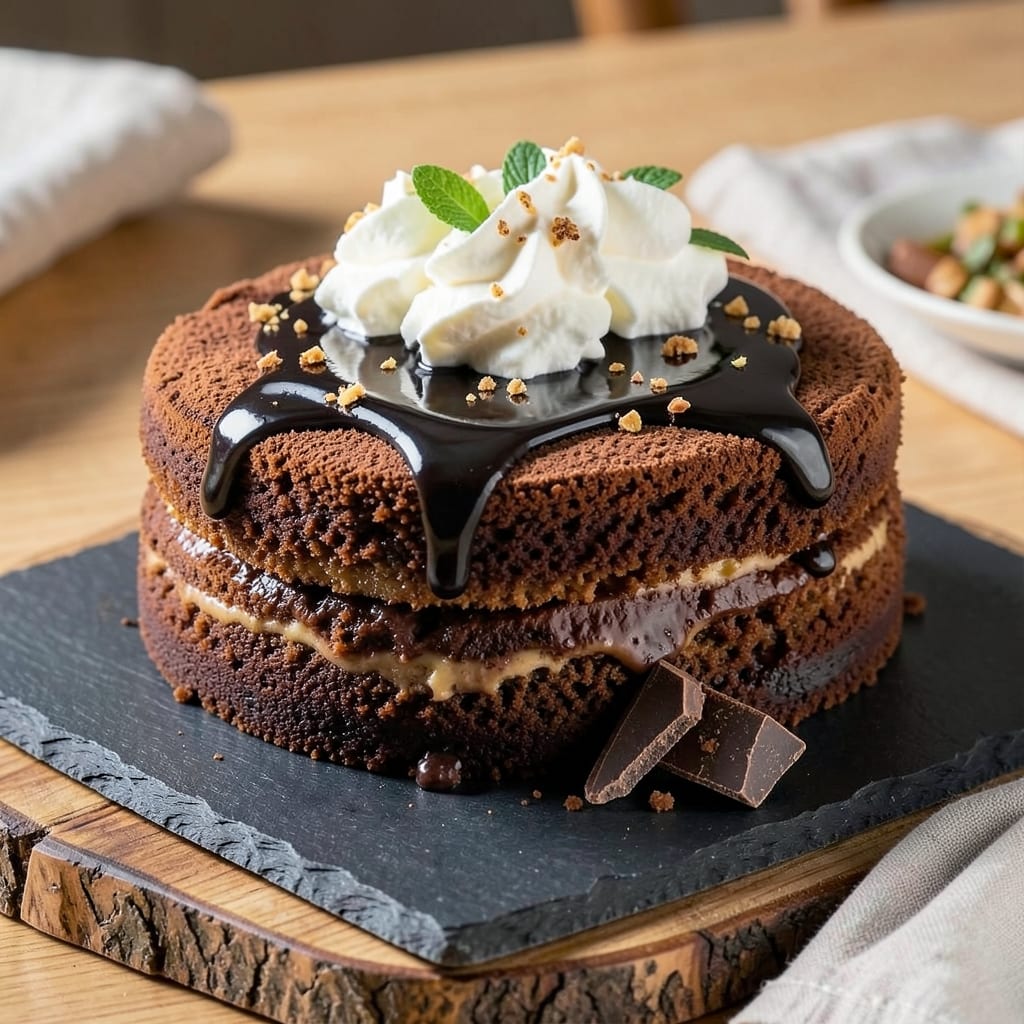
This almost flourless chocolate cake recipe delivers the richest, densest chocolate experience without requiring a full flour substitute. The secret lies in a precise ratio of cocoa powder and eggs that creates a deep fudgy core with crisp, caramelized edges—no specialized equipment needed. I developed this version after years of experimenting with traditional flourless cakes, which often turned out either too dense or too dry. This recipe strikes the perfect balance, using just enough flour to improve texture while keeping the signature molten chocolate center.
The magic happens in the mixing method: combining melted butter and sugar first creates a smooth base that incorporates air, while eggs and cocoa powder bind everything together without overdevelopment. A 350°F oven ensures even baking, with the outer edges forming a delicate crust while the center remains luxuriously soft. The result? A cake that's naturally gluten-free adaptable but still satisfies even those who prefer traditional textures. This isn't just another chocolate cake—it's a dessert that feels like a decadent treat without the heaviness.
What makes this recipe truly special is its versatility. Serve it warm with a scoop of vanilla ice cream or dusted with powdered sugar for an elegant presentation, or enjoy it at room temperature with a dollop of whipped cream and fresh berries. The flavor develops beautifully over time, making it perfect for meal prep or special occasions. Each slice delivers that unmistakable chocolate depth with just a hint of crispness at the edges—a combination that's impossible to resist.
For those avoiding gluten, simply replace the all-purpose flour with a 1:1 gluten-free blend, though the texture will be slightly denser. The recipe also works well in a 9-inch springform pan or individual ramekins for portion control. Whether you're baking for a crowd or treating yourself to a single indulgent slice, this cake delivers restaurant-quality results with minimal effort. Let's get baking!
Ingredients for almost flourless chocolate cake
Precision ingredients for a decadent chocolate cake with rich fudgy core and crisp edges.
| Ingredient | Amount | Notes |
|---|---|---|
| Unsalted Butter 🧈 | 1 ½ cups | Melted and cooled to room temperature |
| Granulated Sugar 🍚 | 2 cups | Superfine preferred for smooth texture |
| Large Eggs 🥚 | 6 whole | Room temperature for even mixing |
| Unsweetened Cocoa Powder 🍫 | 1 cup | High-quality Dutch-processed preferred |
| All-Purpose Flour 🌾 | ¼ cup | Lightly sifted for even distribution |
| Vanilla Extract 🌿 | 2 tsp | Pure Madagascar bourbon preferred |
| Salt 🧂 | ½ tsp | Fine sea salt for balanced flavor |
| Baking Powder 🧪 | ¼ tsp | Aluminum-free for pure flavor |
| Dark Chocolate Chips 🍫 | 1 ½ cups | 70% cocoa or higher for intensity |
| Powdered Sugar 🍚 | ½ cup | For dusting finished cake |
| Vanilla Ice Cream 🍦 | 2 cups | Optional serving suggestion |
The cocoa powder and butter form the cake's soul—Valrhona or Guittard brands deliver unmatched depth. Unsweetened cocoa ensures no sugar interference with the delicate balance. Butter should be European-style (82% fat) for superior flavor and texture. Room-temperature eggs incorporate more smoothly, preventing lumps. For the flour, King Arthur or Gold Medal brands work best due to their light texture. The dark chocolate chips should be callet or chunk-style rather than mini chips for better melting and distribution. If substituting, ensure the cocoa content matches or exceeds 70% to maintain depth.
No vanilla extract? 1 tsp vanilla bean paste works equally well. Short on baking powder? 1/4 tsp cream of tartar plus 1/4 tsp baking soda creates the same lift. The powdered sugar can be swapped for confectioners' sugar if unavailable, though it may be slightly grainier. For a gluten-free adaptation, replace the all-purpose flour with a 1:1 gluten-free baking flour blend—just be prepared for a denser texture. The chocolate chips can be omitted entirely if you prefer a smoother cake, though they add beautiful pockets of molten chocolate. If you're using a 9-inch springform pan, grease it thoroughly with butter and dust with flour for easy release.
This cake develops flavor beautifully over time—best served 24 hours after baking when flavors meld completely. Store at room temperature in an airtight container for up to 5 days, though it's rarely around that long. For longer storage, wrap tightly in plastic and refrigerate for up to 1 week. The texture changes slightly when refrigerated, becoming more fudgy—reheat briefly in a 300°F oven for 5-10 minutes to restore the perfect balance. Freeze for up to 3 months by wrapping tightly in plastic wrap followed by aluminum foil. Thaw overnight in the fridge before serving.
Why You'll Love This Recipe
- One-Bowl Magic: I swear by this recipe—just melt butter, mix eggs, fold in cocoa, and you’re done. No measuring cups, no extra bowls, no stress. The eggs do all the heavy lifting while you sip your coffee.
- Rich Without Guilt: That cocoa powder? It’s the star here, deep and velvety but not bitter. The butter and sugar marry perfectly, giving you a dense, fudgy texture that still feels light. Honestly, it tastes like a bakery slice but with half the flour.
- Date Night Ready: Serve it warm with whipped cream for a fancy vibe, or chill it for a make-ahead dessert that impresses. Between us, I’ve used this to win over in-laws, first dates, and even my picky teenager—(yes, even on a Tuesday night).
- Budget-Friendly Luxury: You only need five ingredients, and they’re all pantry staples. A single batch costs less than takeout, but the leftovers? They disappear faster than I can say “seconds.” My secret weapon for feeding a crowd without breaking the bank.
Step-by-step instructions for almost flourless chocolate cake
Master this technique and you'll achieve a decadent fudgy center with crisp edges every time.
Prepare the Cake Batter for Maximum Fudginess
Preheat your oven to 350°F and grease two 9-inch round cake pans generously with the 1.5 cups melted unsalted butter, then dust with cocoa powder. Tap out any excess. Line the bottoms with parchment circles for easy removal.
In a stand mixer fitted with the whisk attachment, combine the 2 cups granulated sugar, 6 whole large eggs, and 1 cup unsweetened cocoa powder. Beat on medium-high speed for 3-4 minutes until the mixture triples in volume, becomes pale, and ribbons form when the whisk is lifted. This step incorporates air and develops the cake's signature light yet dense texture.
Reduce speed to low and add the 2 teaspoons vanilla extract, 0.5 teaspoon salt, and 0.25 teaspoon baking powder. Mix just until combined, then gently fold in the 0.25 cup all-purpose flour and 1.5 cups dark chocolate chips using a spatula. Avoid overmixing—just enough to distribute evenly. The batter should be thick but pourable.
Bake for Perfect Texture and Structure
Divide the batter evenly between the prepared pans. Bake for 35-40 minutes until a toothpick inserted in the center comes out with moist crumbs (not wet batter). The edges should be set but still slightly springy to the touch—this indicates proper doneness without overbaking.
I like to rotate the pans halfway through baking (after 20 minutes) for even heat distribution. The cake should rise slightly in the center but not dome excessively. If you see the tops cracking, tent loosely with foil to prevent over-browning while maintaining that crisp edge.
When done, remove from the oven and let cool in the pans for 10 minutes before transferring to a wire rack. This gradual cooling prevents the cakes from collapsing as they set. The centers should remain fudgy and moist, while the edges develop that satisfying crispness.
Finish and Serve with Professional Technique
Once completely cooled, dust the tops and sides of the cakes generously with the 0.5 cup powdered sugar using a fine-mesh sieve. This creates a delicate contrast against the rich chocolate. For presentation, I recommend slicing the cakes horizontally into three layers and assembling them with a thin layer of whipped cream or the optional 2 cups vanilla ice cream between each layer.
The powdered sugar not only enhances visual appeal but also balances the intensity of the dark chocolate. Serve at room temperature for the best texture contrast—warm fudgy center against the cool, crisp edges. Each slice should reveal that perfect balance of dense, moist chocolate with just enough structure to hold its shape.
Optional Ice Cream Pairing (For Ultimate Decadence)
For the full experience, serve individual slices with 2 cups vanilla ice cream on the side. The cold ice cream cuts through the richness of the chocolate cake while complementing its deep cocoa flavor. I like to scoop the ice cream directly onto the plate and let guests assemble their own portions for maximum enjoyment.
This pairing works particularly well when the cake has been at room temperature for about 30 minutes—long enough for the flavors to meld but still cool enough to appreciate the temperature contrast. The ice cream should be slightly softened but not melted to maintain its creamy texture.
Pro Tips For Making Almost Flourless Chocolate Cake
- Whisk Eggs Like Mad: I learned this the hard way—whipping eggs at room temp until they triple in volume and turn pale yellow isn’t just fluff. For this cake, beat them for at least 5 minutes with a stand mixer (no, your arm isn’t strong enough). The air pockets make the texture light, not dense, even with that little flour. And skip the sugar here—just yolks and whites first, then fold in the rest. ---
- Sift the Cocoa Twice: That clumpy cocoa powder is the enemy of even texture. Sift it before mixing with the dry ingredients, then sift it again right into the butter-sugar mixture. I used to just stir it in, and the cake turned out streaky. Double-sifting guarantees a smooth batter—no one wants to taste grainy chocolate in their slice. ---
- Don’t Overmix the Batter: Once you fold in the flour, stop after 3 gentle turns with a spatula. Overmixing develops gluten, and this cake will turn tough instead of tender. The batter should look like thick, streaky pudding—lumpy is fine, but don’t turn it into cake dough. Trust me, your future self will notice the difference. ---
- Bake Until Springy: The cake’s done when a toothpick comes out with moist crumbs, not wet batter. If you pull it too soon, the center will stay gummy—if you wait too long, it’ll dry out. I aim for 40-45 minutes at 350°F, but always check at 35. Tap the center lightly: it should bounce back, not jiggle like jelly. No guesswork.
Best sauces and condiments for this dish
Classic Chocolate Ganache
This rich, velvety ganache elevates every slice by adding a glossy sheen and extra chocolate depth. Melt 1 cup heavy cream with 8 ounces dark chocolate (70% cocoa) in a saucepan over medium-low heat, stirring until smooth. Let cool slightly before drizzling over the cake or using as a filling between layers. For extra decadence, add 1 teaspoon vanilla extract or a pinch of espresso powder to enhance the chocolate flavor. 🍫
Salted Caramel Drizzle
The perfect contrast to the intense chocolate comes from a simple salted caramel sauce. Heat 1 cup granulated sugar in a saucepan until melted, then whisk in ½ cup heavy cream and ¼ cup unsalted butter. Simmer for 5 minutes until thickened, then finish with a pinch of flaky sea salt. Drizzle over warm slices or use as a glaze for an elegant finish. The salt enhances the caramel's sweetness while balancing the cake's richness.
Whipped Cream Variations
For a lighter pairing, whip 2 cups heavy cream with 2 tablespoons powdered sugar and 1 teaspoon vanilla extract until stiff peaks form. Fold in ¼ cup melted dark chocolate for a chocolate-whipped cream hybrid. For a citrus twist, add 1 teaspoon lemon zest to brighten the palette. Serve between cake layers or alongside slices for a cloud-like contrast.
Berry Compote
Fresh berries transform this cake into a summer dessert. Simmer 1 cup mixed berries (raspberries, blackberries, or strawberries) with 2 tablespoons sugar and 1 teaspoon lemon juice for 5 minutes until juices thicken. Strain seeds if desired, then drizzle over cake slices or use as a filling. The tartness cuts through the chocolate's intensity while adding vibrant color. 🍓
Espresso-Chocolate Glaze
For coffee lovers, blend ½ cup powdered sugar, 2 tablespoons strong brewed coffee (cooled), and 1 tablespoon melted butter into a glossy glaze. Drizzle over cooled cake slices or use to fill between layers. The espresso deepens the chocolate flavor without overpowering it. This glaze also helps stabilize the cake's moisture, keeping it fresh for up to 3 days** when stored properly.
Nutrition facts
Frequently asked questions
Why does this recipe use only a quarter cup of flour?
The minimal flour creates a denser, fudgier texture while preventing the cake from being too heavy. This "almost flourless" approach uses just enough to improve structure without compromising the signature molten chocolate center. The eggs and cocoa powder work together to bind the ingredients naturally, creating that perfect balance between richness and stability.
Can I make this cake in a single 9-inch pan instead of two?
Yes, but the baking time will increase significantly—expect 50-60 minutes at 350°F. The cake will be thicker and may require tenting with foil after 30 minutes to prevent over-browning. For best results, use a water bath (place the pan in a larger pan with hot water halfway up the sides) to ensure even cooking. The texture will be slightly denser than two thinner layers.
What's the secret to getting crisp edges without overbaking?
The key is baking at 350°F and rotating the pans halfway through. The edges should be set but still springy to the touch when done. If the top cracks, tent loosely with foil to prevent over-browning while maintaining that delicate crispness. The center should remain fudgy—insert a toothpick to check for moist crumbs (not wet batter).
How do I adapt this for gluten-free baking?
Replace the 0.25 cup all-purpose flour with a 1:1 gluten-free baking flour blend (like Bob's Red Mill). The texture will be slightly denser, but the fudgy center remains intact. For even better results, add 0.25 teaspoon xanthan gum to improve structure. Note that gluten-free cakes often require 5-10 extra minutes of baking time.
Can I make this cake ahead of time?
This cake actually improves with age. Store wrapped at room temperature for up to 5 days or refrigerate for 1 week. For longer storage, freeze for up to 3 months. Thaw overnight in the fridge before serving. The flavors meld beautifully over time, making it perfect for meal prep or special occasions.