
Desserts
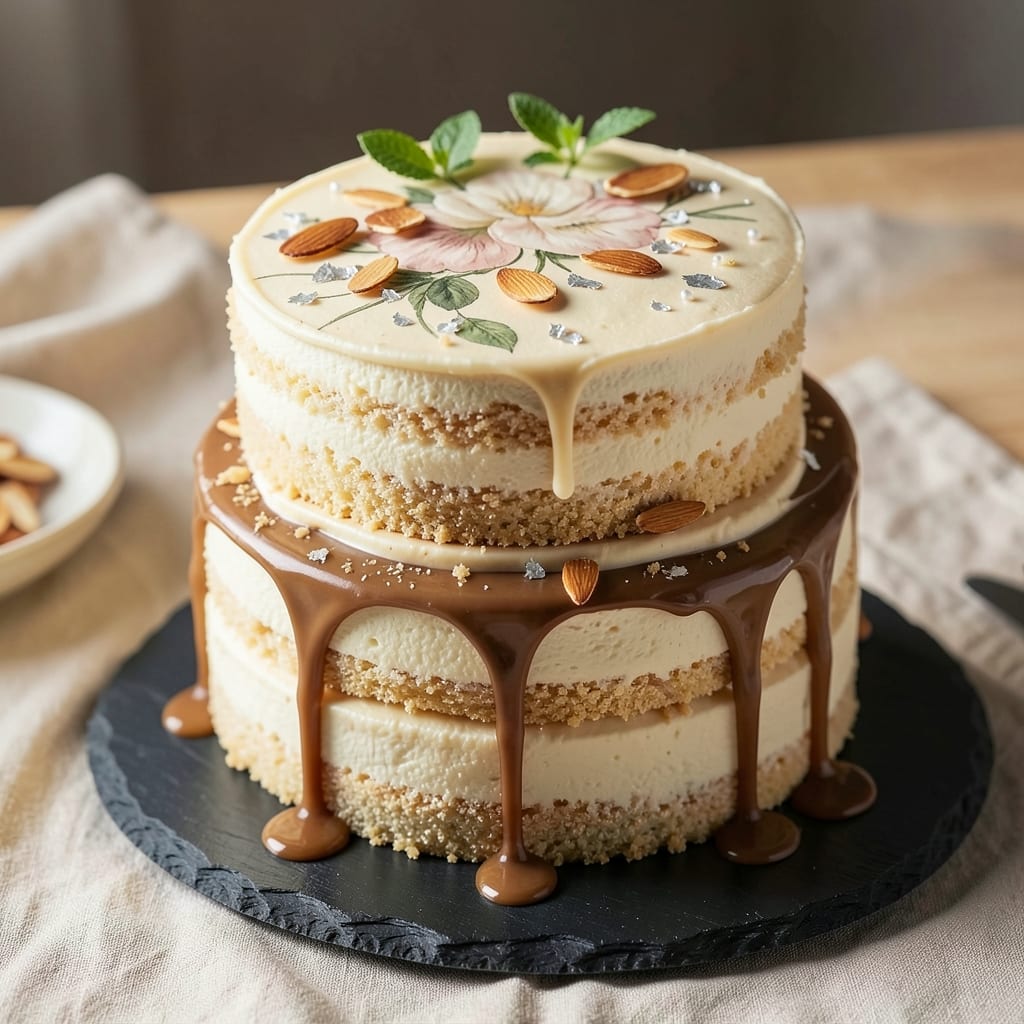
This almond wedding cake recipe from scratch delivers the perfect balance of buttery layers and crunchy almond-topped magic for your special day. 💛 The secret lies in a rich frangipane filling between tender sponge layers, topped with a signature almond crunch that adds both texture and elegance. Every bite combines velvety cake, nutty filling, and that satisfying crunch from the almond topping—a combination that makes this cake unforgettable.
What sets this recipe apart is the professional-level technique simplified for home bakers. We'll bake three layers at once for efficiency, then assemble with a luscious buttercream that complements rather than overpowers the almond flavors. The almond topping, made with ground almonds and a touch of sugar, creates that signature crunch while adding visual appeal that photographers will love.
The result is a wedding cake that's as stunning to look at as it is delicious to eat—golden layers with a crisp almond crust that adds both texture and sophistication. This recipe includes all the professional details you need: precise baking times, proper cooling techniques, and assembly tips to ensure your cake holds its shape and tastes perfect even after being cut and served.
Perfect for both traditional weddings and elegant receptions, this cake keeps beautifully for up to 3 days at room temperature or can be frozen for longer storage. The instructions cover everything from baking to decorating, including tips for creating clean piping borders and adding fondant accents if desired. Let's create your dream wedding cake together.
Ingredients for almond wedding cake recipe from scratch
Twelve ingredients transform into a showstopping almond wedding cake with professional-level texture and presentation.
| Ingredient | Amount | Notes |
|---|---|---|
| Unsalted Butter 🧈 | 2 ½ cups | Room temperature, European preferred |
| Granulated Sugar 🍚 | 3 ½ cups | Superfine preferred for smooth texture |
| Large Eggs 🥚 | 8 whole | Room temperature, separated |
| All-Purpose Flour 🌾 | 3 ½ cups | Sifted, spooned lightly |
| Almond Flour 🌰 | 2 cups | Blanched, fine grind preferred |
| Vanilla Extract 🌿 | 2 tbsp | Pure Madagascar bourbon preferred |
| Baking Powder 🍞 | 1 tbsp | Aluminum-free for stability |
| Salt 🧂 | ½ tsp | Fine sea salt preferred |
| Heavy Whipping Cream 🥛 | 1 ½ cups | 36% fat content preferred |
| Powdered Sugar 🍚 | 4 cups | Confectioners' sugar, sifted |
| Whole Almonds 🌰 | 2 cups | Skin-on, toasted golden brown |
| Almond Extract 🌿 | 1 tsp | Pure, not imitation |
| Cornstarch 🌾 | 1 tbsp | For buttercream stability |
| Lemon Zest 🍋 | 1 tsp | Organic preferred, finely grated |
The almond flour is non-negotiable for that signature nutty richness. Bob's Red Mill or King Arthur brands deliver the finest grind, but any blanched almond flour works if labeled 'fine'—avoid coarse varieties that can create gritty texture. Toast the whole almonds in a 350°F oven for 10-12 minutes until golden and fragrant; this enhances their flavor dramatically. For the butter, Plugrá or European-style brands provide superior fat content and flavor development. Room temperature butter is critical—it should dent but not flatten when pressed. The vanilla extract should be Madagascar bourbon for its complex, caramel notes that complement the almond perfectly.
No almond flour? Substitute with 1.5 cups ground blanched almonds (toasted and processed in a high-speed blender), though texture will differ slightly. Running short on powdered sugar? Granulated sugar processed in a food processor works in a pinch, but sift thoroughly to avoid graininess. The heavy whipping cream must be cold and 36% fat minimum—anything lower risks buttercream instability. For the almond extract, McCormick or Frontier Co-op brands offer pure, potent extracts without artificial additives. The lemon zest adds brightness that balances the richness; organic lemons from specialty markets provide the most vibrant flavor. Every ingredient here serves a purpose—skip none for optimal results.
Store the assembled cake in an airtight cake dome at room temperature for up to 3 days, or refrigerate for 5 days if humidity is high. The frangipane filling stays fresh 2 days at room temperature when properly sealed. For long-term storage, wrap each layer individually in plastic wrap, then place in a sealed container—keeps for 3 months in the freezer. The toasted almonds lose crispness over time, so toast fresh portions as needed for serving. This cake's presentation is its hallmark; keep it covered until serving to maintain the elegant almond borders.
Why You'll Love This Recipe
- No Stand Mixer Needed: I swear by this recipe because it only requires a bowl and a whisk—no fancy equipment. The butter and sugar cream together in minutes, and the almond flour adds that luxurious texture without extra fuss.
- Rich Almond Magic: That nutty depth from the almond flour paired with the buttery richness? It’s like a cross between a classic vanilla cake and a sophisticated almond biscotti. Honestly, the first bite makes you forget it’s from scratch.
- Wedding-Worthy Without Stress: You can bake a single layer for a small gathering or scale it up for a full-tier cake—same recipe, just more love. Between us, I’ve used it for birthdays, bridal showers, and even a last-minute office celebration.
- Leftovers That Stay Fresh: This cake doesn’t dry out fast, so you can slice and store it for days without soggy layers. I’ve had mine last a week in the fridge, and the almond flavor actually gets better as it sits—like a secret upgrade.
Step-by-step instructions for almond wedding cake layers
Master the perfect balance of tender crumb and nutty crunch with these precise techniques.
👨🍳 Step 1: Whip Butter and Sweeteners to Ribbon Stage
In a stand mixer fitted with the paddle attachment, beat the 2.5 cups unsalted butter and 3.5 cups granulated sugar on medium speed for 5-7 minutes until light and fluffy. You're aiming for a ribbon stage where the mixture leaves a trail when the paddle is lifted—this incorporates air for that signature tender crumb.
I like to scrape the bowl every 30 seconds during this process to ensure even distribution. The butter should be completely smooth with no graininess, and the mixture should nearly triple in volume. This step makes all the difference for that melt-in-your-mouth texture we're after.
👨🍳 Step 2: Incorporate Eggs and Extracts in Stages
Add the 8 whole large eggs, one at a time, mixing on low speed for 30 seconds after each addition. This gradual incorporation prevents curdling. After all eggs are incorporated, add the 2 tbsp vanilla extract and 1 tsp almond extract, mixing for another 30 seconds until fully combined.
Here's the thing—room temperature eggs are crucial. If they're cold, they'll cook the butter instead of emulsifying properly. The mixture should be pale yellow and thick enough to hold its shape when dropped from a spoon. If it looks too thin, let it sit for 5 minutes while you prepare the dry ingredients.
👨🍳 Step 3: Combine Dry Ingredients with Precision
In a separate bowl, whisk together the 3.5 cups all-purpose flour, 2 cups almond flour, 1 tbsp baking powder, 0.5 tsp salt, and 1 tsp lemon zest. Sift the dry ingredients through a fine-mesh sieve directly into the wet mixture to prevent gluten development. I find this creates a lighter texture.
With the mixer on low speed, gradually add the dry ingredients to the wet mixture, mixing just until combined. You should still see some flour streaks—overmixing develops gluten and makes the cake dense. The batter should be thick and smooth, like pudding. If it's too stiff, add 1-2 tablespoons of heavy whipping cream to loosen it.
🔥 Step 4: Bake Layers with Perfect Doneness
Preheat your oven to 350°F and line three 8-inch round cake pans with parchment paper. Divide the batter evenly among the pans. Bake for 25-30 minutes until a toothpick inserted in the center comes out clean and the tops spring back when touched.
I've found that 28 minutes works best for my oven, but yours might vary. Watch for the edges to pull away from the pan and the tops to develop a golden hue. Rotate the pans halfway through baking for even heat distribution. Let the cakes cool in the pans for 10 minutes before transferring to a wire rack to cool completely.
🥘 Step 5: Prepare Crunchy Almond Topping
While the cakes cool, toast the 2 cups whole almonds in a dry skillet over medium heat for 5-7 minutes, stirring constantly, until golden brown and fragrant. Spread them on a baking sheet to cool completely. Once cooled, pulse them in a food processor until you achieve a coarse crumb texture—about the size of coarse sand.
This topping is what gives this wedding cake its signature texture contrast. The toasted almonds add a delightful crunch that complements the tender cake layers beautifully. Keep them at room temperature until ready to use on the fully cooled cakes.
Pro Tips For Making Almond Wedding Cake Recipe From Scratch
- CREAM BUTTER SLOWLY: I learned this the hard way—whipping unsalted butter and sugar at high speed too fast just traps air unevenly. Start your butter-sugar mix on low for 3 minutes first, then gradually increase to medium-high. This ensures a smooth, creamy base that won’t turn grainy when you fold in eggs.
- SIFT ALMOND FLOUR: Almond flour is not like regular flour—it’s dense and clumpy. Sift it twice with the all-purpose flour to avoid a dry, crumbly texture. I skip this step sometimes, and the cake ends up tasting like almond paste instead of a balanced wedding cake.
- WEIGH EGGS PRECISELY: Large eggs vary by 10-15 grams, and this recipe relies on their structure. Use a kitchen scale for the eggs (aim for ~50g each) to guarantee the right rise. I was skeptical until I tried it—now I never go back.
- BAKE UNTIL 205°F: Most recipes say "until golden," but almond cakes need internal doneness. Insert a thermometer into the center—pull it out at 205°F (not 212°F). Overbaking dries out the almond flour, and underbaking leaves a gummy core. Trust the thermometer, not your eyes.
Troubleshooting perfect results
Cake Layers Too Dense
Overmixing the batter develops gluten, resulting in dense layers. Mix the dry ingredients into the wet mixture just until combined—you should still see some flour streaks. Also, ensure your butter is room temperature (it should dent but not flatten when pressed). Cold butter creates steam pockets that can cause uneven baking and density. If your batter looks too stiff, add 1-2 tablespoons of heavy whipping cream to loosen it without compromising texture. 💡
Uneven Baking
Uneven baking often happens when pans aren't preheated or rotated. Always preheat your oven to 350°F for at least 15 minutes before baking. Rotate the pans halfway through the 25-30 minute bake time to ensure even heat distribution. If your oven has hot spots, consider using an oven thermometer to verify accuracy—many home ovens run 25°F hotter or colder than set. 🔥
Filling Leaks or Sogginess
Frangipane filling can leak or make layers soggy if the cakes aren't fully cooled. Let each layer cool completely on a wire rack before assembling. If your filling seems too runny, chill it for 30 minutes before spreading. For extra stability, spread a thin layer of buttercream between cake layers before adding the filling—this creates a barrier. Also, ensure your frangipane isn't too wet; if it is, add 1-2 tablespoons of almond flour to thicken it. ✨
Almond Topping Not Crunchy
The almond topping loses crispness if toasted too dark or stored improperly. Toast almonds over medium heat for just 5-7 minutes until golden brown—don't let them burn. Let them cool completely before pulsing in a food processor to avoid moisture. Store the topping in an airtight container at room temperature for up to 3 days, or freeze for longer storage. Re-toast in a dry skillet for 1-2 minutes to restore crispness before using. 🌰
Cake Cracking During Assembly
Temperature shocks cause cracks when assembling layers. Let all components—cakes, filling, and frosting—reach room temperature before assembly. If your kitchen is cold, place the cakes on a warming tray for 10 minutes to bring them to a consistent temperature. Also, level the cakes with a serrated knife for even surfaces. Use a cake turntable to spin while applying frosting for smooth, even layers. 💫
Frosting Too Soft
Buttercream can soften in warm temperatures. Chill your mixing bowl and beaters in the freezer for 10 minutes before whipping. If your kitchen is warm, refrigerate the buttercream for 15-20 minutes before piping. For extra stability, add 1 tbsp cornstarch to the powdered sugar mixture. Avoid overmixing—whip just until smooth and fluffy. If it still softens, place the cake in the fridge for 30 minutes before serving. 🥛
Nutrition facts
Frequently asked questions
Can I make this almond wedding cake gluten-free?
Yes, but you'll need to substitute both the all-purpose and almond flours. Replace the 3.5 cups all-purpose flour with a 1:1 gluten-free baking flour blend (like Bob's Red Mill 1-to-1) and use 2.5 cups gluten-free almond flour (ensure it's labeled fine-ground). You may also need to add 1/2 tsp xanthan gum to improve structure. Keep in mind the texture will differ slightly from traditional versions.
How do I adjust the recipe for a smaller wedding cake?
For a single 6-inch layer cake, reduce all ingredients by 1/3 (about 2.5 cups butter, 2.5 cups sugar, 5 eggs, etc.). Use one 6-inch pan instead of three 8-inch pans, and bake for 20-25 minutes at 350°F. The same ratios apply for the filling and frosting—simply scale everything down proportionally. The almond topping can be reduced to 1 cup for a 6-inch cake.
What's the best way to transport a multi-tiered wedding cake?
Assemble the cake on a sturdy cake board or dowel-supported base, then wrap it tightly in plastic wrap followed by a layer of aluminum foil. Place it in a large, sturdy cake box with at least 2 inches of padding on all sides. For transport, keep the cake in a temperature-controlled vehicle (65-75°F) and avoid direct sunlight. If traveling more than 2 hours, consider using a cake carrier with insulation. Never transport a cake in a car trunk during extreme temperatures.
Can I make this cake ahead of time?
Bake the layers 2-3 days ahead and store them wrapped in plastic at room temperature. Prepare the frangipane filling 1 day ahead and refrigerate. Assemble the cake 24 hours before the wedding and store it in an airtight cake dome at room temperature. The flavors meld beautifully over time, and the almond topping stays crisp. For longer storage, freeze the assembled cake (without decorating) for up to 3 months—thaw overnight at room temperature before serving.
How do I create a decorative almond pattern on top?
After applying the buttercream, use a small offset spatula or bench scraper to create clean vertical lines around the cake. Press the almond topping into these lines to form a decorative border. For a more intricate pattern, use a piping bag fitted with a star tip to pipe small dots of buttercream, then press almond pieces onto them. Another elegant option is to create a lattice pattern by piping buttercream "rails" and filling with almond pieces. Work quickly before the buttercream softens in warm conditions.