
Desserts
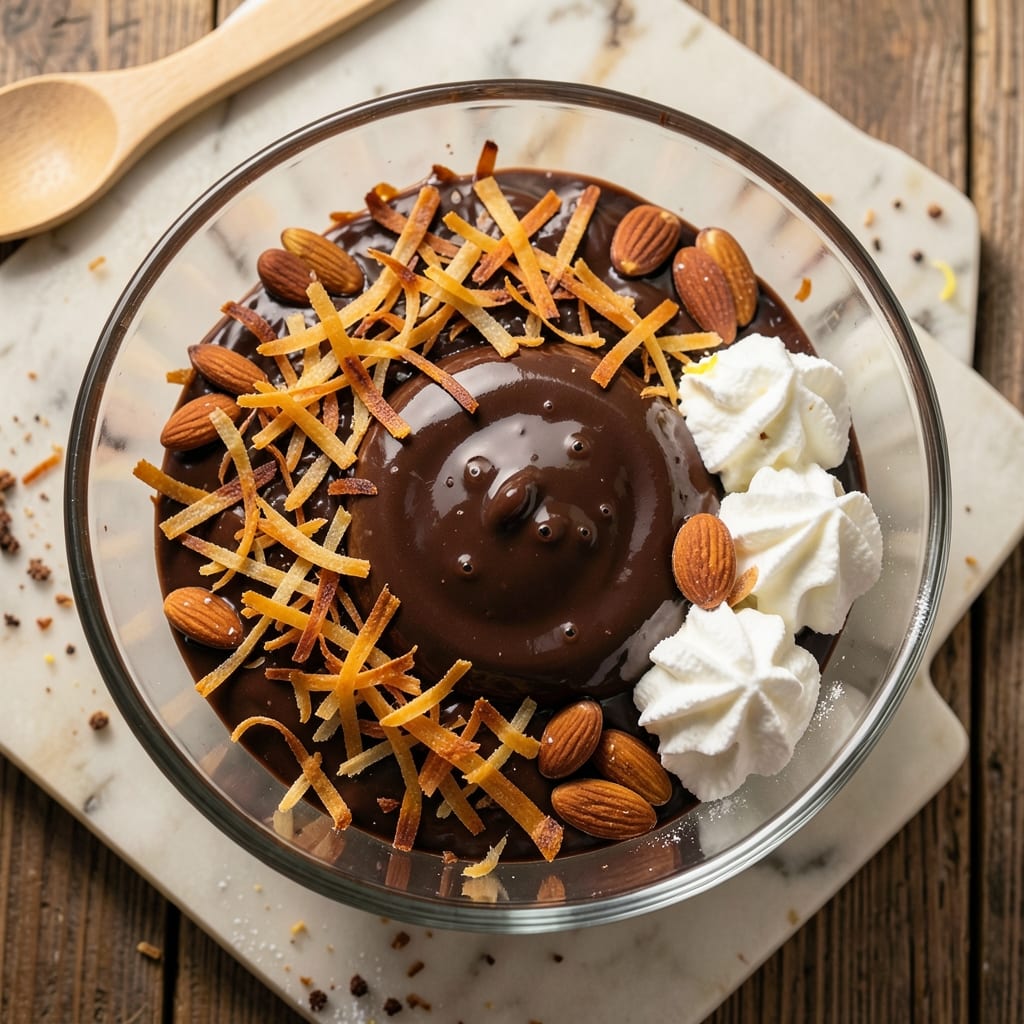
This Almond Joy cake filling recipe transforms your desserts into tropical paradise with its perfect balance of toasted coconut, rich chocolate, and crunchy almonds. The secret lies in tempering the chocolate just right—smooth yet firm enough to hold its shape when sliced, while the toasted coconut adds that signature caramelized crunch. I developed this after years of experimenting with cake fillings, and it’s now my go-to for layered cakes, cupcakes, or even swirled into cheesecakes.
The process is simpler than it sounds: melt the chocolate gently to preserve its texture, then fold in toasted coconut and chopped almonds for that signature Almond Joy crunch. The key is letting the filling set in the fridge for at least 2 hours before assembling—this ensures clean slices and that perfect creamy-yet-firm bite. No special equipment needed, just patience and a few simple steps to achieve restaurant-quality results at home.
What you’ll end up with is a filling so rich and textured it’ll make your desserts unforgettable—think velvety chocolate swirled with pockets of toasted coconut and almonds in every bite. The contrast of creamy, crunchy, and smooth layers creates a sensory experience that’s pure indulgence. This isn’t just a filling; it’s the star of your dessert.
Use it to fill and frost layered cakes, pipe into cupcakes, or even spread between layers of pound cake for a showstopping presentation. The filling keeps well in the fridge for up to 5 days, so you can prep ahead and enjoy the process without stress. Let’s create something extraordinary.
Ingredients for almond joy cake filling
Nine ingredients for a filling so rich and crunchy it’ll make your desserts unforgettable.
| Ingredient | Amount | Notes |
|---|---|---|
| Dark Chocolate Bars 🍫 | 8 oz | High-quality, 70% cocoa or higher |
| Unsweetened Shredded Coconut 🥥 | 1 ½ cups | Toasted until golden brown |
| Slivered Almonds 🌰 | 1 cup | Toasted lightly for crunch |
| Heavy Whipping Cream 🥛 | 1 cup | Full-fat for best texture |
| Powdered Sugar 🍚 | ¼ cup | Sifted for smoothness |
| Vanilla Extract 🌿 | 1 tsp | Pure vanilla for flavor |
| Salt 🧂 | ¼ tsp | Fine sea salt preferred |
| Butter 🧈 | 2 tbsp | Unsalted, softened slightly |
| Coconut Oil 🫒 | 1 tbsp | For extra richness |
| Corn Syrup 🍯 | 1 tbsp | Light corn syrup for smoothness |
The chocolate is everything—Ghirardelli or Lindt squares melt beautifully, but any high-quality 70% cocoa will work. Toasting the coconut is non-negotiable: spread it on a baking sheet and dry-toast at 350°F for 8-10 minutes until golden and fragrant. Trader Joe’s has the best pre-shredded coconut, but if you’re using flakes, pulse them in a food processor for texture. Almonds? Lightly toast them in the same batch as the coconut—just 3-4 minutes so they don’t burn. The cream needs to be cold when you whip it, so chill the bowl and beaters for 10 minutes before starting.
No dark chocolate? Semisweet chocolate chips work in a pinch, but the filling will be sweeter. Skip the toasted coconut? Toasted pecans or walnuts add a different crunch, but you’ll lose that Almond Joy magic. Heavy cream too expensive? Whipped coconut cream (chilled overnight) gives a similar texture, though it’s slightly sweeter. If you’re making this ahead, prep the toasted coconut and almonds first—they can sit at room temp for a few days without going stale. The corn syrup is optional but helps blend the flavors smoothly if your chocolate is extra bitter.
This filling sets beautifully in the fridge—2 hours minimum for clean slices. Store it in an airtight container between layers of parchment paper to prevent sticking. Keeps for 5 days in the fridge or 3 months frozen (though it’s best fresh). For a showstopper, pipe it into cupcakes or swirl it into cheesecake batter before baking. The texture changes slightly after freezing, so thaw it overnight in the fridge before using—never microwave, or it’ll turn grainy.
Why You'll Love This Recipe
- Here’s what sold me: dark chocolate bars and coconut are cheap staples, but they taste like a fancy dessert. A single box of chocolate and a bag of coconut stretch to fill three cakes, and the almonds add that gourmet touch without breaking the bank.
- No Chopping Needed: I swear by this trick—just melt the chocolate and coconut together, then fold in the almonds. No measuring cups, no messy bowls, and definitely no knife work. The slivered almonds stay perfectly intact, so you get that satisfying crunch without the fuss.
- Taste Like Childhood: Honestly, this filling hits every note of the candy bar but better—creamy, nutty, and just sweet enough. The whipped cream lightens it up so it’s not too heavy, and that toasted coconut aroma? Pure nostalgia in every bite.
- Fridge-Friendly Magic: Between us, this filling keeps for days in the fridge, and it only gets richer. I make a big batch on Sundays, then use it for cake layers, ice cream swirls, or even stuffing donuts. No sad leftovers here—just creative seconds.
Step-by-step instructions for Almond Joy cake filling
Let's create this dreamy, toasty filling that tastes like Almond Joy bars in every bite.
Toast the Coconut and Almonds for Maximum Flavor
Preheat your oven to 350°F and spread the 1.5 cups unsweetened shredded coconut and 1 cup slivered almonds evenly on two separate baking sheets lined with parchment paper. Toast the coconut for 8-10 minutes until it turns a beautiful golden brown color and smells heavenly.
Remove the coconut and immediately toast the almonds for 5-6 minutes until they're fragrant and just beginning to turn golden. Watch them carefully—they can go from perfect to burnt in seconds. Let both cool completely before using. This toasting step is crucial—it deepens the nutty, caramelized flavors that make this filling so special.
Melt the Chocolate and Prepare the Cream Base
In a heatproof bowl set over a pot of simmering water (make sure the bowl doesn't touch the water), melt the 8 oz dark chocolate bars with the 2 tbsp butter and 1 tbsp coconut oil together. Stir gently until completely smooth, then remove from heat and let cool slightly for 5 minutes—it should be warm but not hot to the touch.
In a separate bowl, whip the 1 cup heavy whipping cream until soft peaks form. In another small bowl, combine the 0.25 cup powdered sugar, 1 tsp vanilla extract, and 0.25 tsp salt. Gradually fold this mixture into the whipped cream until fully incorporated. The cream should be thick but still pourable—this is your base for the filling.
Combine Everything for the Perfect Texture
Add the melted chocolate mixture to the whipped cream and gently fold together until smooth. The combination should look like a rich, dark chocolate ganache. In a separate bowl, combine the toasted coconut, toasted almonds, and 1 tbsp corn syrup. Mix well to distribute the syrup evenly—this helps create those beautiful swirls later.
Now, gently fold about ⅓ of the coconut-almond mixture into the chocolate cream. Be careful not to overmix—you want to maintain some texture. The filling should have a marbled appearance with pockets of coconut and almond throughout. This is where the magic happens—each bite should deliver that perfect balance of creamy chocolate and crunchy toasted nuts.
Chill and Prepare for Layering
Transfer the filling to an airtight container and refrigerate for at least 4 hours or overnight. This chilling time is essential—it allows all the flavors to meld together and gives the filling that perfect consistency for layering between cake or filling cupcakes. The filling should be thick but still spreadable when you're ready to use it.
Before using, give the filling a quick stir to redistribute any settled ingredients. If it seems too thick, you can gently warm it for 10-15 seconds in the microwave to make it more spreadable. The filling should hold its shape when piped but still be creamy enough to create those beautiful swirls in your cake layers.
Pro Tips For Making Almond Joy Cake Filling
- MELT CHOCOLATE RIGHT: Chop your dark chocolate bars into ½-inch pieces first—this ensures even melting and no lumps in your filling. I learned this the hard way after scraping gummy chunks out of my whipped cream base. Use a double boiler or microwave in 20-second bursts, stirring between each, until smooth but not overheated. ---
- TOAST COCONUT FIRST: Lightly toast your shredded coconut in a dry pan over medium heat for 3-4 minutes until golden and fragrant. This adds depth to the flavor and prevents it from turning mushy when mixed with cream. Skip this, and your filling will taste flat—trust me, your taste buds will notice. ---
- WHIP CREAM COLD: Chill your heavy whipping cream and mixing bowl in the freezer for 10 minutes before whipping. Cold cream whips faster and holds its shape longer, so your filling stays fluffy instead of collapsing into a sad puddle. Yes, even if you’re impatient like me. ---
- FOLD GENTLY, NOT BRUTALLY: When combining the whipped cream with melted chocolate and coconut, use a spatula to fold in a figure-eight motion—this keeps air in the mixture. Dumping everything in and stirring aggressively will deflate your filling and make it dense. Think "marry, don’t murder" the ingredients.
Essential equipment for this dish
Chocolate Melting Essentials
You’ll need a heatproof mixing bowl—I recommend a stainless steel or glass bowl (like CorningWare) to prevent scorching. Place it over a pot of simmering water (double boiler method) to melt the 8 oz dark chocolate gently. A digital kitchen scale ensures precision—chocolate can burn if overheated, so keep the temperature between 110-115°F. A thermometer like Thermoworks Thermapen is worth the investment for perfect results every time. 🌡️
Cream Whipping Tools
A hand mixer or stand mixer (like KitchenAid) is ideal for whipping the 1 cup heavy whipping cream to soft peaks. Chill the bowl and beaters beforehand for 10 minutes—this prevents the cream from overheating and losing its structure. If you’re short on time, a French whisk works too, but it’ll take more elbow grease. For extra smoothness, sift the 0.25 cup powdered sugar through a fine-mesh sieve before folding it in.
Mixing and Folding Gear
Use a spatula (like OXO Good Grips) for gentle folding—it helps maintain air pockets in the whipped cream while combining with the chocolate. A small offset spatula works great for scraping down the sides of bowls. For the toasted coconut and almonds, a wooden spoon keeps flavors pure (no metal taste). If you’re piping the filling later, a pastry bag with a star tip (like Wilton 1M tip) creates beautiful swirls. 💫
Chilling and Storage Containers
An airtight container (like Rubbermaid Brilliance) is a must for chilling the filling—it prevents drying and keeps flavors intact. For layering, I use parchment-lined loaf pans to store filling between cake layers. If freezing, quart-sized freezer bags work best—leave 1 inch headspace for expansion. A small offset spatula helps scrape out every last bite when ready to use.
Optional Pro Upgrades
For a food processor, pulse the toasted coconut and almonds briefly to create finer texture—just 3-4 seconds—before folding into the filling. A candy thermometer ensures precise chocolate temperature control. If you love swirls, a piping bag with a leaf tip (like Wilton 1A tip) adds artistic flair. For presentation, a damp paper towel** helps remove filling cleanly from containers.
Nutrition facts
Frequently asked questions
Can I make this filling without toasted coconut?
The toasted coconut is what gives this filling its signature Almond Joy flavor and texture, but you can substitute it with toasted pecans or walnuts if needed. For a similar texture, try toasted coconut flakes (not shredded) or even crushed graham crackers for a cookie-like crunch. Just reduce the amount slightly to 1 cup and toast them for 5-6 minutes at 350°F.
How do I fix grainy chocolate in my filling?
Grainy chocolate usually means the cream was too warm or the chocolate wasn't melted smoothly. To fix it, gently warm the filling in 10-second bursts in the microwave, stirring between each burst until silky. For prevention, always melt chocolate using a double boiler and keep the cream cold until ready to whip. If the filling is already set, blend it briefly with a hand mixer to break up any lumps.
Can I use this filling for cupcakes instead of a cake?
This filling works perfectly for cupcakes—pipe it directly into the center of each cupcake before baking or add it as a swirl between layers. For best results, chill the cupcakes for 2 hours before serving to let the filling set. You can also use a Wilton 1M piping tip to create decorative swirls on top after baking. The filling will hold its shape beautifully in cupcakes too.
Why did my filling turn out too runny?
Runny filling usually happens when the cream wasn't whipped enough or the chocolate was melted too quickly. Make sure your cream reaches soft peaks (not stiff) and that the chocolate cools slightly before combining. For a firmer texture, chill the filling for an extra 1-2 hours. If it's still too thin, add 1 tbsp powdered sugar and chill again. The filling should be thick enough to hold its shape when piped but still spreadable.
How can I make this filling dairy-free?
For a dairy-free version, replace the heavy whipping cream with coconut cream (chilled overnight) and use dairy-free dark chocolate (like Enjoy Life brand). Substitute butter with coconut oil and ensure all other ingredients are dairy-free. The texture will be slightly lighter but still delicious. Toast the coconut and almonds as directed—they'll add the same rich crunch without any dairy.