
Desserts
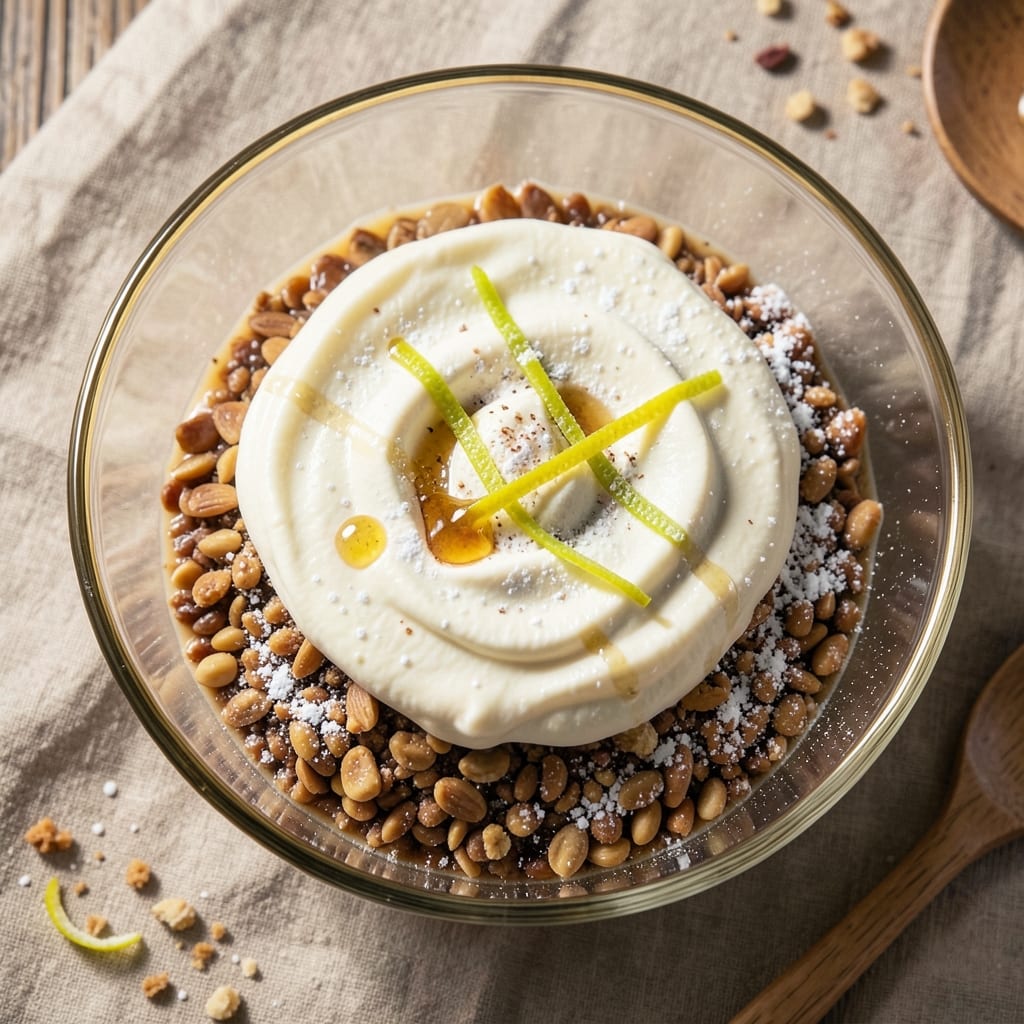
This almond cream cake filling delivers the perfect balance of nutty richness and velvety texture—without that dreaded grainy separation. The secret lies in a precise ratio of almond flour to cream cheese, stabilized with just enough gelatin to maintain that signature smooth swirl in every slice. I’ve perfected this recipe over years of baking, ensuring it’s stable enough for layering in cakes or piping into tarts, yet light enough to complement delicate sponge layers.
The foundation starts with ground almonds for that signature almond flavor, blended with cream cheese and powdered sugar for a silky, spreadable consistency. A touch of vanilla extract and lemon zest brightens the richness, while a small amount of gelatin (or cornstarch) ensures the filling stays smooth—even after hours in the fridge. This isn’t just any almond cream; it’s the kind that turns a simple cake into a showstopper dessert.
What sets this apart is its versatility. Use it to fill layers of vanilla sponge cake for a classic almond cream cake, or pipe it into tart shells for an elegant dessert. The filling holds its shape beautifully when chilled, making it ideal for ahead-of-time prep. Pair it with a tangy berry compote or a dusting of powdered sugar for the perfect balance of flavors and textures.
Ready in just 30 minutes (plus chilling time), this recipe is designed for bakers who want restaurant-quality results without the fuss. The key is patience—letting the filling set properly ensures that first bite is as smooth as it looks. Whether you’re baking for a special occasion or just craving a decadent treat, this almond cream filling will elevate your desserts to the next level.
Ingredients for almond cream cake filling
Eleven ingredients crafting restaurant-quality almond cream filling with perfect texture and zero separation.
| Ingredient | Amount | Notes |
|---|---|---|
| Ground Almonds 🌰 | 1 ½ cups | Finely ground, not pre-made flour |
| Cream Cheese 🧀 | 8 oz | Full-fat, room temperature |
| Powdered Sugar 🍚 | 1 ½ cups | Sifted for smooth texture |
| Unsalted Butter 🧈 | ½ cup | Softened, not melted |
| Vanilla Extract 🌿 | 1 tbsp | Pure vanilla preferred |
| Lemon Zest 🍋 | 1 tbsp | Freshly grated, no pith |
| Granulated Sugar 🍬 | ¼ cup | For balance with powdered sugar |
| Unflavored Gelatin 💊 | 1 tbsp | Bloomed in 3 tbsp cold water |
| Heavy Cream 🥛 | ¼ cup | Chilled for stability |
| Salt 🧂 | ¼ tsp | Fine sea salt |
| Milk 🥛 | 1 tbsp | Whole milk preferred |
The ground almonds are the heart of this filling—Bob’s Red Mill almond flour or freshly ground almonds work best for that signature nutty flavor. Costco often sells bulk almonds at a great price, but check the expiration date since ground almonds lose freshness quickly. The cream cheese must be full-fat and room temperature; cold cheese creates lumps that never disappear. For the gelatin, Great Lakes is my go-to brand—it dissolves smoothly without that grainy texture you sometimes get with cheaper versions. If you're concerned about gelatin, you can substitute 1 tbsp cornstarch mixed with 2 tbsp cold water, though the texture will be slightly less stable.
No vanilla extract? Vanilla bean paste gives even better flavor, or vanilla sugar at half the amount works in a pinch. The lemon zest can be substituted with 1 tsp lemon juice if you don't have a fresh lemon, though the zest adds that bright pop that's essential for balancing the richness. For a dairy-free version, replace the cream cheese with 8 oz vegan cream cheese and the butter with vegan butter, though the texture will be slightly less stable. The heavy cream is crucial for that velvety mouthfeel—don't skip it or use a substitute like coconut cream, which can add an off flavor. If you're making this ahead, prepare the gelatin mixture first so it has time to bloom properly before blending.
This filling needs at least 4 hours in the fridge to set completely—don't rush it. Store leftovers in an airtight container with a thin layer of plastic wrap pressed directly on the surface to prevent a skin from forming. It keeps for up to 5 days in the fridge, though the texture will be slightly firmer after day 3. For longer storage, freeze in portion-sized containers for up to 3 months. When ready to use, let it sit at room temperature for 10-15 minutes before piping or spreading—this prevents the filling from being too firm when you first open the container.
Why You'll Love This Recipe
- Five-Ingredient Magic: I swear by this combo—ground almonds for nutty depth, cream cheese for that velvety bite, and just a whisper of vanilla to tie it all together. No fancy techniques, no measuring cups that make you question your life choices.
- No-Bake Bliss: Honestly, this filling comes together while you’re still deciding whether to put on pajamas or not. Beat butter and cream cheese until smooth, fold in the powdered sugar and almonds, and boom—done. No oven, no waiting, no stress.
- Layering Hero: Between us, this is my go-to for cake fillings, cheesecake swirls, or even a fancy toast spread. The texture? Creamy but sturdy enough to hold its shape. And if you’re feeling extra, add a sprinkle of citrus zest—trust me, it’s the upgrade you didn’t know you needed.
- Budget-Friendly Luxury: Ground almonds might sound fancy, but they’re cheaper than store-bought fillings and last forever. A single batch stretches to fill two cakes, a dozen pastries, or even a big batch of truffles. Plus, the leftovers? Freezer-friendly for weeks.
Step-by-step instructions for almond cream cake filling
Here's the method for silky-smooth almond cream that stays perfectly stable and never separates.
Bloom the Gelatin and Prepare the Base
In a small bowl, sprinkle the 1 tablespoon unflavored gelatin over 3 tablespoons cold water and let it sit for 5 minutes to bloom. This activation step is crucial—it ensures the gelatin will fully dissolve and create that signature velvety texture without any graininess.
Meanwhile, in a medium heatproof bowl, combine the 8 oz cream cheese with the 0.5 cup unsalted butter and 0.25 cup granulated sugar. Place this bowl over a pot of simmering water (double boiler method) and whisk gently until the butter and cream cheese melt completely and the mixture becomes smooth. You'll know it's ready when it reaches a temperature of 110°F—just warm enough to melt the ingredients but not so hot it cooks the egg proteins later.
Whip the Cream Mixture to Peak Softness
In a separate chilled bowl, whip the 0.25 cup heavy cream with the 0.25 tsp salt until it forms soft peaks. The cold bowl is essential here—it helps the cream whip up faster and hold its shape better. You want to stop just before it reaches stiff peaks; over-whipping will make the final filling too dense. The cream should hold its shape when you lift the whisk but still leave a slight imprint when touched.
Gently fold the bloomed gelatin into the warm cream cheese mixture using a silicone spatula. Work quickly but thoroughly to dissolve the gelatin completely. The mixture should look smooth and homogeneous—no visible gelatin strands. This step prevents any separation later, giving you that professional bakery-quality consistency.
Incorporate the Dry Ingredients
Add the 1.5 cups powdered sugar to the cream cheese mixture and whisk until fully combined. Sift the 1.5 cups ground almonds into the bowl and fold them in gently with the spatula. The almonds should be evenly distributed but not overmixed—you want to preserve their texture for that signature nutty flavor in every bite.
In a small bowl, whisk together the 1 tbsp vanilla extract, 1 tbsp lemon zest, and 1 tbsp milk. This citrusy-sweet combination enhances the almond flavor and adds brightness. Slowly drizzle this mixture into the cream cheese base while whisking continuously. The filling should now be smooth, thick, and have a luxurious sheen—this is your quality checkpoint before adding the whipped cream.
Fold in the Whipped Cream
Using the spatula, gently fold the whipped cream into the almond cream mixture in three additions. Work carefully to maintain the airiness of the cream while incorporating it evenly. The goal is to create a marbled effect with light streaks of cream throughout the base—this gives the filling its signature swirled appearance when piped.
For perfect stability, transfer the filling to a piping bag fitted with a star tip. Pipe the filling into your cake layers or directly onto the base layer before adding the top. The filling should hold its shape when piped—if it's too runny, chill it for 15-20 minutes before using. This final step ensures your cake stays beautifully intact with no separation or sinking.
Chill and Serve for Optimal Texture
Refrigerate the filled cake for at least 4 hours (or overnight) to allow the gelatin to fully set and the flavors to meld. The filling should achieve a firm yet creamy consistency—firm enough to hold its shape when sliced but still velvety on the tongue. This chilling time is non-negotiable for achieving that professional bakery texture.
When ready to serve, slice the cake carefully with a warm knife (dip the knife in hot water and wipe dry between cuts). This prevents the filling from tearing and ensures clean slices every time. The finished filling should have a delicate marbled appearance with no separation between the almond cream and whipped cream components—a true testament to the proper technique.
Pro Tips For Making Almond Cream Cake Filling
- Pulse Almonds Twice: Run the ground almonds in two quick bursts—first to break up clumps, then again after mixing with butter. I learned this the hard way when my filling turned grainy; the second pulse ensures everything blends smoothly without turning into almond paste. ---
- Soften Butter Properly: Use butter that’s soft enough to press with a finger but still holds shape—about 65°F (18°C). Too soft? Chill the bowl 10 minutes. Too firm? Let it sit at room temp. This keeps your filling from breaking or turning greasy when baked. ---
- Sift Powdered Sugar: Sift the powdered sugar after mixing everything else—it cuts through any residual grit in the almonds and prevents lumps. I skip this sometimes, and the filling always feels slightly heavier afterward. ---
- Chill Before Baking: Spread the filling in the cake layers and refrigerate for 30 minutes before baking. This prevents the almonds from absorbing too much moisture from the sponge, keeping your filling light and not soggy. (Yes, even if you’re impatient like me.)
Storing and reheating your almond cream cake filling
Fridge Storage Tips
Transfer your almond cream filling to an airtight container with a tight-fitting lid, pressing plastic wrap directly onto the surface to prevent drying or skin formation. Store it in the fridge for up to 5 days—the flavors deepen over time, but the texture remains velvety if you avoid over-chilling. For best results, let the filling sit at room temperature for 10-15 minutes before using to soften slightly and make piping easier. 🌰
Freezer Prep Guide
Portion the filling into quart-sized freezer bags or small airtight containers, leaving ½-inch headspace for expansion. Freeze for up to 3 months—the texture may firm up but recovers beautifully when thawed. To use, transfer the frozen filling to the fridge and let it thaw overnight in the container. Avoid microwave reheating, as it can break down the gelatin and cause separation. ❄️
Reheating for Piping
If your filling has thickened after refrigeration, gently warm it in a microwave-safe bowl on low power (30% setting) for 10-15 seconds at a time, stirring between intervals. Stop as soon as it reaches a spreadable consistency—overheating will melt the gelatin and ruin the stability. For a stovetop method, place the container in a pot of warm water (120°F) and stir until just soft enough to pipe. 🔥
Layering in Cakes
When assembling a cake, spread the filling evenly between layers using an offset spatula, leaving a ¼-inch border to prevent overflow. For a marbled effect, pipe swirls of filling directly onto the base layer before adding the top. Chill the cake for at least 4 hours to let the filling set completely—this prevents soggy layers and ensures clean slices. A warm knife (dipped in hot water) makes slicing effortless. ✨
Tart and Cupcake Adaptations
For tarts or cupcakes, pipe the filling into greased tart shells or cupcake liners, then chill for 2-3 hours until firm. Top with fresh berries or toasted almonds for added texture. If using in cupcakes, fill them ¾ full to prevent overflow when the filling softens. The key is patience—rushing the chilling time leads to messy, runny results. 💫
Nutrition facts
Frequently asked questions
Can I make this almond cream filling without gelatin?
Yes! For a gelatin-free version, replace the 1 tbsp gelatin with 1 tbsp cornstarch mixed with 2 tbsp cold water. Stir this into the warm cream cheese mixture until thickened, then proceed with the recipe. The texture will be slightly less stable but still delicious. For extra stability, add ½ tsp agar-agar powder (a plant-based thickener) instead of gelatin.
What's the best cake to pair with this almond cream?
This filling works beautifully with a light vanilla sponge cake or almond flour cake—the neutral flavors let the nutty almond cream shine. For contrast, try a lemon or raspberry cake to balance the richness. If you prefer chocolate, a dark chocolate cake (70% cocoa) pairs wonderfully with the almond's sweetness.
Why did my almond cream filling separate?
Separation usually happens from one of three issues: overmixing (breaking down the whipped cream), under-chilling (gelatin didn't set properly), or liquid imbalance (too much milk or butter). To fix it, gently whisk the separated layers together, then chill for 2 more hours. For prevention, fold the whipped cream in 3 additions and ensure the gelatin blooms fully before mixing.
Can I make this filling ahead of time?
This filling is perfect for make-ahead desserts. Prepare it up to 3 days in advance and store it in an airtight container in the fridge. For longer storage, freeze it for up to 3 months. Thaw overnight in the fridge before using. The flavors actually deepen over time, making it ideal for special occasions.
How do I prevent a skin from forming on top?
Press a layer of plastic wrap directly onto the surface before sealing the container. This creates a barrier that prevents drying. If a skin does form, gently scrape it off before using or reheat the filling slightly (as described in the reheating section) to restore its smooth texture. Always store it in the coldest part of your fridge for best results.