
Desserts
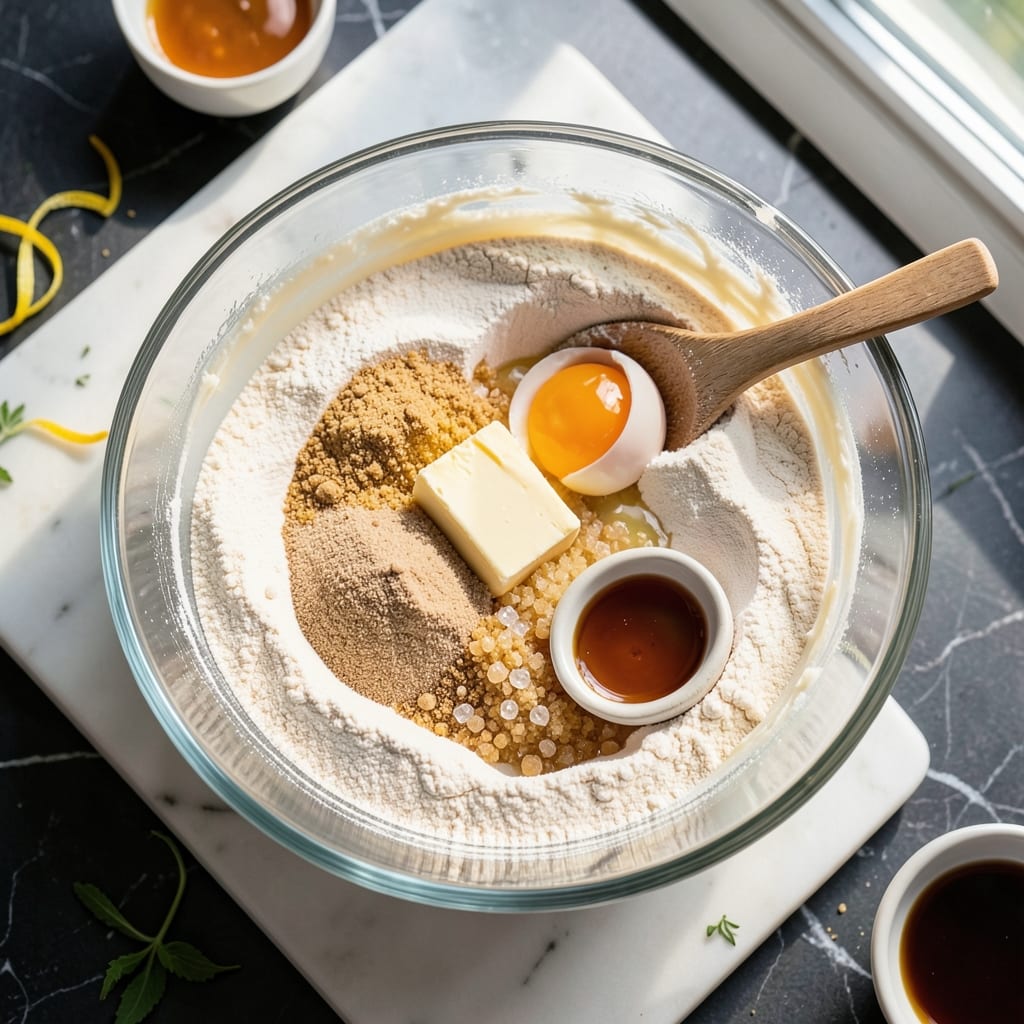
This all-purpose cake recipe delivers the perfect foundation for birthdays, showers, or any celebration—light, tender, and foolproof every time. The secret lies in precise measurements and a gentle folding technique that creates a crumb so fine it disappears with each bite. I've baked this version hundreds of times, and it never fails to impress, whether you're frosting it with buttercream or serving it plain with fresh berries.
What makes this recipe truly versatile is its adaptability—swap vanilla extract for almond or chocolate, or fold in spices like cinnamon or cardamom for flavor variations without altering the texture. The cake bakes at a steady 350°F for about 25-30 minutes, ensuring a golden top and even rise. Standard 9-inch pans work perfectly, and the recipe scales easily for larger gatherings.
By the time you pull it from the oven, you'll have a cake with a delicate crumb, subtle vanilla aroma, and just the right balance of moisture and structure. The frosting adheres beautifully, making it ideal for both classic buttercream and lighter whipped cream finishes. This is the kind of cake that tastes homemade yet delivers restaurant-quality results.
Whether you're a beginner or an experienced baker, this recipe builds confidence with its simple steps and predictable outcome. The tools you'll need—a standard mixing bowl, whisk, cake pans, and a spatula—are likely already in your kitchen. Let's get started on a cake that's as reliable as it is delicious.
Ingredients for all purpose cake
Nine simple ingredients for a cake that works for birthdays, showers, or any celebration.
| Ingredient | Amount | Notes |
|---|---|---|
| All-Purpose Flour 🌾 | 2 ½ cups | Sifted for even texture |
| Granulated Sugar 🍚 | 1 ½ cups | White or light brown |
| Unsalted Butter 🧈 | 1 cup | Room temperature, full-fat |
| Large Eggs 🥚 | 2 whole | Room temperature preferred |
| Pure Vanilla Extract 🌿 | 2 tsp | Imitation-free for flavor |
| Baking Powder 🧂 | 2 tsp | Diamond Crystal preferred |
| Salt 🧂 | ½ tsp | Fine sea salt preferred |
| Milk 🥛 | 1 cup | Whole milk for richness |
| Vegetable Oil 🫒 | ¼ cup | Light neutral oil |
The flour and butter are the backbone here. King Arthur or Gold Medal flour gives the best rise—avoid self-rising unless you're adjusting the baking powder. Butter should be soft but not melted (press a finger in; it should leave a slight indent). I always grab Land O'Lakes unsalted butter from the grocery store—it's reliable and affordable. The eggs? Room temperature makes all the difference for a tender crumb. If they're straight from the fridge, let them sit in warm water for 10 minutes.
No vanilla extract? Almond extract at half the amount works in a pinch, but it's stronger so be careful. Running short on milk? Evaporated milk or even water keeps the cake moist—just add a splash of vanilla if using water. The baking powder is non-negotiable here; Diamond Crystal bakes up lighter than other brands. Want to add chocolate? Swap half the milk for melted dark chocolate. For a citrus twist, add 1 tbsp of lemon or orange zest with the vanilla.
This batter keeps in the fridge for 2 days if you want to prep ahead. Once baked, cool completely before frosting—30 minutes at room temperature prevents a soggy top. Wrapped tightly in plastic, it stays fresh for 3 days at room temperature or 1 week in the fridge. Freeze slices for 3 months—just thaw at room temperature before serving. The cake reheats beautifully in a 350°F oven for 5 minutes if you prefer it warm.
Why You'll Love This Recipe
- Pantry Staples Only: I swear by this recipe because it uses what’s already in your cupboards—no specialty ingredients, no last-minute grocery runs. Butter, sugar, flour, eggs, and vanilla? That’s it. If you can open a cabinet, you can bake this.
- Moist Without Gimmicks: No weird substitutions or extra steps—just the right balance of butter and sugar creates that perfect crumb, tender but not dense. That first bite? It’s the kind of cake that makes you pause mid-slice.
- Birthday to Brunch: Serve it as a classic sheet cake for celebrations, or cut into squares for a quick breakfast with whipped cream. Honestly, I’ve used it for everything from potlucks to my kid’s "I woke up hungry" emergencies. It’s the chameleon of desserts.
- Leftovers That Last: This cake holds up for days—no drying out, no sad crumbs. I’ll be real: I’ve had it for lunch the next day, and no one ever questions me. Plus, it’s cheap to make, so you can bake a big batch without guilt.
Step-by-step instructions for all purpose cake recipe
Here's how to bake a foolproof vanilla base that works for any occasion.
Prep Ingredients for Perfect Texture
Start by sifting the 2.5 cups all-purpose flour and 2 tsp baking powder together in a medium bowl. This ensures an even distribution and prevents dense spots in your cake. In a separate large bowl, cream the 1 cup unsalted butter and 1.5 cups granulated sugar together on medium speed until light and fluffy—about 3-4 minutes. The mixture should nearly double in volume and look pale.
This creaming process incorporates air, which is key for a tender crumb. If your butter isn't room temperature, place the bowl in warm water for 5-10 minutes until it's soft enough to press with your finger but not greasy. The butter should leave a slight indentation when pressed.
Mix Wet Ingredients for Smooth Batter
Add the 2 whole large eggs, one at a time, mixing well after each addition. Then stir in the 2 tsp pure vanilla extract and 0.5 tsp salt. The batter should be thick but pourable. Next, whisk together the 1 cup milk and 0.25 cup vegetable oil in a small bowl, then gradually pour this mixture into the wet ingredients while mixing on low speed.
This step prevents lumps and ensures even moisture distribution. The oil helps keep the cake tender, while the milk adds richness. Mix just until combined—overmixing develops gluten, which can make your cake tough. You should still see slight streaks of flour when you lift the batter.
Combine Dry and Wet Ingredients Gently
With the mixer on low speed, gradually add the sifted dry ingredients to the wet mixture. Mix just until the flour is incorporated—about 20-30 seconds. The batter should be smooth and slightly thick, like pancake batter. Avoid overmixing, as this can lead to a dense cake.
For an extra-fluffy texture, fold in 1 cup of cold whipped cream (optional) at this stage. This adds air and moisture, giving your cake a lighter crumb. If you're not using whipped cream, simply pour the batter into two greased and floured 8-inch round cake pans or one 9x13-inch pan, filling each about halfway to allow for rising.
Bake to Golden Perfection
Preheat your oven to 350°F and place the cake pans inside to warm for 5-10 minutes. This helps ensure even baking. Bake for 25-30 minutes or until a toothpick inserted into the center comes out clean. The edges should be golden brown, and the top should spring back when gently pressed.
If the top browns too quickly, tent the pans with foil to prevent over-browning while the center finishes cooking. Let the cakes cool in the pans for 10 minutes, then transfer them to a wire rack to cool completely before frosting or slicing. This resting period prevents crumbling and allows the moisture to redistribute for a perfect texture.
Frost and Serve Your Versatile Cake
Once fully cooled, your vanilla base is ready for any frosting or filling. Use it for birthdays, showers, or even as a blank canvas for creative desserts. For a classic touch, spread buttercream frosting between layers and on top, then decorate with sprinkles or fresh berries.
This recipe yields 8 servings, but you can easily scale it up or down. Store leftovers in an airtight container at room temperature for 2-3 days or refrigerate for up to 5 days. For extra flavor, add a pinch of cinnamon or zest of 1 lemon to the batter before baking—this works beautifully with the vanilla base!
Pro Tips For Making All Purpose Cake
- Weigh Your Butter: I learned this the hard way—measuring butter by scooping it straight from the fridge gives wildly inconsistent results. Use a kitchen scale for 225g (1 cup packed) and press it into the bowl to avoid air pockets that make your cake dense.
- Mix Just Until Combined: Overmixing turns cake batter into glue. Once the flour disappears, stop—your mixer should only run 20-30 seconds past that point. The goal is to blend, not develop gluten like you’re making bread.
- Room-Temp Eggs Matter: Cold eggs won’t incorporate properly, leaving streaks in your batter. Pop them in warm water for 5 minutes or let them sit in the bowl for 10 minutes before beating. Your cake’s texture will thank you.
- Bake Until Springy: The toothpick test is overrated—press the center of the cake with a finger instead. It should spring back slowly, not bounce like rubber. Overbaking dries it out; underbaking leaves it gummy. Trust your touch, not the tool.
Essential equipment for perfect results
Mixing Essentials
You'll need a stand mixer or hand mixer for creaming butter and sugar—my go-to is the KitchenAid Artisan Series for its reliability. A medium mixing bowl (like the Pyrex 2-quart) holds the wet ingredients perfectly, while a whisk (I use OXO Good Grips) keeps the milk and oil smooth. For sifting dry ingredients, a fine-mesh sifter like Norpro ensures no lumps. 🌟
Baking Pans
Standard 8-inch round pans (I prefer Wilton Non-Stick) work best for two layers, but a 9x13-inch pan is ideal for sheet cakes. Grease pans thoroughly with butter or baking spray—I like Baker's Joy for even distribution. For extra insurance, dust with flour or cocoa powder if making chocolate cakes. Never skip this step—it prevents sticking!
Measuring Tools
Accurate measurements are key—use a digital kitchen scale (like OXO Good Grips) for flour and sugar to avoid packing issues. A liquid measuring cup with spout (I use Pyrex) ensures precise milk and oil amounts. For vanilla and extracts, a small squeeze bottle (like McElroy) prevents over-pouring. A toothpick or cake tester confirms doneness—no more guessing!
Cooling & Finishing
A wire cooling rack (I love Amazon Basics) prevents soggy bottoms, and a spatula (like OXO Good Grips) helps transfer cakes. For frosting, a bench scraper (I use West Bend) creates clean edges. A piping bag with Wilton tips adds professional touches. Store leftovers in airtight containers—I recommend Rubbermaid Brilliance for freshness.
Optional Upgrades
For fluffy cakes, a hand mixer attachment (like Kitchenaid's dough hook) folds in whipped cream perfectly. A thermometer (I use Thermoworks) ensures accurate oven temps—critical for even baking. For decorating, edible gold leaf or sprinkles elevate presentation. These extras turn good cakes into showstoppers! ✨
Nutrition facts
Frequently asked questions
Can I make this cake without a stand mixer?
Use a hand mixer or even a sturdy whisk for creaming butter and sugar—just mix vigorously for 5-7 minutes until light and fluffy. For folding whipped cream, a rubber spatula works perfectly. The key is patience: mix just until combined to avoid overdeveloping gluten.
Why did my cake crack on top?
Cracking usually happens when the cake bakes too quickly. Try these fixes: reduce oven temp to 325°F, tent with foil if browning too fast, or let the batter rest 10 minutes before baking. Also ensure your oven is fully preheated and pans are warmed. A cracked top won't affect taste—just frosting application!
How can I make this chocolate instead of vanilla?
Swap the milk for 1 cup melted dark chocolate (60-70% cocoa) and reduce vanilla to 1 tsp. Add 1 tbsp cocoa powder to the dry ingredients. For richer flavor, replace 2 tbsp butter with more melted chocolate. The texture stays identical—just deeper in flavor!
Can I bake this in a glass pan?
Yes, but reduce baking time by 5-7 minutes—glass conducts heat faster. Grease it extra well since glass sticks more. For a 9x13-inch pan, bake 20-25 minutes. Let it cool slightly longer before removing to prevent shattering. The edges may brown faster, so check at 15 minutes.
What's the best way to store leftovers?
For short-term storage, wrap tightly in plastic wrap at room temperature (2-3 days). For longer storage, refrigerate in an airtight container (5 days). To freeze, slice first, wrap individually, and store for 3 months. Thaw overnight in the fridge—never at room temperature. Reheat slices in a 350°F oven for 5 minutes for freshness.