
Desserts
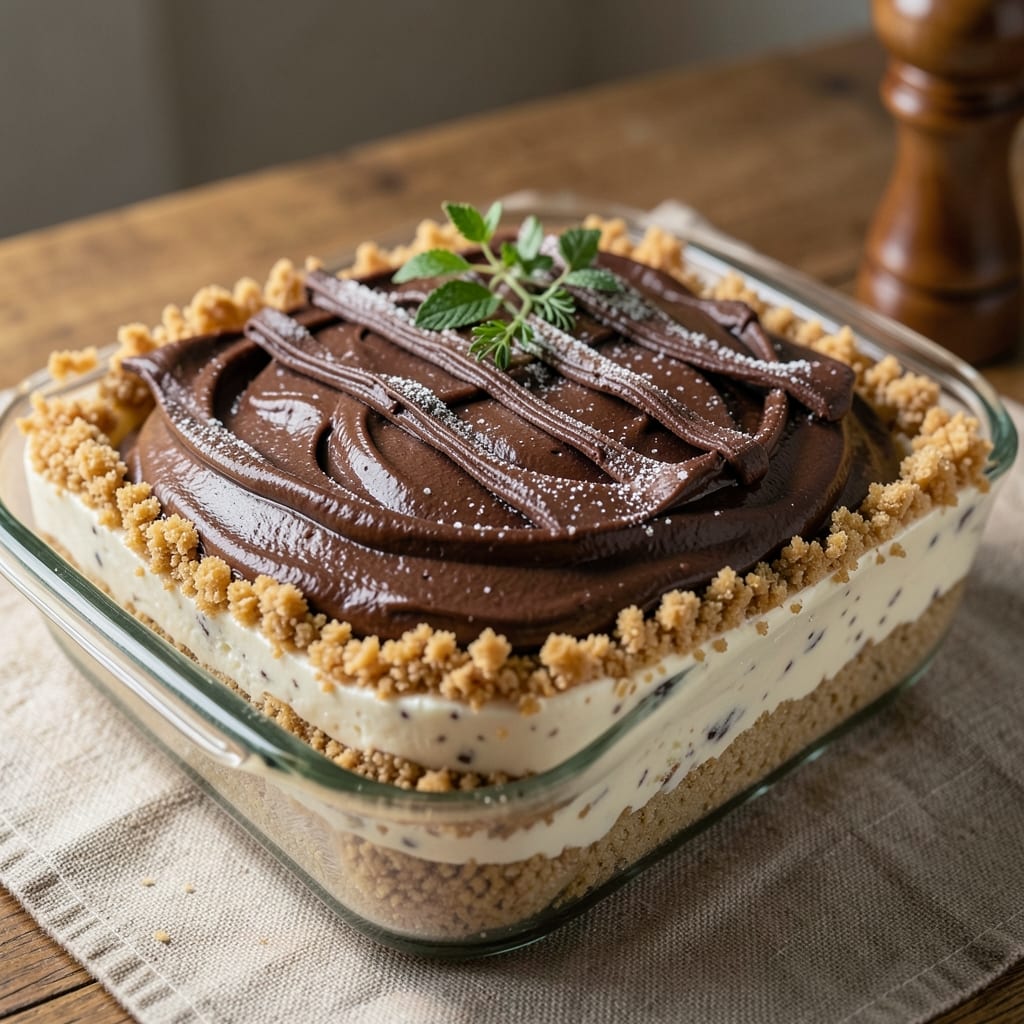
This all-ice cream cake recipe transforms dessert night into a no-bake breeze—layers of rich ice cream stacked like a dream, staying perfectly cold for days without a single oven turned on. The secret lies in sturdy graham cracker crusts and strategic freezing, ensuring each bite delivers that velvety, creamy texture you crave. I perfected this version after years of testing, and it never disappoints—whether you're feeding a crowd or treating yourself to a decadent solo dessert.
The beauty of this recipe is its simplicity: no melting, no baking, just assembly and chilling. You'll work with store-bought or homemade ice cream, layered between buttery graham crackers and a light whipped cream filling. The key to success is letting each layer set properly in the freezer, preventing any unwanted softening. This method guarantees a cake that stays firm, cold, and delicious for up to three days, making it ideal for parties or last-minute celebrations.
What you'll end up with is a showstopping dessert that looks as impressive as it tastes—smooth, creamy layers of ice cream separated by crispy graham crackers, all held together by a luscious whipped cream base. The texture is what makes this cake special: the contrast between the cool, creamy ice cream and the slightly sweet, crunchy crust creates a bite that's pure indulgence. Plus, the no-bake approach means no risk of overbaking or uneven layers.
For added flair, top with fresh berries, chocolate shavings, or a drizzle of caramel before serving. This recipe scales effortlessly, so you can adjust the size to fit any occasion. Let's build this cake—your taste buds will thank you.
Ingredients for all ice cream cake
Eight simple ingredients transform into a showstopping ice cream cake that stays cold for days.
| Ingredient | Amount | Notes |
|---|---|---|
| Vanilla Ice Cream 🍦 | 4 cups | Store-bought or homemade, fully frozen |
| Chocolate Ice Cream 🍫 | 4 cups | Store-bought or homemade, fully frozen |
| Graham Crackers 🍪 | 2 cups | Crushed into fine crumbs (about 24 whole crackers) |
| Unsalted Butter 🧈 | ½ cup | Melted, full-fat for best flavor |
| Heavy Whipping Cream 🥛 | 1 cup | Cold, full-fat for stability |
| Granulated Sugar 🍚 | ¼ cup | For whipped cream sweetness |
| Vanilla Extract 🌿 | 1 tsp | Pure, for whipped cream flavor |
| Freezer-Safe Wax Paper 📄 | 1 sheet | For layer separation |
| Fresh Berries 🍓 | 1 cup | Sliced strawberries or raspberries (optional) |
| Dark Chocolate Chips 🍫 | ½ cup | Melted for drizzle (optional) |
| Caramel Sauce 🍯 | ½ cup | Store-bought or homemade (optional) |
The ice cream is the star, so grab two tubs—vanilla and chocolate work perfectly, but any flavors you love will do. Breyers or Ben & Jerry's are solid store-bought options, but homemade ice cream keeps longer in the freezer. Look for tubs that are fully frozen but not rock-hard—this makes layering easier. The graham crackers should be the sturdy kind, like Honey Maid or Nabisco. Crush them finely in a food processor or by hand with a rolling pin—no big chunks, or your layers won't hold together. The butter matters here too: Land O'Lakes or Plugrá melt smoothly, but stay away from margarine—it won't hold up in the freezer.
No vanilla extract? A splash of vanilla bean paste works too, or skip it entirely if you're using strongly flavored ice cream. Running short on whipped cream? Coconut whipped cream is a great dairy-free swap, but it won't hold as stiff. The wax paper is non-negotiable—it keeps layers from sticking, and you can usually find it in the baking aisle at Walmart or Target. For the topping, fresh berries add brightness, while chocolate chips or caramel give that extra decadent touch. Pro tip: if you're using store-bought toppings, grab them the day you assemble the cake so they're at their freshest.
This cake is all about patience—let each layer freeze for at least 4 hours before adding the next. If you're prepping ahead, wrap the whole thing in plastic and freeze for up to 3 days. To serve, let it sit at room temperature for 10-15 minutes so it's easier to slice. The whipped cream layer will soften slightly, but that's normal—it's still delicious. Store leftovers in the freezer, and let them thaw for 30 minutes before serving again. Trust me, the first slice is always the best, but it's hard to stop at just one.
Why You'll Love This Recipe
- No-Bake Magic: I swear, this cake takes less effort than deciding what to watch on Netflix. Just crush graham crackers, mix in melted butter, and press—no oven, no waiting, no stress. The layers of ice cream stay cool while the crust sets, and honestly? It’s the kind of dessert that makes you feel like a baking genius.
- Two Scoops for the Win: That first forkful of vanilla ice cream peeking through the chocolate layer? Chef’s kiss. The contrast is pure bliss—creamy, rich, and just sweet enough without being cloying. Between us, I’ve never met an ice cream cake that didn’t disappear faster than my willpower.
- Party Ready in Minutes: Birthday? Game night? A last-minute “I forgot to plan” moment? This cake handles it all. Serve it chilled for a fancy vibe or at room temp for a no-fuss crowd-pleaser. (Yes, even on a Tuesday night.) The best part? No one will guess it’s basically just ice cream in disguise.
- Zero Guilt Leftovers: Let’s be real—you’re making two layers, and no one eats the whole thing in one sitting. The good news? It keeps perfectly in the freezer for weeks, so you’re always ready for dessert emergencies. Budget-friendly? Absolutely. Time-saving? Even more so. My secret weapon for lazy days and hungry guests.
Step-by-step instructions for all-ice cream cake
Here's how to build this dreamy, no-bake dessert that stays perfectly cold for days.
Prepare the Graham Cracker Crust
Crush the 2 cups of graham crackers into fine crumbs using a food processor or rolling pin. I like to pulse in batches until you get a texture similar to sand—this ensures an even base that won't crumble when you cut the cake. Press the crumbs evenly into a 9x13-inch baking dish, using the bottom of a measuring cup to create a flat, compact layer. This step is crucial for holding the ice cream layers together without getting soggy.
Melt the 0.5 cup unsalted butter in a microwave-safe bowl in 30-second intervals, stirring between each interval until completely smooth. Pour this over the graham cracker base and spread it evenly with a spatula. Press down gently to help the butter soak into the crumbs. Let this crust set in the freezer for 10 minutes while you prepare the ice cream layers—this gives the base time to firm up slightly before adding the first layer of ice cream.
Create the Ice Cream Layers
Divide the 4 cups of vanilla ice cream into two equal portions (about 2 cups each). Spread one portion evenly over the graham cracker crust, pressing down gently with a rubber spatula to create a smooth, even layer. The key here is to work quickly—ice cream softens as you handle it, but you want it to stay firm enough to hold its shape. Place the dish in the freezer for 5 minutes to help this layer set.
Repeat with the 4 cups of chocolate ice cream, dividing it into two equal portions. Spread one portion over the frozen vanilla layer, again pressing down gently. This alternating pattern creates the signature marbled effect. Return the dish to the freezer for another 5 minutes before adding the second chocolate layer. The layers should be completely solid before proceeding—this prevents melting and keeps the cake structure intact.
Add the Whipped Cream Layer
In a chilled bowl, whip the 1 cup heavy whipping cream with the 0.25 cup granulated sugar and 1 tsp vanilla extract until soft peaks form. I use a hand mixer for this step—it's easier to control the texture than with a stand mixer. Spread this whipped cream evenly over the top chocolate layer, creating a smooth, even surface. The whipped cream acts as a stabilizer between the ice cream layers and adds a light, airy texture to the final cake.
Cover the dish tightly with the freezer-safe wax paper and place it back in the freezer for at least 4 hours, or until completely frozen solid. This step is where the magic happens—the longer it freezes, the more stable the cake will be when you slice it. I like to let mine freeze overnight for maximum firmness, especially if I'm serving it at room temperature later.
Decorate and Serve
Once the cake is fully frozen, remove it from the freezer and let it sit at room temperature for 5-10 minutes to make slicing easier. Use a sharp, long knife (like a serrated bread knife) to cut the cake into 8 equal squares. Dip the knife in hot water and wipe it dry between each cut—this prevents the ice cream from sticking and ensures clean slices.
For decoration, melt the 0.5 cup dark chocolate chips in a microwave-safe bowl in 20-second intervals, stirring between each interval until smooth. Drizzle this over the top of the cake, then add the 0.5 cup caramel sauce in zigzag patterns. Scatter the 1 cup fresh berries on top for a pop of color and freshness. Serve immediately, or return the cake to the freezer for up to 24 hours if you're not serving it right away—the flavors actually meld better over time.
Pro Tips For Making All Ice Cream Cake
- Freeze the Crust First: Press your graham cracker crust into the pan and pop it in the freezer for 10 minutes before adding the ice cream layers. I learned this the hard way—skipping it means a soggy bottom that ruins the whole thing, especially in warm kitchens. ---
- Soften Butter Properly: Use room-temperature unsalted butter for the whipped cream topping—no microwave, just let it sit out for 30-45 minutes until it’s soft enough to press into the ice cream. Over-softened butter? It’ll melt into a greasy mess. Under-softened? You’ll be fighting clumps. ---
- Layer Ice Cream Fast: Work in a cool (not cold) kitchen and spread the ice cream layers thin—about ½ inch thick—then freeze for 10 minutes before adding the next. Thick layers crack, and no one wants a cake that looks like a failed science experiment. ---
- Whip Cream Early: Whip the heavy cream to soft peaks before assembling the cake, then fold it into the top layer right before serving. It’ll stay fluffy longer—no one likes a soggy topping after 10 minutes, and this guarantees it stays light. (Yes, even if you’re impatient like me.)
Wine and beer pairings for this all ice cream cake
Sweet Wine Pairings
For this rich, creamy ice cream cake, opt for dessert wines with similar sweetness and texture. A Moscato d'Asti from Italy is my go-to—its light body and floral notes complement the vanilla and chocolate layers without overpowering them. Serve it slightly chilled (45-50°F) to enhance its refreshing qualities. 🍷
Creamy Dessert Wines
If you prefer something more decadent, try a Sauternes or Late Harvest Riesling. These wines have natural sweetness balanced by acidity, which cuts through the richness of the ice cream. I love pairing a Château d'Yquem with the chocolate layers—its honeyed notes elevate the dessert to new heights.
Light Beer Options
For beer lovers, a Belgian witbier like Hoegaarden adds a crisp, citrusy contrast to the sweetness. The effervescence cleanses your palate between bites. Another great option is a wheat beer with a hint of vanilla, like Blue Moon, which mirrors the cake’s flavors without competing.
Coffee Liqueur Twist
For a boozy touch, drizzle the cake with a mix of Kahlúa and heavy cream before serving. The coffee notes pair beautifully with chocolate ice cream, adding depth to each bite. Serve with a small glass of espresso on the side for the perfect finish. ☕
Non-Alcoholic Pairings
Skip the alcohol? No problem! A sparkling apple cider like Martinelli's adds bubbly freshness, while a vanilla chai latte enhances the dessert’s creamy, spiced notes. Both options keep the experience indulgent without the booze. 🍎
Seasonal Adjustments
In summer, pair with a peach schnapps cocktail or a sparkling peach iced tea. In winter, a spiced rum (like Captain Morgan) with a dash of cinnamon adds warmth. Adjust based on what’s in season and what you love most! 🌶️
Nutrition facts
Frequently asked questions
Can I make this ice cream cake without a freezer?
This recipe relies on freezing to maintain structure, but you can try a refrigerator-only version by using stabilized whipped cream (like Cool Whip) between layers and chilling for 6-8 hours. The texture will be softer, but it'll still taste delicious! For best results, use a 9x13-inch dish and press layers firmly to prevent melting.
How do I prevent ice cream from melting between layers?
Work quickly and keep your ice cream fully frozen (not soft). Spread each layer evenly with a spatula, press gently, and freeze for 5 minutes between layers. Use wax paper between layers if needed, and avoid opening the freezer door frequently. The whipped cream layer acts as a natural barrier too!
What's the best way to slice this cake without it crumbling?
Let the cake sit at room temperature for 10-15 minutes before slicing. Use a hot knife (dip in hot water, wipe dry) between each cut. For cleaner slices, dip the knife in hot water again after every 2-3 cuts. Cut straight down and avoid twisting—this keeps the layers intact.
Can I use different ice cream flavors?
The classic combo is vanilla and chocolate, but you can mix coffee, mint chip, or strawberry for fun twists. Just ensure flavors complement each other—avoid overly strong flavors like coffee or pistachio unless balanced with milder options. Homemade ice cream works too, but let it freeze completely first.
How long can I store leftovers?
Leftovers stay fresh in the freezer for up to 3 days. Thaw slices at room temperature for 30 minutes before serving. For longer storage, wrap individual portions tightly in plastic wrap and aluminum foil. The texture may soften slightly after thawing, but it's still delicious!