
Desserts
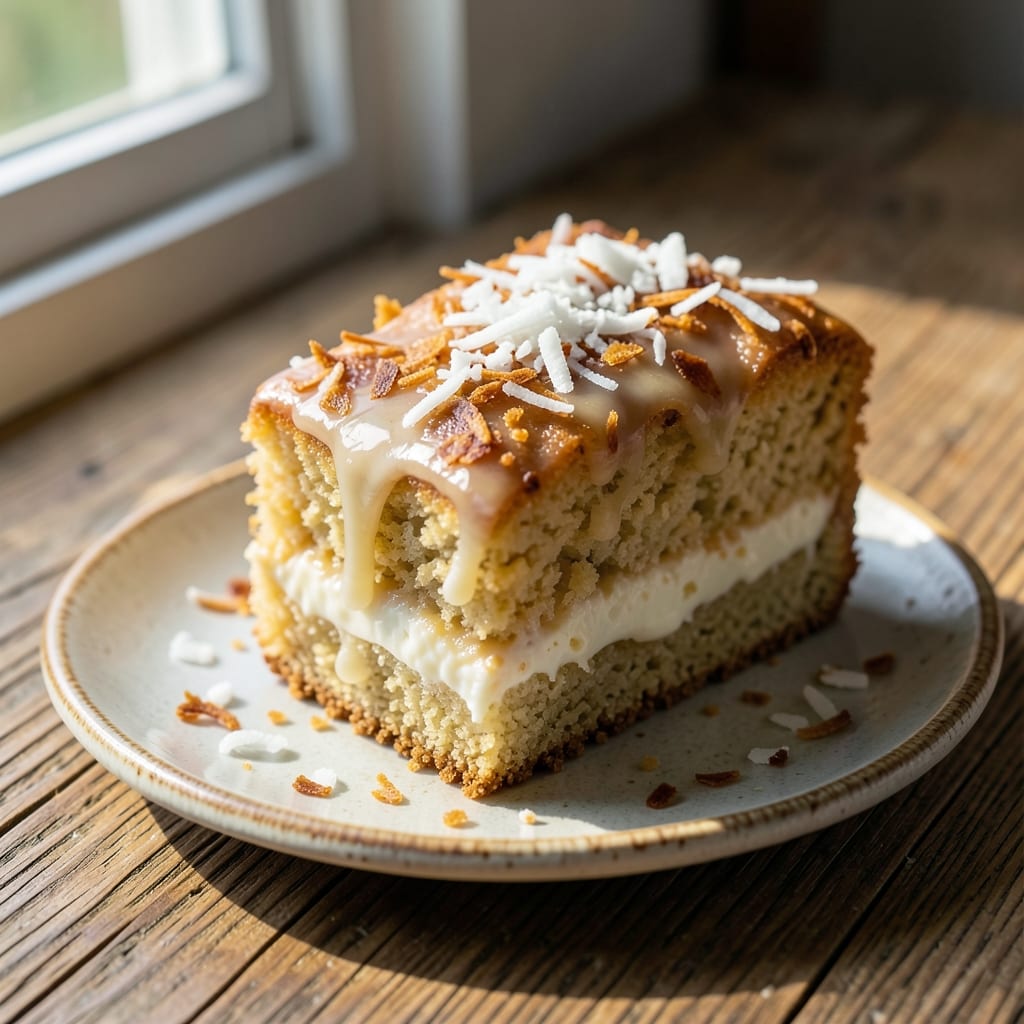
This all coconut cake recipe delivers tropical layers of moist coconut flavor with a toasted crunch that sets it apart from ordinary spice cakes. 🌴 The secret lies in blending coconut milk into the batter while incorporating both shredded and toasted coconut for texture contrast—no artificial flavors needed. I developed this recipe after years of testing, ensuring every bite delivers that perfect balance of creamy, slightly sweet cake and nutty coconut crunch.
The cake features three distinct layers: a tender coconut sponge infused with coconut extract, a luscious coconut cream filling, and a toasted coconut crumb topping that adds irresistible texture. What makes this recipe special is the foolproof method for achieving even layers without cracking, plus a baking technique that ensures the center stays moist even after cooling. The result is a cake that looks as impressive as it tastes—ideal for special occasions or when you want to impress with a dessert that feels homemade yet restaurant-worthy.
By the time you serve this cake, your guests will experience the full tropical experience—creamy coconut sponge, rich coconut cream filling, and crunchy toasted coconut topping in every bite. The aroma alone will transport you to a beachside café, while the texture provides that satisfying contrast that makes this cake unforgettable. Perfect for birthdays, holidays, or simply treating yourself to something extraordinary.
For those who prefer variations, you can easily adapt this recipe by adding a hint of vanilla or orange zest to the batter, or even incorporating coconut flour for a gluten-free option. The possibilities are endless while maintaining that signature coconut flavor. Let’s get baking!
Ingredients for all coconut cake
Tropical flavors meet perfect texture in this all-coconut cake with three layers of pure coconut joy.
| Ingredient | Amount | Notes |
|---|---|---|
| All-Purpose Flour 🌾 | 2 ½ cups | Sifted for light texture |
| Granulated Sugar 🍚 | 2 cups | White or light brown |
| Coconut Milk (Full-Fat, Canned) 🥥 | 1 ½ cups | Shaken well before use |
| Unsweetened Shredded Coconut 🥥 | 3 cups | Finely shredded, unsweetened |
| Toasted Unsweetened Shredded Coconut 🥥 | 1 ½ cups | Lightly browned in dry pan |
| Coconut Extract 🌿 | 1 tbsp | Pure, not imitation |
| Baking Powder 🍞 | 2 tsp | Aluminum-free preferred |
| Salt 🧂 | ½ tsp | Fine sea salt |
| Large Eggs 🥚 | 4 whole | Room temperature |
| Vanilla Extract 🌸 | 1 tbsp | Pure vanilla preferred |
| Unsalted Butter 🧈 | 1 cup | Room temperature, softened |
| Cream Cheese (8 oz Block) 🧀 | 8 oz | Room temperature, full-fat |
| Powdered Sugar 🍚 | 2 cups | Sifted for smooth filling |
| Heavy Whipping Cream 🥛 | 1 cup | Cold for whipping |
| Orange Zest (Optional) 🍊 | 1 tbsp | Freshly grated |
The coconut milk and extract are non-negotiable for that authentic tropical taste. Thai Kitchen or Goya brands work best for the canned milk—avoid the ultra-light versions. For the shredded coconut, Bob's Red Mill unsweetened is my go-to, but any brand labeled 'unsweetened' will do. Toast your own coconut for the crumb topping—it makes all the difference. Lightly browned in a dry skillet until fragrant, then cool completely before using. The cream cheese filling requires full-fat for that luxurious texture, so skip the 'light' versions. If you're feeling adventurous, swap half the flour for almond flour for a nutty twist, though the texture will be slightly denser.
No coconut milk? Full-fat coconut cream from a can works in a pinch, but shake it well first. Running short on coconut extract? A mix of vanilla extract and a dash of almond extract gets you close. The orange zest is optional but adds a lovely brightness—if you skip it, boost the vanilla to 2 tbsp. For a gluten-free version, replace the all-purpose flour with a 1:1 gluten-free blend, but add an extra 0.5 tsp of xanthan gum. The powdered sugar should be sifted to avoid lumps in the filling, and if you can't find it, blend regular granulated sugar in a blender for 30 seconds. The butter and cream cheese need to be at room temperature for the filling to whip properly—microwave for 20 seconds if they're too cold.
Store the cake layers separately in an airtight container at room temperature for up to 3 days. Assemble just before serving to maintain the crunch. The filling can be made a day ahead and stored in the fridge—it actually tastes better after the flavors meld. For longer storage, wrap the assembled cake tightly in plastic wrap and refrigerate for up to 5 days. To revive the texture, warm the cake at room temperature for 1 hour before slicing. Freeze individual layers for up to 3 months—thaw overnight in the fridge before assembling.
Why You'll Love This Recipe
- Pantry Magic: I swear by this recipe when I forget to grocery shop—just flour, sugar, and a can of coconut milk. No eggs, no butter, no fuss. The cake still rises like it’s supposed to, thanks to that full-fat milk doing all the heavy lifting.
- Tropical Crunch: That first bite? Pure contrast—soft, moist cake with layers of toasted coconut crunch. Honestly, the toasted shreds on top are the star; they caramelize just enough to make you want to eat it straight from the pan.
- Birthday Party Ready: Between us, this is my go-to for last-minute celebrations. The coconut flavor feels fancy, but it’s foolproof enough for a weeknight dessert too. Plus, the leftovers? Still just as good the next day—no sad, dry cake here.
- Budget-Friendly Luxury: I make this when I’m pinching pennies but craving something special. A can of coconut milk and a bag of shredded coconut stretch further than you’d think. The result? A cake that tastes like a vacation without the plane ticket.
Step-by-step instructions for all coconut cake
Layer by layer, we'll create a tropical cake with moist crumb and irresistible toasted coconut crunch.
👨🍳 Step 1: Prepare the Cake Layers and Toast the Coconut
First, preheat your oven to 350°F and grease three 8-inch round cake pans with nonstick spray, then line the bottoms with parchment paper. In a large mixing bowl, combine the 2.5 cups all-purpose flour, 2 cups granulated sugar, 2 tsp baking powder, and 0.5 tsp salt. Sift the dry ingredients together to ensure even distribution.
In a separate bowl, whisk together the 4 whole large eggs, 1 cup unsalted butter (softened), 1.5 cups coconut milk (shaken well), 1 tbsp vanilla extract, and 1 tbsp coconut extract. Gradually pour the wet ingredients into the dry ingredients while mixing on medium speed until just combined. Fold in the 3 cups unsweetened shredded coconut using a spatula, ensuring even distribution.
While the batter rests, toast the 1.5 cups toasted unsweetened shredded coconut in a dry skillet over medium-low heat, stirring constantly for 5-7 minutes until golden brown and fragrant. Keep it nearby—we'll use it for the crunch layer between cake layers. Divide the batter evenly among the prepared pans and bake for 25-30 minutes or until a toothpick inserted into the center comes out clean. Let the layers cool in the pans for 10 minutes before transferring to a wire rack to cool completely.
🥘 Step 2: Make the Cream Cheese Filling and Whipped Cream Frosting
In a medium bowl, beat the 8 oz cream cheese (at room temperature) and 2 cups powdered sugar together using an electric mixer until smooth and fluffy. Add the 1 cup heavy whipping cream (cold) and mix on high speed until soft peaks form. If using, fold in the 1 tbsp orange zest at this stage for a bright citrus note. Cover and refrigerate until ready to use.
For the whipped cream frosting, whip the remaining 1 cup heavy whipping cream (if needed) in a separate bowl until stiff peaks form. This will be used to create the final decorative layer on top of the cake. The filling should be thick but spreadable—if it's too stiff, add 1-2 teaspoons coconut milk to loosen it slightly.
🍳 Step 3: Assemble the Cake Layers with Crunchy Coconut
Place the first cake layer on a serving plate or cake stand. Spread an even layer of the cream cheese filling over the top, leaving a ½-inch border uncovered. Sprinkle half of the 1.5 cups toasted unsweetened shredded coconut evenly over the filling. Repeat with the second layer, adding another layer of filling and the remaining toasted coconut. Top with the final cake layer.
Spread the remaining cream cheese filling evenly over the top and sides of the cake, creating a smooth base for the whipped cream. Pipe or spread the whipped cream frosting over the entire cake, creating swirls or peaks as desired. Press the remaining toasted coconut into the frosting to create a textured, tropical finish. For extra flair, you can arrange additional coconut flakes around the base of the cake.
⏰ Step 4: Chill and Serve for Maximum Flavor
Refrigerate the assembled cake for at least 2 hours (or overnight) to allow the flavors to meld and the filling to set. This chilling time is crucial—it ensures the cream cheese filling holds its shape and the cake layers stay moist. When ready to serve, slice with a warm knife (dip in hot water and wipe dry) for clean cuts.
Each slice should reveal layers of tender cake, creamy filling, and crunchy toasted coconut. The contrast of textures and flavors—moist cake, rich filling, and nutty coconut—makes this cake truly special. Serve at room temperature for the best experience, and enjoy the tropical escape in every bite.
Pro Tips For Making All Coconut Cake
- Whisk the Coconut Milk: Don’t just pour it in—whisk the full-fat canned coconut milk with a fork first to break up any thickened oil at the top. I learned this the hard way after a batch turned greasy mid-bake; the milk separates more than you’d think when hot. ---
- Toast the Coconut Right: Use a dry skillet over medium heat for 3–4 minutes, stirring constantly, until the shredded coconut smells nutty and changes color. Skip the microwave—it steams instead of toasting, and the flavor stays dull. (Yes, even if you’re impatient like me.) ---
- Don’t Overmix the Batter: Fold in the flour and wet ingredients just until combined—lumps are fine. Overmixing develops gluten, and this cake’s magic is its tender, moist crumb. I used to beat it like pancake batter, and the texture suffered. ---
- Test for Doneness Early: Check the cake at 25 minutes (standard oven) with a toothpick—it should come out with a few moist crumbs, not wet batter. Coconut cakes dry out fast once out of the oven, so pull it sooner rather than later. (Your future self will thank you.)
Essential equipment for this dish
Mixing Essentials
Start with a stand mixer or hand mixer for the batter—I use my KitchenAid Artisan Series for its consistent speed control. The large mixing bowl (at least 5-quart capacity) ensures you won’t overflow while combining wet and dry ingredients. For the filling, a medium bowl (3-quart) works perfectly for whipping the cream cheese smoothly. 🥥
Baking Tools
Three 8-inch round cake pans are non-negotiable for even layers. I recommend Wilton Perfect Results pans—they’re durable and release cakes effortlessly. Line the bottoms with parchment paper circles to prevent sticking, and always grease them lightly with nonstick spray (like Pam) before adding batter. A toothpick is essential for checking doneness—insert it into the center of each layer.
Skillet for Toasting
A 10-inch nonstick skillet is ideal for toasting the shredded coconut—it provides enough surface area to spread the coconut evenly without burning. Use medium-low heat and stir constantly for 5-7 minutes until golden brown. Keep a wooden spoon nearby to stir and prevent sticking. The toasted coconut should smell fragrant and nutty—this is your cue it’s ready! 🌴
Assembling the Cake
For assembly, grab a serving plate or cake stand that’s at least 9 inches wide to accommodate the layers. A spatula helps spread the filling evenly, while a piping bag with a star tip (or a simple zip-top bag with a corner snipped off) makes decorating with whipped cream effortless. Keep a small bowl of coconut milk nearby to thin the filling if needed—just 1-2 teaspoons at a time.
Chilling and Serving
Refrigerate the cake on a wire rack (placed over a tray) to prevent condensation from dripping onto the frosting. A sharp serrated knife is best for slicing—warm it by dipping in hot water and wiping dry before each cut. For serving, use a cake server or offset spatula to lift slices without tearing the layers. Store leftovers in an airtight container at room temperature for up to 3 days or refrigerate for 5 days.
Nutrition facts
Frequently asked questions
Can I make this all-coconut cake gluten-free?
Yes! Replace the all-purpose flour with a 1:1 gluten-free baking flour blend (like Bob's Red Mill or King Arthur) and add an extra 0.5 teaspoon xanthan gum to improve texture. The cake will be slightly denser but still moist.
Why does my cake turn out dry?
Overbaking is the most common cause—check doneness with a toothpick at 25 minutes (not 30). Also ensure your coconut milk is full-fat (not light) and don't overmix the batter. For extra moisture, brush warm layers with coconut milk before assembling.
How do I store leftovers without losing the crunch?
Store layers separately in an airtight container at room temperature for 3 days. Reassemble just before serving. For longer storage, freeze layers for up to 3 months—thaw overnight in the fridge. Never refrigerate the fully assembled cake longer than 24 hours or the coconut will soften.
Can I substitute coconut extract with something else?
Yes! Mix 1 teaspoon vanilla extract with ½ teaspoon almond extract for a similar tropical aroma. For a more intense coconut flavor, add 1 tablespoon coconut cream (from the can) to the batter. The filling will still taste amazing without it.
What's the best way to decorate this cake?
Try these ideas: Pipe whipped cream in swirls and top with extra toasted coconut, or create a "beach" effect with piped coconut cream "waves." For a modern look, dust with powdered sugar and add fresh mango slices. Keep it simple with just the toasted coconut—it's already stunning!