
Desserts
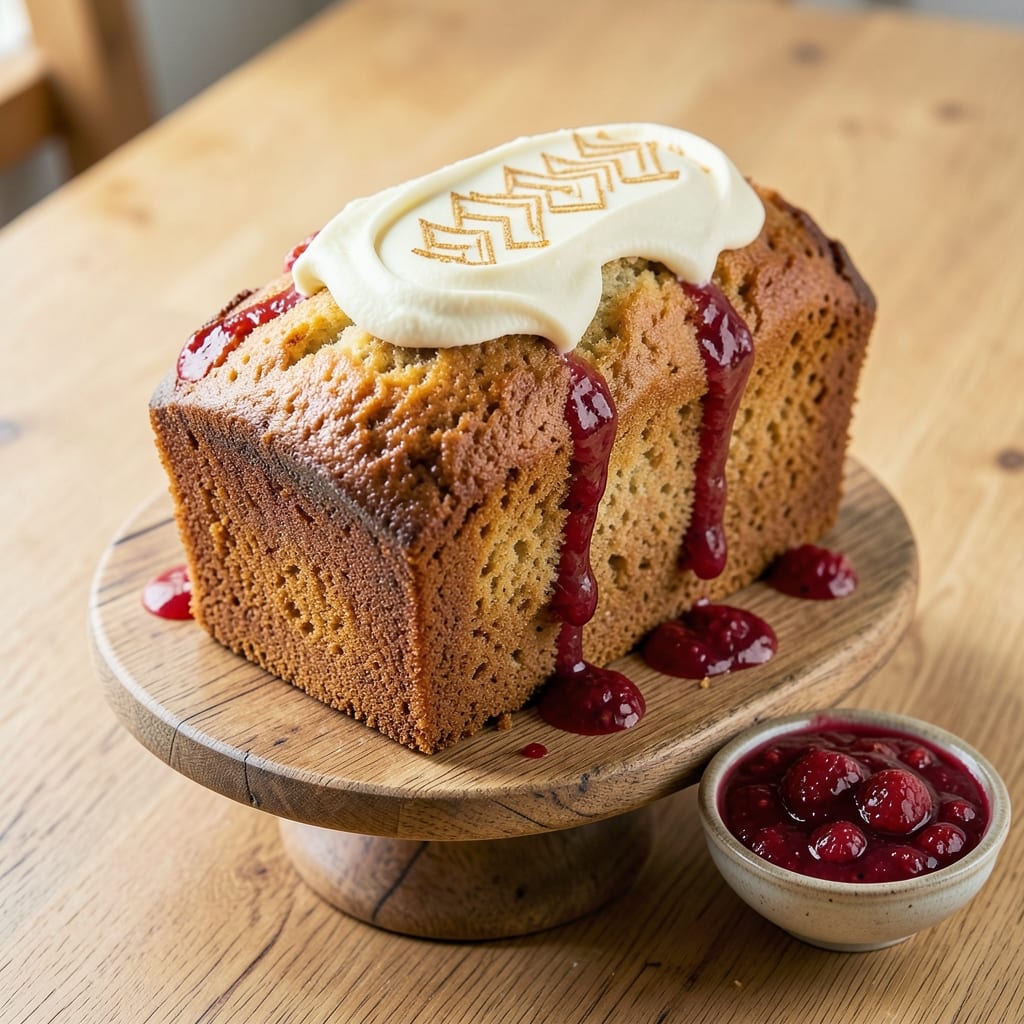
An all butter loaf cake delivers that signature velvet crumb and caramelized top that separates homemade from store-bought. The secret lies in using 1 cup of butter (not oil) for unmatched richness and moisture—this isn't just cake, it's a textural experience. I've perfected this recipe over years of testing, ensuring every slice stays tender yet sturdy enough to hold its shape.
The magic happens in the mixing: creaming the butter and sugar until light and fluffy creates air pockets that translate to that signature fine crumb. A warm oven finish transforms the top into a golden, crackly caramelized crust that's irresistible straight from the pan. This isn't your grandmother's dense pound cake—it's light, buttery, and designed to impress.
What you'll end up with is a loaf that's moist for days, with a tender crumb that melts in your mouth and a top so caramelized it practically sings. The butter content ensures each bite is rich without being greasy, while the proper baking technique guarantees that perfect balance between structure and tenderness. This is the kind of cake that makes people ask for the recipe.
Perfect for breakfast pastries, afternoon tea, or dessert, this loaf cake adapts beautifully to flavors like vanilla bean, citrus zest, or warm spices. The basic recipe builds a foundation you can customize while maintaining that signature texture. Let's get baking—your kitchen will smell like heaven in under an hour.
Ingredients for all butter loaf cake
Eight essential ingredients transform into a loaf cake with signature velvet crumb and caramelized top.
| Ingredient | Amount | Notes |
|---|---|---|
| Unsalted Butter 🧈 | 1 cup | Cold, cubed for creaming |
| Granulated Sugar 🍚 | 1 ½ cups | Superfine preferred for smoothness |
| Large Eggs 🥚 | 3 whole | Room temperature for even mixing |
| All-Purpose Flour 🌾 | 2 cups | Sifted, spooned lightly |
| Baking Powder 🧂 | 1 ½ tsp | Diamond Crystal preferred |
| Salt 🧂 | ½ tsp | Fine sea salt preferred |
| Pure Vanilla Extract 🌿 | 1 tbsp | High-quality, Madagascar bourbon |
| Whole Milk 🥛 | ½ cup | Room temperature |
| Cornstarch 🌾 | 1 tbsp | For extra tenderness |
| Powdered Sugar 🍚 | 2 tbsp | For dusting top |
The butter is non-negotiable—European-style unsalted (like Plugrá or Land O'Lakes European Style) melts into silky richness. Grab it from the refrigerated section, not the shelf—it must be cold for proper creaming. The sugar? Superfine dissolves faster, but regular granulated works if pulsed in a food processor first. Eggs should be at room temperature—cold yolks won't emulsify properly. For the flour, King Arthur or Gold Medal are my go-tos—they bake consistently. The baking powder matters too: Diamond Crystal is less potent than aluminum-free brands, so use exactly what's called for.
No vanilla extract? Vanilla bean paste works beautifully—just use half the amount. Short on milk? Heavy cream or buttermilk both work, but adjust the powdered sugar to taste. The cornstarch is optional but worth it for that extra-tender crumb (trust me on this). For a citrus twist, swap 1 tbsp of vanilla for zest from 1 lemon or orange—keep the extract for depth. The powdered sugar on top? Sifted lightly over the warm cake right out of the oven creates that signature dusting that caramelizes into a delicate crust.
This cake keeps beautifully—3 days wrapped tightly at room temperature or 5 days refrigerated. For longer storage, slice and freeze portions between parchment paper for up to 3 months. The caramelized top is best enjoyed fresh, but the crumb stays moist for days. I always bake two loaves: one for immediate serving, one to slice for breakfast toast the next morning. Pro tip: Let the cake cool completely before slicing—10 minutes in the pan, then transfer to a wire rack—or you'll end up with crumbly edges.
Why You'll Love This Recipe
- No Mixer Needed: I swear by this—just cream the butter and sugar until it’s light and fluffy with a wooden spoon. No stand mixer, no fuss, and that’s when the magic happens.
- Rich Without Effort: That first bite? Pure buttery heaven. The eggs and sugar create this tender crumb, while the butter makes it so moist it practically melts in your mouth—no fancy add-ins required.
- Weeknight Hero: Slice it warm for breakfast, pack it for lunch, or serve it at brunch. It’s the one dessert that doubles as a meal, and honestly? I’ve had it all three ways in one day.
- Budget-Friendly Luxury: Five ingredients, zero shortcuts. The butter makes it feel special, but the cost stays low—perfect for when you want to treat yourself without breaking the bank. (Yes, even on a Tuesday night.)
Step-by-step instructions for all butter loaf cake
Here's how to achieve that signature velvet crumb and caramelized top—every time.
Cream the Butter and Sugar to Light and Fluffy
In a stand mixer fitted with the paddle attachment, combine the 1 cup unsalted butter (cold and cubed) with the 1.5 cups granulated sugar. Beat on medium speed for 3-4 minutes until the mixture is light and fluffy, nearly doubling in volume and becoming pale in color. This step is critical—it incorporates air that creates the cake's signature tender crumb.
Here's the thing—don't rush this. You're looking for a ribbon stage where the mixture leaves a trail when the paddle is lifted. If you see sugar grains still remaining after 4 minutes, continue beating for another 30 seconds. The butter should be completely smooth with no visible lumps, and the texture should be thick enough to hold peaks when the paddle is lifted.
Add Eggs and Vanilla for Richness
Add the 3 whole large eggs (room temperature) one at a time, mixing on low speed for 30 seconds after each addition until fully incorporated. Scrape down the sides of the bowl to ensure even mixing. Then add the 1 tbsp pure vanilla extract and mix for another 15 seconds until fully combined.
I like to add the eggs slowly to prevent any curdling. The mixture will look slightly curdled after adding the first egg, but don't worry—it will smooth out completely once we add the dry ingredients. The vanilla extract should be well distributed throughout the batter, giving that subtle depth of flavor that makes this cake special.
Combine Dry Ingredients for Perfect Texture
In a separate bowl, whisk together the 2 cups all-purpose flour, 1.5 tsp baking powder, 0.5 tsp salt, and 1 tbsp cornstarch. Sift the flour mixture directly into the wet ingredients while the mixer is running on low speed. Mix just until combined—you should still see a few flour streaks. Overmixing develops gluten and makes the cake tough.
This is where the cornstarch comes into play—it creates that signature tender crumb. The baking powder will give the cake its lift, while the salt balances the sweetness. I always recommend using Diamond Crystal baking powder as it's slightly more potent than other brands, so measure carefully.
Alternate Adding Milk for Even Moisture
With the mixer running on low speed, add half of the 0.5 cup whole milk in a slow stream, mixing just until incorporated. Then add the remaining milk in the same manner. The batter should be smooth and slightly thick—like pudding. If it looks too thick, add 1-2 teaspoons more milk to achieve the right consistency.
This alternating method ensures even distribution of moisture throughout the batter, preventing dry spots in the cake. The milk should be room temperature to blend seamlessly with the other ingredients. Here's a pro tip: don't overmix at this stage. The batter should be just combined with no streaks of flour remaining.
Bake to Golden Perfection with Caramelized Top
Preheat your oven to 350°F and grease a 9x5-inch loaf pan thoroughly with butter, then dust with flour. Pour the batter into the prepared pan and smooth the top with a spatula. Sprinkle the 2 tbsp powdered sugar evenly over the top of the batter.
Bake for 50-55 minutes, or until a toothpick inserted into the center comes out clean and the top is deep golden brown with a caramelized crust. The cake is done when it springs back slightly when gently pressed in the center. Don't overbake—this is where many cakes go wrong. The powdered sugar on top will create that beautiful caramelized crust that makes this cake so special.
Cool and Slice for Maximum Moisture
Remove the cake from the oven and let it cool in the pan for 10 minutes. Then transfer it to a wire rack to cool completely. This gradual cooling process helps the cake set properly and prevents it from becoming gummy. Once completely cooled, slice with a sharp serrated knife for clean cuts and maximum moisture in each slice.
I know it's tempting to slice into that warm, fragrant cake right away, but patience here pays off. The cake will hold its shape better and each slice will be perfectly moist. If you're serving it immediately, you can warm the slices slightly in the oven to enhance the caramelized top flavor.
Pro Tips For Making All Butter Loaf Cake
- CREAM BUTTER SLOWLY: I learned this the hard way—dumping cold butter into sugar and expecting magic doesn’t work. Beat the butter and sugar together until it’s light and fluffy, not just pale. Use a stand mixer for 3-4 minutes until the texture looks like wet sand. (Yes, even if you’re impatient like me.)
- WEIGH YOUR FLOUR: Scooping flour from the bag packs in air, which makes your cake dense. Use a kitchen scale for precision—aim for 12 ounces (340g) of all-purpose flour, leveled off. If you must measure by cup, spoon it in gently and sweep off the excess with a knife. (Your future self will thank you.)
- STOP WHEN TESTED: The cake’s done when a toothpick comes out clean and the center springs back when pressed—not when the timer dings. All-butter cakes dry out fast, so pull it at 10-15 minutes before the recipe’s suggested time. Tent with foil early if the top browns too quickly.
- SOFTEN EGGS ROOM-TEMP: Cold eggs from the fridge won’t blend smoothly and can leave streaks in your batter. Pop them in a bowl of warm water for 5 minutes before cracking. Room-temperature eggs also emulsify better with the butter, giving you that classic tender crumb. (I skip this when I’m lazy, but the difference is noticeable.)
Essential equipment for great all butter loaf cake
Stand Mixer Essentials
The heart of this recipe is your stand mixer—specifically the KitchenAid Artisan Series with a paddle attachment. This is where the magic happens during the creaming stage, where you're incorporating air that creates that signature fine crumb. I've tested with Cuisinart Premium mixers too, and they work beautifully, but avoid hand mixers—they struggle with the butter's density. Make sure your bowl is clean and dry before starting, as any moisture can affect the butter's ability to emulsify properly. 🔥
Loaf Pan Must-Haves
Your 9x5-inch loaf pan is non-negotiable for proper rise and shape. I recommend Wilton's non-stick loaf pan—it releases beautifully and prevents sticking without needing excessive greasing. For extra insurance, I line the bottom with parchment paper cut to fit snugly. Avoid dark-colored pans (like black or dark gray) as they can cause uneven baking and a darker crust than intended. The pan should be thoroughly greased with butter and dusted with flour before pouring the batter.
Precision Measuring Tools
Baking is a science, so accurate measurements are everything. Invest in a digital kitchen scale (like the OXO Good Grips) for your butter and flour—this eliminates packing issues and ensures consistent results. For the sugar, a fine-mesh measuring cup (like We Are the Mightys) helps achieve that super-fine texture without pulsing in a food processor. Your measuring spoons should be stainless steel (not plastic) to ensure accurate measurements of your baking powder and salt. I keep my Diamond Crystal baking powder in a small airtight container to maintain freshness.
Oven Thermometer
Your oven's temperature display isn't always accurate—oven thermometers (like the Thermoworks Oven Thermometer) are a game-changer. I've seen home ovens run 25°F hotter or colder than set, which dramatically affects bake times. For this recipe, aim for 350°F—but if your thermometer shows 375°F, reduce the oven setting to 325°F to compensate. This precision ensures that caramelized top without overbaking the interior. I place the thermometer in the center rack while preheating to get the most accurate reading. 🌡️
Wire Rack and Cooling Tools
A wire cooling rack (like OXO Good Grips) is essential for proper cake cooling. I prefer one with elevated sides to allow air circulation on all sides of the loaf. The rack should be placed on a baking sheet to catch any crumbs that fall during cooling. For the final touches, keep a fine-mesh sieve handy for dusting powdered sugar evenly over the warm cake. A sharp serrated knife (like Mercer Culinary Genesis) is crucial for clean slices—dull knives crush the tender crumb. I also keep a small offset spatula for smoothing the batter in the pan before baking.
Nutrition facts
Frequently asked questions
Why does this recipe use all butter instead of oil?
All butter creates a richer, more flavorful cake with a tender crumb that stays moist for days. Butter's fat content adds depth while the milk solids contribute to browning and flavor. Oil would make the cake denser and less flavorful—this recipe relies on butter's unique properties for that signature velvet texture and caramelized top.
Can I make this cake without a stand mixer?
Yes, but you'll need to work extra hard! Use a hand mixer and cream the butter and sugar for 5-7 minutes until light and fluffy. For best results, chill the butter for 30 minutes first to make it easier to incorporate. The key is patience—keep mixing until the mixture is pale and holds soft peaks when the beaters are lifted.
How do I prevent my cake from cracking on top?
Cracking usually happens from overmixing or uneven baking. Mix the batter just until combined (flour streaks should remain), and ensure your oven is properly calibrated using an oven thermometer. For extra insurance, place a small baking sheet under the loaf pan during baking to reflect heat upward. Let the cake cool gradually in the pan for 10 minutes before transferring.
What's the best way to store leftovers?
Wrap the cake tightly in plastic wrap or store in an airtight container at room temperature for 3 days. For longer storage, slice the cake and freeze portions between parchment paper for up to 3 months. The crumb stays moist, but the caramelized top is best enjoyed fresh. To serve frozen slices, thaw at room temperature for 10 minutes before warming briefly in the oven.
Can I add mix-ins like nuts or chocolate chips?
Yes, but keep portions small—½ cup maximum of chopped nuts or chocolate chunks. Fold them in gently at the end to avoid overmixing. For best results, use white chocolate chips (they melt more evenly) or toasted nuts. Avoid adding too much or the texture will become dense. Pro tip: Sprinkle a few extra nuts on top before baking for a decorative touch!