
Desserts
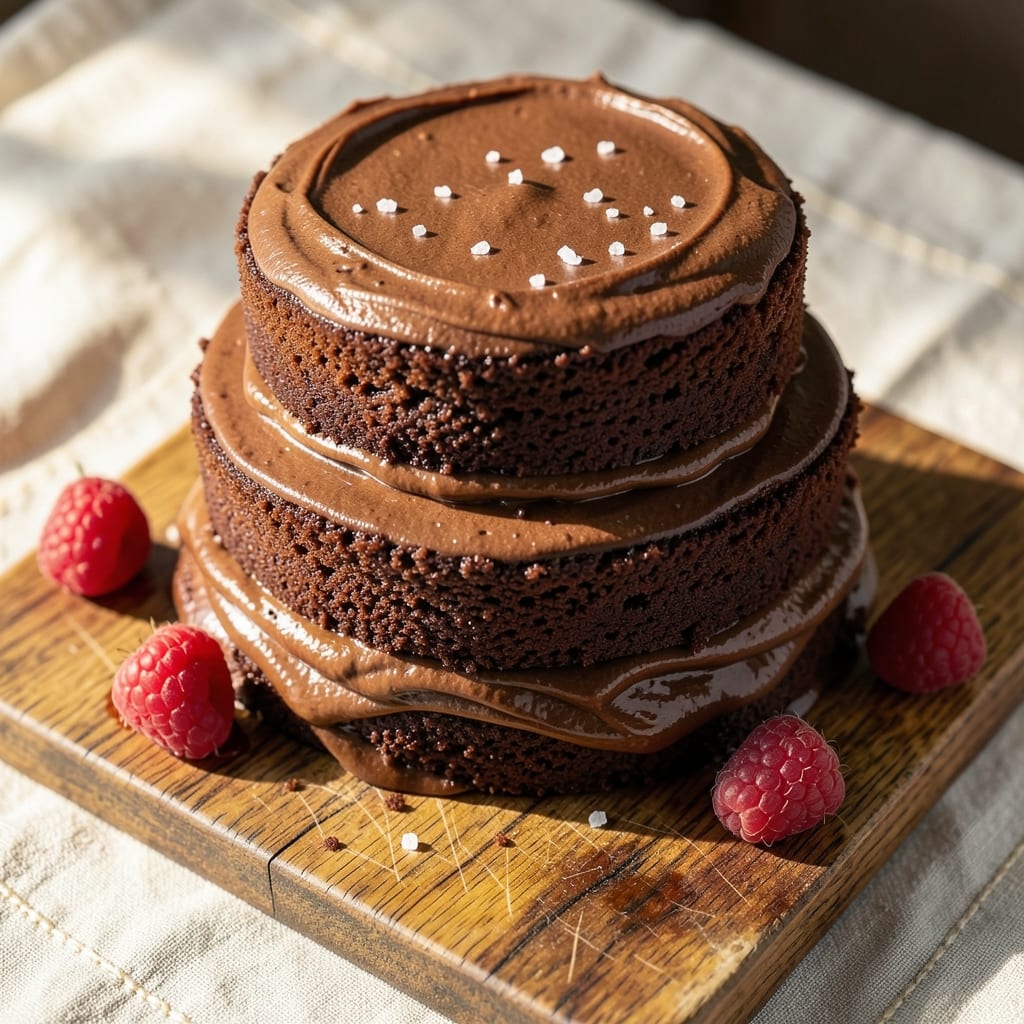
This All-American chocolate cake recipe delivers the perfect balance of rich cocoa and tender crumb—with a classic vanilla-buttercream swirl that stays moist for days. 💛 The secret lies in a simple yet foolproof method that combines buttermilk for moisture and a touch of espresso powder to deepen the chocolate flavor without bitterness. I've perfected this recipe over years of baking, ensuring it rises just enough to create that signature domed shape while maintaining a fudgy center. What sets this apart is the vanilla buttercream—lightly sweetened with a hint of vanilla bean for that authentic American bakery taste. The swirl technique isn't just decorative; it adds layers of flavor with every bite. The cake itself bakes in 350°F for 30-35 minutes, yielding a tender crumb that holds up to slicing without drying out. Whether you're baking for a birthday or just craving a classic dessert, this recipe delivers restaurant-quality results at home. The frosting is where the magic happens—whipped to a perfect consistency that's neither too sweet nor too heavy, with just enough butter to create that signature creamy texture. The swirls cut through the dense chocolate layers beautifully, creating a visual and textural contrast that makes every slice feel special. This isn't just cake; it's a showstopper that tastes like nostalgia in every bite. For those who love tradition with a modern twist, this recipe includes simple substitutions (like Greek yogurt for buttermilk) and tips for adjusting sweetness to taste. Let's get baking!
Ingredients for all american chocolate cake
Twelve classic ingredients for a cake that's rich, moist, and full of nostalgic American flavor.
| Ingredient | Amount | Notes |
|---|---|---|
| All-Purpose Flour 🌾 | 2 ½ cups | Sifted for light texture |
| Granulated Sugar 🍚 | 2 cups | White or light brown |
| Unsalted Butter 🧈 | 1 ½ cups | Room temperature, cubed |
| Buttermilk 🥛 | 1 ½ cups | Room temperature |
| Large Eggs 🥚 | 2 whole | Room temperature |
| Vanilla Extract 🌸 | 2 tsp | Pure extract preferred |
| Espresso Powder ☕ | 1 tbsp | Enhances chocolate depth |
| Baking Soda 🧪 | 1 tsp | Pure, not baking powder |
| Salt 🧂 | ½ tsp | Fine sea salt |
| Cocoa Powder 🍫 | ¾ cup | Dutch-processed preferred |
| Powdered Sugar 🍚 | 3 cups | For buttercream |
| Vanilla Bean 🌸 | 1 whole | Seeded for authentic flavor |
| Heavy Cream 🥛 | 1 cup | Cold for whipping |
The cocoa powder and espresso powder are non-negotiable for that deep, authentic chocolate taste. Dutch-processed cocoa from Ghirardelli or Hershey's gives the smoothest texture, while instant espresso powder (like Starbucks) deepens the flavor without bitterness. For the butter, Land O'Lakes or Plugrá work best—never salted. The vanilla bean? Madagascar bourbon from Williams Sonoma elevates the buttercream, but pure extract works in a pinch. Flour should be sifted to avoid dense cake—King Arthur or Gold Medal are my go-tos. And that buttermilk? If you don't have it, mix 1 tbsp vinegar or lemon juice with 1.5 cups milk and let it sit for 5 minutes.
No buttermilk? Greek yogurt or sour cream works beautifully as a 1:1 swap—just remember to whisk it well before adding. Short on powdered sugar? Granulated sugar plus 1 tsp cornstarch mimics the texture. The buttercream can be made ahead—just whip it up and refrigerate for up to 2 days. For a lighter cake, replace 0.5 cup flour with cornstarch. The espresso powder is optional but recommended—it enhances the chocolate without overpowering it. And if you're worried about the cake being too rich, reduce sugar by 0.25 cup and increase cocoa by 0.1 cup for a more intense flavor.
Store cake layers wrapped in plastic at room temperature for up to 3 days or refrigerate for 5 days. The buttercream keeps for 5 days in the fridge or 3 months frozen. For the best texture, bring the buttercream to room temp before whipping. Cake layers can be frozen individually for 2 months—just thaw overnight in the fridge before frosting. The secret to that signature domed shape? Bake in two 9-inch pans for 30-35 minutes at 350°F, then let them cool completely before frosting. Patience here ensures clean slices and perfect swirls.
Why You'll Love This Recipe
- No Mixer Needed: I swear, this cake comes together with just a bowl and a whisk—no stand mixer, no fancy gadgets. The buttermilk and butter blend so smoothly, you’d never guess it’s this effortless.
- Rich Without Bitterness: That perfect balance of sugar and butter? It’s decadent but not overpowering. The eggs add just enough structure so every slice stays moist—no dry crumbs here.
- Birthday or Backup: Serve it warm with vanilla ice cream for a party, or slice it cold for a quick lunch. Honestly, it’s my go-to when I need dessert fast—no one ever turns it down.
- Budget-Friendly Luxury: Pantry staples only, and a single batch feeds six. Leftovers? They’re even better the next day—great for packing or sneaking into my lunchbox when I’m craving something sweet.
Step-by-step instructions for vanilla-buttercream swirl chocolate cake
Here's how to bake a rich, moist chocolate cake with perfect swirls that stay tender for days.
👨🍳 Step 1: Prepare the Cake Batter
Preheat your oven to 350°F and grease two 9-inch round cake pans with butter, then line the bottoms with parchment paper. In a medium bowl, whisk together the 2.5 cups all-purpose flour, 1 tsp baking soda, 0.5 tsp salt, and 1 tbsp espresso powder. Sift the mixture to remove any lumps and set aside.
In a large mixing bowl, cream the 1.5 cups unsalted butter and 2 cups granulated sugar on medium speed until light and fluffy—about 3-4 minutes. This step is crucial for creating air pockets that make the cake tender. Add the 2 whole large eggs, one at a time, mixing well after each addition. Scrape down the sides of the bowl as needed to ensure even mixing.
👨🍳 Step 2: Combine Wet Ingredients and Fold in Dry Mix
In a separate bowl, whisk together the 1.5 cups buttermilk, 2 tsp vanilla extract, and seeds from the 1 whole vanilla bean. Gradually add this mixture to the butter-sugar-egg mixture, alternating with the dry flour mixture. Start and end with the flour to ensure the batter is properly combined. Mix on low speed just until the batter is smooth—overmixing develops gluten and makes the cake tough.
Divide the batter evenly between the prepared cake pans. For the signature swirl, drop spoonfuls of the batter into one pan, then add dollops of the prepared vanilla buttercream (see Step 3) on top. Use a knife to swirl the buttercream into the batter before adding the remaining batter. This creates those beautiful marbled layers. Bake for 30-35 minutes or until a toothpick inserted into the center comes out clean.
🥘 Step 3: Make the Vanilla Buttercream
While the cake bakes, prepare the buttercream. In a medium bowl, beat the 1.5 cups unsalted butter (softened) and 3 cups powdered sugar with an electric mixer on medium speed until light and fluffy—about 3-4 minutes. Add the 1 cup heavy cream and 2 tsp vanilla extract, mixing until smooth. For extra richness, scrape the bowl and beat again for 1 minute to ensure a silky texture.
Here's the thing—this buttercream needs to be at room temperature when you assemble the cake. If it's too cold, the layers won't stick properly. If it's too warm, it might melt into the cake. Aim for a consistency that's soft enough to spread but holds its shape when piped.
⏰ Step 4: Cool and Assemble the Cake
Remove the cakes from the oven and let them cool in the pans for 10 minutes. Then transfer them to a wire rack to cool completely. This gradual cooling prevents cracking and ensures even layers. Once fully cooled, level the tops if needed using a serrated knife. Place one cake layer on a serving plate and spread half of the vanilla buttercream evenly over the top.
Place the second cake layer on top of the buttercream and press down gently. Spread the remaining buttercream over the top and sides of the cake, creating a smooth finish. For a polished look, use a spatula to smooth the buttercream and create clean edges. Chill the cake in the refrigerator for 30 minutes before slicing to help the layers hold together.
🍽️ Step 5: Serve and Enjoy
Slice the cake into 12 even servings using a sharp knife dipped in hot water and wiped clean between cuts. This ensures clean slices every time. The cake should be rich, moist, and full of chocolate flavor with pockets of creamy vanilla buttercream throughout. Serve at room temperature for the best texture—this cake stays moist for up to 3 days when stored properly in an airtight container.
For an extra touch, dust the top with a light layer of cocoa powder or garnish with fresh berries. The contrast of the dark chocolate cake with the bright buttercream makes this a showstopper for any occasion. Real talk: this cake is so moist that you'll want to save slices for later—it's that good.
Pro Tips For Making All American Chocolate Cake
- MEASURE BUTTER COLD: Take that butter straight from the fridge—no softening, no room-temperature nonsense. The All-American recipe relies on the butter staying firm enough to create pockets of air when creamed with sugar, which gives the cake its signature tender crumb. I used to rush this step, and the cake turned out dense. Trust me, the fridge is your friend here.
- WHISK EGGS ROOM TEMP: Crack those eggs into a separate bowl first, then let them sit for 10 minutes before adding them to the batter. Cold eggs can cause the butter mixture to seize up, and you’ll end up with a lumpy, uneven batter. I learned this the hard way after scraping a bowl full of stubborn clumps out of my mixer.
- DON’T OVERMIX THE DRYS: Once you fold in the flour mixture, stop as soon as it’s just combined—no streaks of flour, but no extra stirring either. Overmixing develops the gluten in the flour, which turns your rich chocolate cake into a tough, dry brick. Two turns with a spatula is all it takes. I know, I know, but trust the process.
- CHECK DONENESS WITH A TOOTHPICK: The cake’s done when a toothpick comes out with moist crumbs, not wet batter. If you pull it out clean too early, the center will sink like a sad pancake. If you wait until it’s bone-dry, it’ll be a chewy, overbaked mess. The middle should spring back when gently pressed—like a well-made mattress. (Yes, I’ve compared cakes to mattresses.)
Flavor customization for this dish
Classic Spice Swaps
For a cozy twist, add ½ tsp cinnamon and ¼ tsp nutmeg to the dry ingredients—this creates a warm, almost spiced-chocolate flavor that pairs beautifully with the vanilla buttercream. I've tested this variation, and it works especially well during fall or winter holidays. For a more sophisticated touch, replace the espresso powder with 1 tbsp instant coffee granules—it intensifies the chocolate without the bitterness. 🌶️
Fudgy or Fluffy?
Want a denser, fudgier texture? Reduce the flour by 0.25 cup and increase the cocoa powder by 0.1 cup. This swap creates a richer, more decadent cake that’s perfect for chocolate lovers. For a lighter, fluffier crumb, fold ½ cup whipped egg whites into the batter just before baking—this adds airiness without compromising moisture. The trade-off? A slightly less dense cake with a cloud-like texture.
Fruit Infusions
Brighten the chocolate with fresh fruit—fold ½ cup mashed raspberries or blueberries into the batter for a tangy contrast. I recommend using frozen berries to avoid excess moisture. For a tropical twist, add 1 tbsp orange zest to the dry ingredients and top with a glaze of powdered sugar and orange juice. The citrus cuts through the richness while adding a vibrant pop of color.
Boozy Enhancements
Elevate the cake with a splash of alcohol—add 2 tbsp bourbon or rum to the buttermilk for depth. For a coffee-chocolate fusion, replace the buttermilk with 1.5 cups cold brew coffee (chilled) mixed with 1 tbsp sugar. This swap deepens the chocolate flavor and adds a subtle bitterness that balances the sweetness. Just ensure the coffee is fully cooled to avoid altering the butter’s texture.
Nutty Crunch Layer
Add texture with a layer of chopped nuts—fold ½ cup toasted pecans or walnuts into the buttercream before assembling. For extra crunch, sprinkle a mix of chopped nuts and flaky sea salt over the top before chilling. This contrast of sweet, salty, and crunchy makes every bite exciting. Pro tip: Toast the nuts in the oven at 350°F for 5-7 minutes until fragrant before adding them to the buttercream.
Seasonal Twists
Summer calls for a lighter touch—swap the buttermilk for Greek yogurt and add 1 tsp lemon zest to the batter. For a winter wonderland version, fold ½ cup white chocolate chips into the batter and top with a dusting of powdered sugar and crushed candy canes. The white chocolate adds a creamy contrast, while the candy cane bits bring festive cheer. 🎄
Nutrition facts
Frequently asked questions
Why does this recipe use buttermilk instead of regular milk?
Buttermilk adds moisture and tenderness to the cake without making it dense. Its slight acidity also helps activate the baking soda for better rise. For a 1:1 swap, mix 1 tbsp vinegar or lemon juice with 1.5 cups milk and let it sit for 5 minutes before using. This creates the same tangy reaction that buttermilk provides.
Can I make this cake without an oven thermometer?
Yes, but test your oven's accuracy first. Many ovens run 25°F hotter or colder than set. For this recipe, if your oven runs hot, reduce the temperature to 340°F and add 2-3 minutes to baking time. Always check for doneness with a toothpick—it should come out with a few moist crumbs, not wet batter.
How do I fix cracks in the cake layers?
Cracks usually happen when cakes cool too quickly. To prevent them, let cakes cool in pans for 10 minutes before removing. If cracks appear, don't worry—they're mostly cosmetic. For assembly, simply fill them with extra buttercream. For next time, try baking at 325°F for 38-40 minutes to slow the rise slightly.
Can I use this recipe for a 6-inch or 8-inch cake?
This recipe is designed for two 9-inch pans, but you can adjust. For a 6-inch cake, divide batter into three pans and bake for 25-30 minutes. For an 8-inch cake, use one pan and bake for 40-45 minutes. Reduce buttercream by 1 cup for smaller cakes or increase by 1 cup for larger ones to maintain proportions.
Why did my buttercream turn grainy?
Grainy buttercream usually means the butter was too warm or the powdered sugar wasn't sifted. Always use room-temperature butter (soft but not melted) and sift powdered sugar before mixing. For extra smoothness, add 1 tsp lemon juice to the buttercream—it helps break down sugar crystals. If it's already grainy, beat in 1 tbsp heavy cream to restore smoothness.