
Desserts
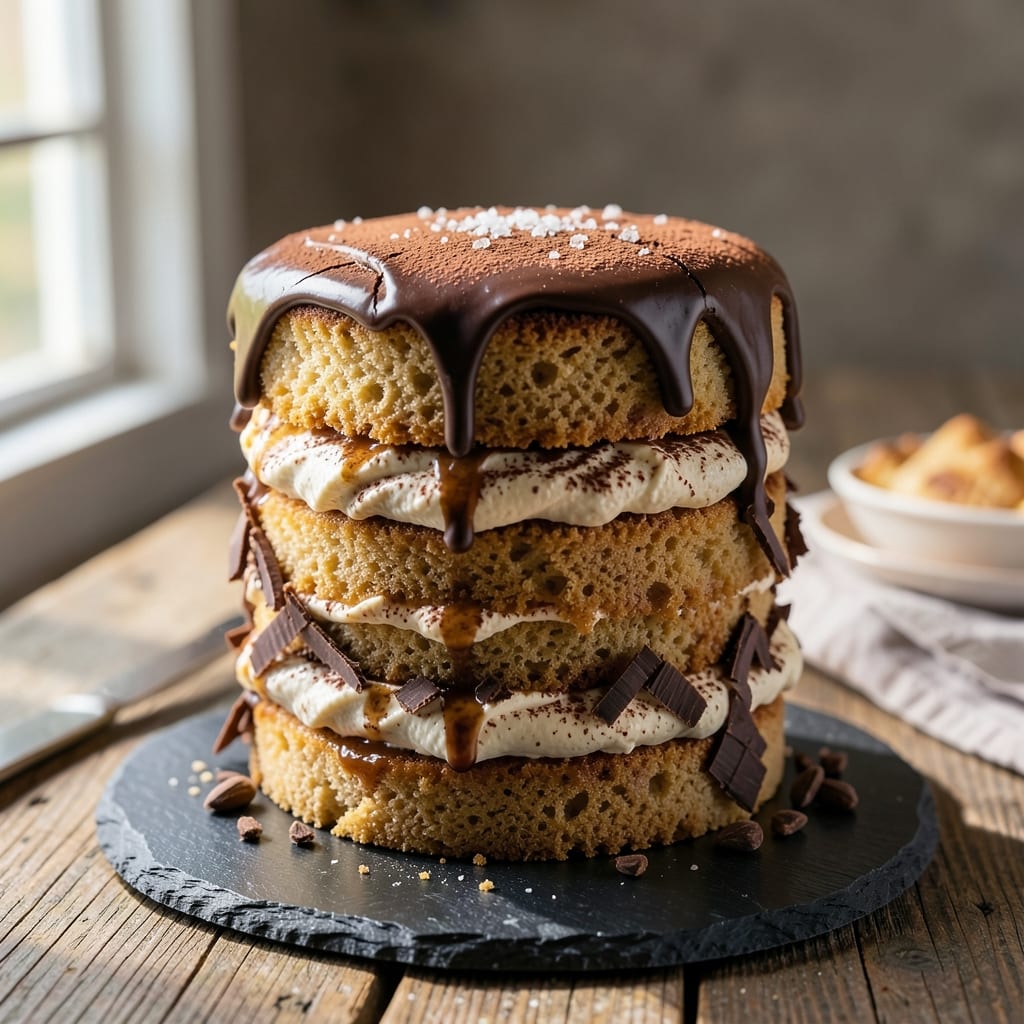
This alcohol-free tiramisu cake delivers all the classic flavors—coffee, mascarpone, and cocoa—without the boozy kick. The secret lies in balancing rich coffee syrup with velvety cream layers, creating a stable, luscious dessert that holds its shape perfectly. I've perfected this recipe after years of testing, ensuring each bite offers the right harmony of bitterness and sweetness while maintaining that signature tiramisu texture.
The foundation starts with a strong coffee syrup—no alcohol needed—simmered just long enough to develop depth without bitterness. Mascarpone cream, whipped to light, airy perfection, forms the creamy layers that keep the cake tender yet sturdy. The key to stability? Chilling time—each layer must set properly to prevent collapsing, even without alcohol's binding effect.
What you'll end up with is a moist, layered cake with crisp cocoa dusting between each velvety mascarpone layer. The coffee flavor shines through without overpowering, and the texture stays firm yet creamy—no soggy bottoms here. This version proves alcohol-free desserts can be just as indulgent, with every element working in perfect balance.
Perfect for coffee lovers who want to skip the alcohol but not the flavor, this cake keeps beautifully for 3 days in the fridge. Serve with a dusting of cocoa or a sprinkle of cinnamon for extra warmth. Let's build this dessert step by step.
Ingredients for alcohol free tiramisu cake
Coffee-infused syrup, velvety mascarpone layers, and precise cocoa dusting create this sophisticated alcohol-free tiramisu cake.
| Ingredient | Amount | Notes |
|---|---|---|
| Strong Brewed Coffee ☕ | 2 cups | Cold or room temperature preferred |
| Granulated Sugar 🍚 | 1 ½ cups | For coffee syrup |
| Unsweetened Cocoa Powder 🍫 | ½ cup | Dutch-processed for smoother flavor |
| Large Eggs 🥚 | 4 whole | Room temperature for best whipping |
| Granulated Sugar 🍚 | 1 cup | For meringue base |
| Mascarpone Cheese 🧀 | 16 oz | Full-fat for maximum creaminess |
| Heavy Whipping Cream 🥛 | 1 ½ cups | Cold for optimal whipping |
| Vanilla Extract 🌿 | 1 tbsp | Pure Madagascar preferred |
| All-Purpose Flour 🌾 | ¼ cup | Sifted for smooth layers |
| Unsalted Butter 🧈 | ½ cup | Softened for easy mixing |
| L Ladyfingers 🍞 | 16 whole | Store-bought or homemade |
| Powdered Sugar 🍚 | ½ cup | For final dusting |
| Dark Chocolate Chips 🍫 | ¼ cup | Optional garnish |
| Cinnamon 🌿 | ½ tsp | Ground for garnish |
The coffee syrup is where this dessert's depth begins. Use high-quality ground coffee—Starbucks or Peet's work well—and brew it strong. The sugar should dissolve completely without caramelizing, so simmer gently for about 10 minutes. Dutch-processed cocoa powder adds a subtle richness without bitterness. For the ladyfingers, look for the classic Italian-style with a tender crumb—Bimbo or Barilla brands are reliable. If making from scratch, ensure they're completely dry to prevent a soggy cake. The eggs must be at room temperature for the meringue to whip properly, so plan ahead if your kitchen is chilly.
No mascarpone on hand? Substitute with a blend of cream cheese and heavy cream—mix equal parts for a similar texture. The heavy whipping cream should be cold before whipping to achieve stiff peaks. For an extra layer of flavor, infuse the cream with a vanilla bean while chilling. If you prefer a less sweet cake, reduce the granulated sugar in the meringue by 2 tablespoons. The cocoa powder can be swapped for hot cocoa mix in a pinch, though the flavor won't be as refined. For a gluten-free version, replace the all-purpose flour with a 1:1 gluten-free blend, ensuring it's sifted thoroughly to avoid lumps.
This cake requires patience—each layer must set for at least 30 minutes before adding the next. For best results, assemble the cake in the evening and refrigerate overnight. The final cocoa dusting should be sifted gently to avoid clumping. Store in an airtight container with parchment paper between layers for up to 5 days in the fridge. To serve, dust generously with powdered sugar and a sprinkle of cinnamon. The cake holds its shape beautifully at room temperature for 2 hours, making it perfect for room-temperature serving during gatherings.
Why You'll Love This Recipe
- Same recipe, different vibes: serve it with espresso for a fancy dessert or skip the fancyware for a "I made this on a Tuesday" win. The eggs and sugar keep it budget-friendly too.
- No Fuss Layers: I swear by the "soak the ladyfingers in coffee while you whip the custard" trick—it cuts prep time in half. No waiting around for alcohol to evaporate, just layer and chill.
- Coffee-Cocoa Magic: That first bite? Rich, velvety custard with a whisper of cocoa and deep coffee punch—no alcohol means the flavors shine clean. Honestly, my coffee-loving friends ask for seconds without hesitation.
- Weeknight or Celebration: Same recipe, different vibes: serve it with espresso for a fancy dessert or skip the fancyware for a "I made this on a Tuesday" win. The eggs and sugar keep it budget-friendly too.
Step-by-step instructions for alcohol-free tiramisu cake
Here's the method to create a rich, layered dessert with coffee depth and creamy texture—no alcohol required.
Prepare the Coffee Syrup
In a medium saucepan, combine the 2 cups strong brewed coffee and 1.5 cups granulated sugar designated for the syrup. Bring to a gentle boil over medium-high heat, stirring until the sugar fully dissolves. Reduce heat to medium-low and simmer for 5-7 minutes until slightly thickened and aromatic. The syrup should coat the back of a spoon but remain pourable.
Remove from heat and stir in the 0.5 cup unsweetened cocoa powder until completely dissolved. Let cool to room temperature before using—this prevents the ladyfingers from becoming soggy. The syrup should have a deep, robust coffee flavor with no graininess. If you prefer a smoother texture, strain through a fine-mesh sieve before proceeding.
Create the Meringue Base
In a separate large bowl, beat the 4 whole large eggs at room temperature with the 1 cup granulated sugar designated for the meringue using an electric mixer on medium-high speed for 3-4 minutes. The mixture should become pale, thick, and form stiff peaks when the beaters are lifted. This step is critical for achieving the light, airy texture that defines tiramisu.
Gradually add the 16 oz mascarpone cheese to the meringue mixture, mixing on low speed until fully incorporated. Scrape down the sides of the bowl as needed to ensure even blending. Fold in the 1 tbsp vanilla extract and 0.25 cup all-purpose flour using a spatula, being careful not to deflate the meringue. The final mixture should be smooth and hold its shape when spooned—this ensures proper layering.
Whip the Cream and Assemble Layers
In a chilled bowl, whip the 1.5 cups heavy whipping cream (cold) to soft peaks using an electric mixer. Fold one-third of the whipped cream into the mascarpone mixture to lighten it, then gently fold in the remaining cream until fully combined. This step creates the signature creamy texture while maintaining aeration.
Dip each of the 16 whole L ladyfingers quickly into the cooled coffee syrup, allowing excess to drip off. Arrange half of the soaked ladyfingers in the bottom of a 9x13-inch baking dish, slightly overlapping. Spread half of the mascarpone mixture evenly over the ladyfingers, then repeat with the remaining layers. Press down gently to ensure even distribution—this prevents shifting during chilling.
Chill and Finish
Cover the assembled cake with plastic wrap and refrigerate for at least 4 hours, or preferably overnight. Chilling allows the flavors to meld and the layers to set properly. For a firmer texture, you can freeze for 1 hour before serving, though this may slightly alter the traditional tiramisu mouthfeel.
Before serving, dust the top generously with 0.5 cup powdered sugar using a fine-mesh sieve. Sprinkle with 0.25 cup dark chocolate chips and 0.5 tsp cinnamon for visual appeal and added flavor contrast. Serve chilled, cutting into squares for neat portions. The cake should have distinct layers of moist ladyfingers, rich mascarpone cream, and aromatic coffee syrup—each bite delivering balanced sweetness and depth.
Pro Tips For Making Alcohol Free Tiramisu Cake
- Whisk Eggs to Ribbon Stage: Stop when the mixture holds a soft ribbon—about 3-4 seconds before it gets stiff. Over-whisking turns your custard into meringue, and that’s a texture disaster. I learned this the hard way when my first attempt tasted like dry cake instead of creamy heaven. ---
- Chill Coffee Before Soaking: Use room-temperature coffee—never hot—so the ladyfingers don’t turn to mush. Cold coffee soaks too fast, and hot coffee steams them into a sad, soggy pulp. Trust me, your layers will thank you. ---
- Sift the Cocoa Powder: Skip the clumps—sift that cocoa powder before mixing it into the custard. Lumpy cocoa makes your tiramisu look like it was made by someone who gave up halfway. A fine layer = professional results. ---
- Layer Fast, Press Light: Work quickly when assembling—dampen the ladyfingers just enough to stick, then press gently. Too much moisture = a soggy bottom; too little = crumbly layers. A light hand keeps the structure intact. (Yes, even if you’re impatient like me.)
Perfect pairings for this alcohol free tiramisu cake
Coffee-Inspired Drinks
Pair this alcohol-free tiramisu with a cold brew concentrate—mix 2 tbsp concentrate with 8 oz cold milk for a smooth, rich sip. I love adding ½ tsp vanilla syrup for extra depth. For a non-caffeinated option, try chicory root coffee—its nutty notes complement the cake beautifully. 🌿
Spiced Tea Pairings
Warm chai tea with cinnamon and cardamom enhances the cake’s flavors. Brew 1 chai tea bag in 8 oz hot water, then add 1 tsp honey for sweetness. The spices mirror the cake’s cinnamon garnish and balance the coffee’s bitterness.
Creamy Dessert Wines
Skip the alcohol but still enjoy a sparkling grape juice like Martinelli’s—its effervescence cleanses the palate between bites. For a boozy alternative, a demi-sec like Château d’Yquem (if you’re indulging) pairs perfectly with traditional tiramisu.
Chocolate Dippers
Serve with dark chocolate squares (70% cocoa) for dipping—melt 2 oz chocolate with 1 tbsp coconut oil for a silky dip. The chocolate’s bitterness contrasts the cake’s sweetness, creating a harmonious finish. 🍫
Citrus Zest Garnishes
Add a lemon or orange twist to drinks or garnish the cake with zest. The bright acidity cuts through the richness, making each bite feel fresh. I love a sprinkle of orange zest on the powdered sugar for a citrusy pop. ✨
Nutrition facts
Frequently asked questions
Can I make this alcohol-free tiramisu cake without ladyfingers?
For a gluten-free version, use sponge cake layers or angel food cake cut into strips. If you prefer a cookie base, try digestive biscuits or graham crackers—just soak them in the coffee syrup for 10-15 seconds to avoid sogginess. The texture will differ slightly but still deliver rich flavors.
Why does my mascarpone cream turn grainy?
Graininess usually happens when the mascarpone isn't at room temperature or the meringue isn't fully whipped. Always use room-temperature eggs and mascarpone and whip the meringue to stiff peaks before folding in the cheese. If it still happens, strain the mixture through a fine-mesh sieve to remove any lumps.
How do I prevent the cake from collapsing?
The key is proper chilling time—never skip the 4+ hour refrigeration! Use an 8x8-inch baking dish for taller layers, and press each layer gently with a spoon to compact the cream. Avoid overmixing the cream or meringue, which can deflate the structure. If it starts collapsing, freeze for 1 hour before serving.
Can I make this ahead of time?
This cake actually improves overnight! Assemble it up to 2 days in advance and store covered in the fridge. The flavors meld beautifully, and the layers hold their shape perfectly. For serving, let it sit at room temperature for 30 minutes to soften slightly before slicing.
What's the best way to reheat slices?
This cake is best served chilled, but if you prefer warm slices, microwave individual portions for 10-15 seconds on 50% power. For a gentler approach, place the slice on a baking sheet and warm in a 250°F oven for 5-7 minutes. The cream will soften slightly while keeping the ladyfingers intact.