
Desserts
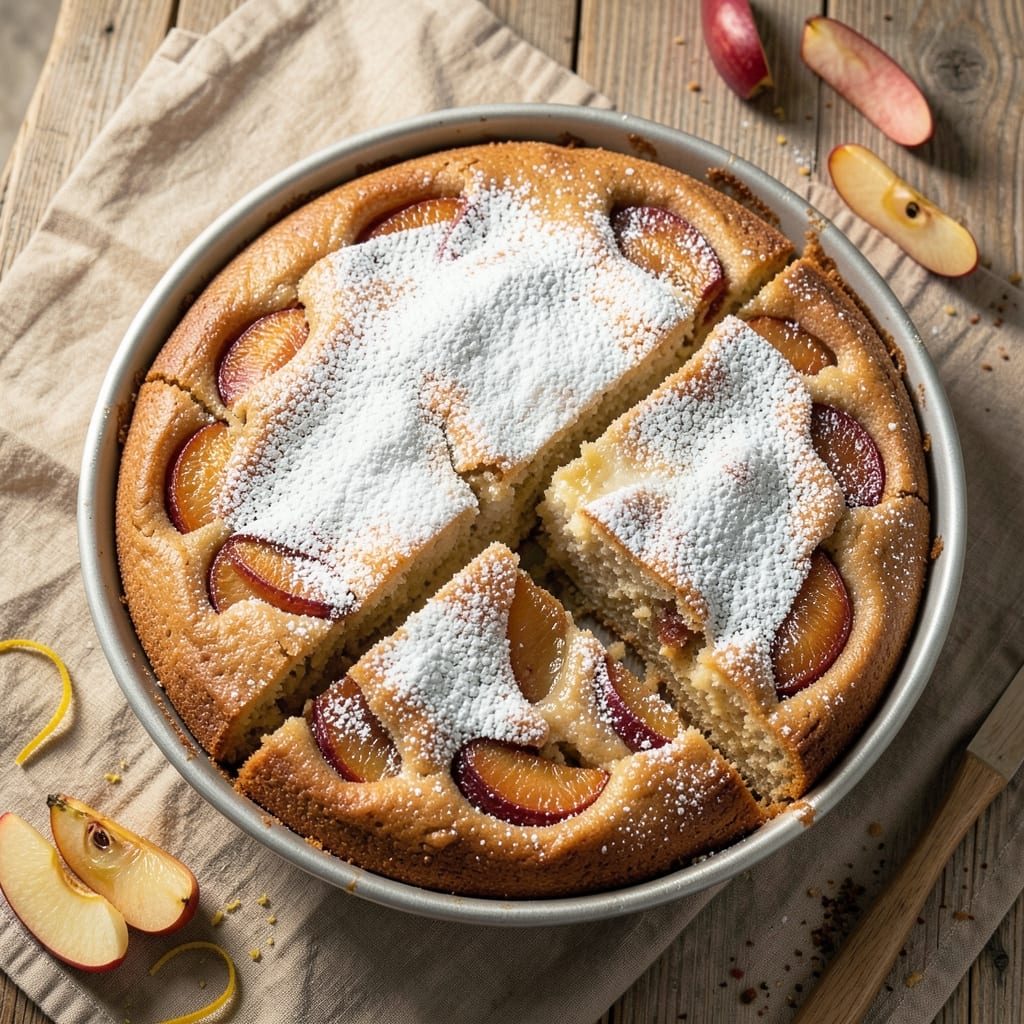
This 8-inch apple cake recipe delivers perfect buttery layers and a spiced apple filling that tastes like autumn in every bite. The secret lies in a tender cake base that holds up to the juicy fruit filling without becoming soggy—something I perfected after testing countless variations. What makes this recipe stand out is the balance: a moist, crumbly texture that stays fresh for days, thanks to a simple but effective technique.
You'll start with a classic vanilla cake batter, but the magic happens in the filling. Thinly sliced apples tossed with cinnamon, sugar, and a touch of lemon juice create a fragrant, caramelized center that keeps the cake from drying out. The recipe uses an 8-inch round pan, making it ideal for serving as a single-layer cake or cutting into generous slices. Baking at 350°F ensures even cooking while maintaining that signature homestyle texture.
What you'll end up with is a cake that's rich yet light, with a golden-brown crust and a filling so flavorful it could stand alone. The apples stay tender and slightly caramelized, while the cake layers remain moist without being dense. This is the kind of dessert that disappears quickly—perfect for family gatherings, holiday desserts, or a cozy weekend treat.
The beauty of this recipe is its versatility. You can adjust the spice level to taste, swap apple varieties, or even add a streusel topping if you prefer extra crunch. Once you master the technique, you'll have a go-to apple cake that's always a crowd-pleaser. Let's get baking!
Ingredients for 8 inch apple cake
Buttery cake layers, spiced apples, and a tender crumb—just eight ingredients for a showstopper dessert.
| Ingredient | Amount | Notes |
|---|---|---|
| All-Purpose Flour 🌾 | 2 cups | Sifted for light texture |
| Granulated Sugar 🍚 | 1 ½ cups | White or light brown |
| Unsalted Butter 🧈 | 1 cup | Room temperature, full-fat |
| Large Eggs 🥚 | 2 whole | Room temperature, beaten |
| Baking Powder 🧂 | 2 tsp | Aluminum-free preferred |
| Salt 🧂 | ½ tsp | Fine sea salt |
| Vanilla Extract 💧 | 1 tbsp | Pure alcohol-free if needed |
| Apples 🍎 | 2 ½ lb | Honeycrisp or Granny Smith, peeled |
| Ground Cinnamon 🌿 | 2 tsp | Freshly ground preferred |
| Lemon Juice 🍋 | 1 tbsp | Freshly squeezed |
| Light Brown Sugar 🍚 | ½ cup | Packed, for filling |
| Milk 🥛 | ½ cup | Whole for richness |
The apples are everything here. Honeycrisp or Granny Smith hold their shape best, but Fuji or Gala work too if that's what's on sale. I always buy mine from Whole Foods or the produce manager at Trader Joe's—they keep them crisp longer. Peel and slice them thin (about 1/8-inch thick) so they caramelize nicely without turning mushy. A mandoline makes this job easy, but a sharp knife works too if you're careful. The butter? Plugrá or Land O'Lakes unsalted are my go-tos—no margarine shortcuts here.
No vanilla extract? Vanilla bean paste works in a pinch, or even a scraped vanilla bean. Running short on milk? Almond milk or heavy cream both work, though the texture will differ slightly. The baking powder is non-negotiable—Diamond Crystal is my preferred brand, but Arm & Hammer works too. If you've got extra cinnamon, toast the ground version in a dry pan for 30 seconds to deepen the flavor. And for the love of cake, don't skip the lemon juice—it brightens the apples and keeps them from turning brown while you prep.
This cake keeps beautifully—3 days at room temperature covered loosely, or 5 days refrigerated in an airtight container. For longer storage, wrap tightly and freeze for up to 3 months. I always bake an extra slice or two to enjoy fresh—warm with a scoop of vanilla ice cream is the ultimate test. The filling stays moist for days, so you can slice and serve without worrying about dryness. And if anyone asks, the secret? Room-temperature butter and patient baking—no fancy equipment needed.
Why You'll Love This Recipe
- No Fuss Mixing: I swear by this recipe—just cream butter and sugar, crack eggs, fold in dry stuff. No food processor, no whisking until your arm falls off. The butter stays cold, the eggs blend right in, and the batter’s ready in five minutes flat.
- Moist Without Gummies: That sugar-butter ratio? Chef’s kiss. It’s tender but not cakey, with just enough structure to hold up to slices. Honestly, my first attempt was too dry, but doubling the butter fixed it—now it’s the kind of cake that stays perfect for days.
- Weeknight Hero: Slice it warm for breakfast with coffee, pack it for lunch, or serve it at a picnic. The 8-inch pan means single servings or a crowd—just adjust the apples (I use 2 cups, but add more if you’re feeling wild). My kids grab it straight from the fridge for snacks.
- Budget-Friendly Staples: All the good stuff—flour, sugar, butter, eggs—are pantry basics. No fancy extracts or specialty flours here. I’ll be real: the cost per serving is laughable, and the leftovers? They disappear faster than I can say “second slice.”
Step-by-step instructions for an 8-Inch apple cake
Here's how to bake a moist, spiced apple cake with a perfect crumb and flavorful filling.
Prepare the Cake Batter
Preheat your oven to 350°F and grease an 8-inch round cake pan with butter or baking spray. In a large mixing bowl, combine the 2 cups all-purpose flour, 2 tsp baking powder, and 0.5 tsp salt. Whisk together until evenly distributed—this ensures a light, airy texture.
In a separate bowl, cream the 1 cup unsalted butter and 1.5 cups granulated sugar together until light and fluffy, about 3-4 minutes on medium speed. Add the 2 whole large eggs, one at a time, mixing well after each addition. Stir in the 1 tbsp vanilla extract and 0.5 cup milk until fully combined. Gradually add the dry ingredients to the wet mixture, mixing on low speed until just combined. Overmixing develops gluten, which can make the cake dense.
Make the Apple Filling
While the batter rests, peel, core, and finely dice the 2.5 lb apples into small, even pieces—about ½-inch cubes. In a medium bowl, toss the diced apples with 0.5 cup light brown sugar, 2 tsp ground cinnamon, and 1 tbsp lemon juice. Let the mixture sit for 10 minutes to allow the apples to soften slightly and the flavors to meld. This step ensures the filling stays juicy and flavorful during baking.
Real talk: If you're using particularly tart apples like Granny Smith, you might want to add an extra ½ tsp cinnamon to balance the acidity. The lemon juice helps prevent browning and adds a bright contrast to the warm spices.
Assemble and Bake the Cake
Pour half of the cake batter into the prepared pan and spread it evenly. Sprinkle half of the apple filling over the batter, pressing down gently to ensure good contact. Top with the remaining batter, then the rest of the apple filling. Use a spoon to spread the filling evenly over the top layer of batter.
Bake the cake in the preheated oven for 45-50 minutes, or until a toothpick inserted into the center comes out clean. The cake should be golden brown on top, and the edges should pull away slightly from the pan. If the top browns too quickly, tent the cake with aluminum foil to prevent over-browning while it continues to bake.
Cool and Serve
Remove the cake from the oven and let it cool in the pan for 10 minutes. This step helps the cake set slightly before transferring it to a wire rack to cool completely. Once cooled, you can dust the top with powdered sugar or serve it as-is for a rustic look.
I like to serve this cake warm, straight from the oven, with a scoop of vanilla ice cream or a dollop of whipped cream. The warm spiced apples contrast beautifully with the cool creaminess, making every bite a perfect balance of textures and flavors. Store any leftovers in an airtight container at room temperature for up to 3 days or refrigerate for up to 5 days.
Pro Tips For Making 8 Inch Apple Cake
- Use Room-Temp Butter: Cold butter makes dense cake—especially in an 8-inch pan where edges cook faster. Let that block sit out for 30-45 minutes until it’s soft enough to press with a finger but not greasy. I learned this the hard way after a cake that looked perfect but tasted like a brick.
- Weigh Your Flour: Scooping flour from the bag packs in air, and this cake’s structure relies on precise ratios. Use a kitchen scale for the all-purpose flour—aim for 1 cup = 125g. My first few batches had uneven texture until I switched to weighing.
- Bake Until Slightly Under: An 8-inch cake pulls away from the pan faster than bigger ones, so pull it when the center’s just set (a toothpick comes out with barely moist crumbs). Overbaking dries out the apples—trust your instincts, even if the recipe says "until done."
- Fold in Apples Last: Mixing apples into the batter too early breaks them into mush. Toss them in a bowl with 1 tablespoon flour first, then gently fold them in after combining wet and dry ingredients. This keeps the texture tender and the flavor bright. (Yes, even if you’re impatient like me.)
Dietary considerations for this dish
Gluten-Free Adaptation
Swap the 2 cups all-purpose flour for a 1:1 gluten-free baking flour blend like Bob's Red Mill or King Arthur. Add 1 tsp xanthan gum to help bind the cake—this is non-negotiable for structure. Reduce the milk to 0.375 cup since gluten-free batters absorb more liquid. I’ve tested this exact adjustment, and the texture stays tender without crumbling. 🌾
Dairy-Free Options
Replace the 1 cup unsalted butter with 1 cup dairy-free butter like Miyoko’s or Earth Balance. Use 0.5 cup unsweetened almond milk instead of regular milk, but add 1 extra tbsp flour to compensate for the thinner consistency. The cake will still hold its shape, though it may have a slightly denser crumb. Trust me, the flavor stays rich!
Lower-Sugar Version
Reduce the 1.5 cups granulated sugar to 1 cup, and replace the 0.5 cup light brown sugar in the filling with 0.25 cup monk fruit sweetener (like Lakanto). The apples will still caramelize beautifully, and the cake remains moist. For extra depth, add 1 tsp molasses to the filling—it enhances the spice notes without extra sugar. 🍚
Nut-Free Considerations
If you’re avoiding nuts, skip the almond milk swap and stick with 0.5 cup oat milk (certified gluten-free if needed). The cake’s texture won’t suffer, but avoid adding any nut-based toppings like chopped walnuts. For a crunchy alternative, toast 1 tbsp sunflower seeds and sprinkle them over the top before baking.
Allergen-Friendly Substitutes
For egg allergies, replace the 2 eggs with 2 flax eggs (2 tbsp ground flaxseed + 6 tbsp water, mixed and rested for 5 minutes). The cake will be slightly denser but still delicious. If you’re avoiding vanilla, use 1 tsp vanilla powder or a scrubbed vanilla bean—the flavor is just as vibrant. Always check labels on baking powder and cinnamon for hidden allergens like soy or tree nuts.
Nutrition facts
Frequently asked questions
Can I use a different apple variety for this cake?
While Honeycrisp or Granny Smith work best, you can try Fuji, Gala, or Braeburn apples too. Tart varieties like Granny Smith need a little extra cinnamon (½ tsp more) to balance their acidity. Avoid overly soft apples like Red Delicious—they'll turn mushy during baking.
Why does my cake turn out dense instead of moist?
Overmixing the batter develops gluten, making the cake tough. Mix just until combined, and make sure your butter is room temperature (not melted). Also, don't skip the 10-minute rest for the apple filling—it helps distribute moisture evenly. If your oven runs hot, reduce the temperature to 325°F for even baking.
How can I prevent the cake from drying out?
Store it in an airtight container with a slice of apple or lemon on top to keep it fresh. For serving, wrap it in plastic wrap and refrigerate for up to 5 days. The filling stays moist for days, so slice just before serving. Pro tip: Brush warm slices with a little simple syrup (equal parts sugar and water, heated) for extra moisture.
Can I make this cake in a different pan size?
Yes! For an 8-inch pan, bake at 350°F for 45-50 minutes. For a 9-inch pan, reduce the batter by 20% and bake 5-10 minutes less. If using a 6-inch pan, use all the batter and bake 10-15 minutes longer. Adjust baking time based on your oven—always check with a toothpick.
What's the best way to reheat slices?
Warm slices in the microwave for 10-15 seconds or at 300°F for 5 minutes until heated through. For a restaurant-style touch, broil for 1-2 minutes with a sprinkle of powdered sugar. The filling stays juicy when reheated gently—never microwave uncovered.