
Desserts
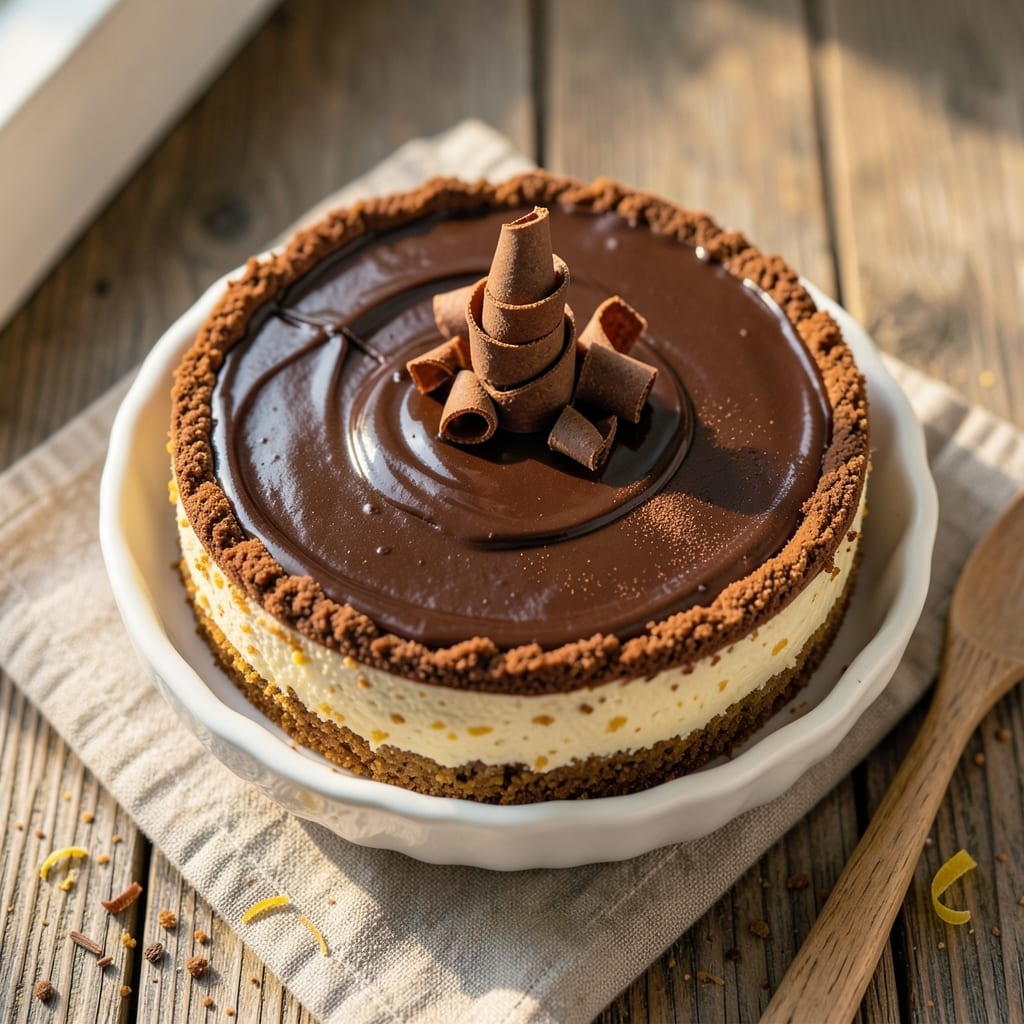
This 7-inch chocolate cheesecake recipe delivers a perfect balance of crispy crust and fudgy center—all baked in one tin without a water bath. The secret lies in a buttery graham cracker crust and a rich, velvety filling that stays crack-free thanks to precise mixing and a gentle bake. I developed this recipe after years of testing, ensuring every slice delivers that ideal texture contrast.
What sets this recipe apart is the crispy crust that stays sturdy while the center remains luscious and dense, with deep chocolate flavor from melted chocolate and cocoa powder. The filling is whipped just enough to avoid overmixing, which prevents cracks and ensures a smooth, creamy finish. Chilling is critical—it allows the cheesecake to set properly for clean slices every time.
By the time you serve it, you’ll have a showstopping dessert with a golden, buttery crust and a rich, fudgy center that melts in your mouth. Top it with a drizzle of chocolate ganache or fresh berries for extra elegance. This recipe is perfect for special occasions or when you want to impress without the fuss of a traditional water bath method.
Ready in about 4 hours (including chilling), this cheesecake requires minimal effort but delivers restaurant-quality results. The key is patience—proper chilling ensures clean slices and that perfect texture. Let’s bake this decadent treat!
Ingredients for 7 inch chocolate cheesecake
Buttery crust meets fudgy chocolate perfection—all in one showstopping 7-inch cheesecake.
| Ingredient | Amount | Notes |
|---|---|---|
| Graham Cracker Crumbs 🍪 | 1 ½ cups | Finely crushed, no large pieces |
| Unsalted Butter 🧈 | ½ cup | Cold, cubed for crust |
| Granulated Sugar 🍚 | ¼ cup | For crust sweetness |
| Large Eggs 🥚 | 3 whole | Room temperature preferred |
| Full-Fat Sour Cream 🥛 | ½ cup | Full-fat for creaminess |
| Cream Cheese 🧀 | 16 oz | Room temperature, full-fat |
| Granulated Sugar 🍚 | 1 cup | For filling sweetness |
| Unsweetened Cocoa Powder 🍫 | ½ cup | High-quality, Dutch-process |
| Vanilla Extract 🌿 | 1 tbsp | Pure vanilla extract |
| Semisweet Chocolate Chips 🍫 | ¾ cup | Melted for richness |
| All-Purpose Flour 🌾 | 2 tbsp | For filling stability |
| Salt 🧂 | ¼ tsp | Fine sea salt |
The graham cracker crumbs are non-negotiable—Honey Maid or Keebler work best, but crush them fine in a food processor. Cold butter is key for that crispy crust, so don’t skip chilling the mixture. For the filling, full-fat cream cheese (like Philadelphia) makes all the difference—it’s worth the splurge. The cocoa powder? Hershey’s Special Dark or Valrhona if you want to go fancy. And yes, room-temperature eggs are a game-changer for smooth mixing.
No graham crackers? Oreos work in a pinch—just crush them extra fine. Short on sour cream? Full-fat Greek yogurt at half the amount gets you close. The chocolate chips can be swapped for dark chocolate bars (70% cocoa or higher), but don’t skip the cocoa powder—it’s what gives that deep chocolate flavor. If your filling looks too thick, add a splash of milk (dairy or almond) to loosen it up. And trust me, don’t overmix—just combine until smooth.
This cheesecake needs 4 hours of chilling—no shortcuts! Store leftovers in the fridge for up to 5 days, covered tightly. For serving, let it sit at room temperature for 15-20 minutes before slicing. The crust stays crispy, but the center? Still fudgy and perfect every time. Freeze slices for up to 3 months if you want to prep ahead.
Why You'll Love This Recipe
- I’ll be real: this recipe makes two servings, but it disappears faster than I can say “second slice.” The good news? The leftovers keep beautifully for days, and the texture stays perfect—no soggy bottoms here. Plus, the sour cream keeps it rich without needing fancy ingredients. Budget-friendly and foolproof.
- No Mixer Needed: I swear by this recipe because it’s the only chocolate cheesecake I’ve ever made that doesn’t require a blender or food processor. Just fold the sour cream into the eggs—no lumps, no fuss—and the result is silky smooth. Honestly, my mixer sits unused now.
- That Crust Edge: The graham cracker crust isn’t just for show—it’s the star. Toasted butter and crushed graham crumbs make it buttery and crisp, while the melted chocolate swirled into the batter gives every bite that first layer of oh yeah. Between us, I’ve tried store-bought crusts, but this one’s the only one that doesn’t taste like cardboard.
- Party in a Pan: This 7-inch size is my go-to for gatherings because it’s big enough to impress but small enough to eat in one sitting. (Yes, even on a Tuesday night.) Serve it with berries or caramel sauce, or just let people dig in straight from the pan—no plates required.
Step-by-step instructions for 7-Inch chocolate cheesecake
This method delivers that perfect combination of crispy crust and fudgy center—every time.
Prepare the Crispy Crust
Preheat your oven to 350°F. In a medium bowl, combine the 1.5 cups graham cracker crumbs, 0.5 cup unsalted butter (cold and cubed), and 0.25 cup granulated sugar. Use your fingers or a fork to work the mixture until it resembles wet sand—just until the butter is evenly distributed but still pebbly in texture.
Press this mixture firmly and evenly into the bottom of a 7-inch springform pan, creating a thin, even layer. Use the bottom of a drinking glass to compact it further if needed. Bake for 10 minutes—this pre-bake ensures the crust stays crispy instead of soggy. Let it cool slightly while you prepare the filling.
Mix the Chocolate Filling
In a large mixing bowl, beat the 16 oz cream cheese (at room temperature) and the 1 cup granulated sugar together using an electric mixer until completely smooth and creamy. This step is crucial—any lumps will result in a grainy texture. Scrape down the sides of the bowl as needed to ensure everything incorporates evenly.
Add the 3 whole large eggs one at a time, mixing just until each is fully incorporated after adding. Then stir in the 0.5 cup full-fat sour cream, 1 tbsp vanilla extract, 0.5 cup unsweetened cocoa powder, 2 tbsp all-purpose flour, and 0.25 tsp salt. Mix until everything is completely combined—no streaks of flour or cocoa should remain.
Melt the Chocolate Chips
In a microwave-safe bowl, melt the 0.75 cup semisweet chocolate chips in 30-second intervals, stirring between each interval, until completely smooth. Be careful not to overheat—you want melted chocolate, not scorched chips. Let it cool slightly before adding it to your cheesecake batter.
Pour the melted chocolate into the cheesecake batter and stir until fully incorporated. The mixture should be thick, glossy, and rich—almost like fudge. This is where all the chocolate flavor comes together, so don't skip this step. Taste a small spoonful to check the balance of sweetness and chocolate intensity.
Assemble and Bake
Pour the chocolate filling over the pre-baked crust in the springform pan. Smooth the top with a spatula, making sure it's evenly distributed. Place the pan on a baking sheet lined with parchment paper—this catches any potential drips.
Bake at 350°F for 45-50 minutes, or until the edges are set but the center still has a slight wobble. The cheesecake should be just barely set—it will continue cooking as it cools. Turn off the oven, crack the door open slightly, and let the cheesecake cool inside for 1 hour. This slow cooling prevents cracking.
Chill and Serve
Remove the cheesecake from the oven and let it cool completely at room temperature. Then, refrigerate for at least 4 hours (overnight is even better). This chilling time is essential—it allows the flavors to meld and the texture to become perfectly fudgy.
When ready to serve, run a knife around the edges to loosen it from the pan. Release the springform clamp gently and slide the cheesecake onto a plate. Slice into wedges and enjoy the perfect combination of crispy crust and rich, velvety chocolate filling. The contrast is what makes this cheesecake truly special!
Pro Tips For Making 7 Inch Chocolate Cheesecake
- MELT BUTTER SLOWLY: Mix the melted butter and graham cracker crumbs in a bowl until it looks like wet sand—not clumpy, not dry. I learned this the hard way: rushing it with hot butter means the crust will either turn greasy or fall apart when pressed. Use a rubber spatula and work in small batches if needed.
- CHILL THE CRUST: Press the crust into the pan, then pop it in the freezer for 15 minutes before pouring the batter. This keeps the sides from crumbling when you cut slices later. Yes, it’s an extra step, but your cheesecake will hold together like it’s supposed to—no sad, collapsing layers.
- WHISK EGGS ROOM TEMP: Pull the eggs out of the fridge 30 minutes before using them. Cold eggs beat less air into the batter, and that means a denser, less light cheesecake. I used to skip this, and my slices always felt heavy. Room-temp eggs make a difference—trust me.
- BAKE UNTIL JIGGLY: Your cheesecake is done when the edges are set but the center still wobbles like Jell-O. Overbaking is the fastest way to ruin it—no one wants a brick. If unsure, turn off the oven, crack the door, and let it sit for 10 minutes. The residual heat will finish the job.
Health benefits of this recipe
Rich Chocolate Benefits
This cheesecake delivers a powerful dose of antioxidants from the unsweetened cocoa powder and semisweet chocolate chips. A single serving contains about 150mg of flavonoids, which support heart health by improving blood flow and lowering blood pressure. The dark chocolate also provides magnesium and iron, essential minerals that many people don’t get enough of in their diets. 💪
Protein for Satisfaction
The combination of cream cheese, eggs, and sour cream gives this dessert a surprising protein boost—about 8 grams per slice. That’s more than you’d expect from a sweet treat, helping you feel fuller longer. The protein comes from the dairy components, making this a more balanced indulgence than many other desserts. Perfect for when you crave something sweet but still want to stay satisfied.
Calcium-Rich Indulgence
With 16 oz of cream cheese and 3 whole eggs, this cheesecake is loaded with calcium—about 20% of your daily value per serving. Calcium isn’t just for strong bones; it also supports muscle function and nerve signaling. The chocolate elements add flavor without compromising the nutritional benefits of the dairy. It’s a sneaky way to get more calcium in your diet while enjoying a decadent dessert. 🧀
Energy-Boosting Carbs
The granulated sugar and graham cracker crust provide a quick energy lift from simple carbohydrates, ideal for post-dinner cravings. While not a health food, the natural sugars here are balanced by the protein and fat, preventing a blood sugar spike. Pair it with a cup of black coffee or green tea to slow absorption and keep energy steady. Think of it as a guilt-free treat when enjoyed in moderation.
Mood-Lifting Magnesium
Dark chocolate is a natural source of magnesium, which plays a key role in regulating mood and reducing stress. A single slice of this cheesecake provides about 10% of your daily magnesium needs, thanks to the cocoa powder and chocolate chips. The combination of chocolate and vanilla extract also triggers serotonin production, making it a dessert that’s as good for your mood as it is for your taste buds. 🌿
Portion Control Made Easy
Serving this cheesecake in 8 equal slices makes it easier to enjoy without overindulging. Each portion is rich but not overwhelming, thanks to the balanced texture of crispy crust and fudgy center. For a lighter option, top with fresh raspberries or a dollop of Greek yogurt to add fiber and reduce sugar content. The key is moderation—this dessert is a treat, not a staple, but it’s designed to satisfy without leaving you feeling sluggish. 🍓
Nutrition facts
Frequently asked questions
Why does this recipe use a pre-baked crust?
The 10-minute pre-bake ensures your crust stays crispy instead of turning soggy from the filling's moisture. This is especially important for a 7-inch pan, where the crust has less surface area to absorb heat. Skipping this step often leads to a mushy bottom—trust the process!
Can I make this cheesecake without a springform pan?
Yes, but with caution! Use a 7-inch oven-safe dish (like ceramic or metal) and line the bottom with parchment paper for easy removal. Avoid glass—it conducts heat unevenly and may crack. If needed, wrap the outside of the dish with foil during baking to prevent over-browning.
How do I prevent cracks in the chocolate filling?
Cracks usually happen from overmixing or rapid temperature changes. Mix the filling just until combined, then pour immediately into the pre-baked crust. After baking, let the cheesecake cool 1 hour in the turned-off oven before refrigerating—this slow cooling prevents stress cracks.
What's the best way to serve this cheesecake?
Let it sit at room temperature for 15-20 minutes before slicing for clean wedges. Top with warm chocolate ganache, fresh berries, or a sprinkle of flaky sea salt to enhance the chocolate flavor. For extra drama, drizzle with melted white chocolate and crushed nuts.
Can I make this gluten-free?
Swap the graham crackers for a gluten-free crust mix (like almond flour + melted butter) and use a gluten-free flour blend in the filling. Test the crust first—it may need 5 extra minutes of baking to crisp up properly. The chocolate filling will still be delicious!