
Desserts
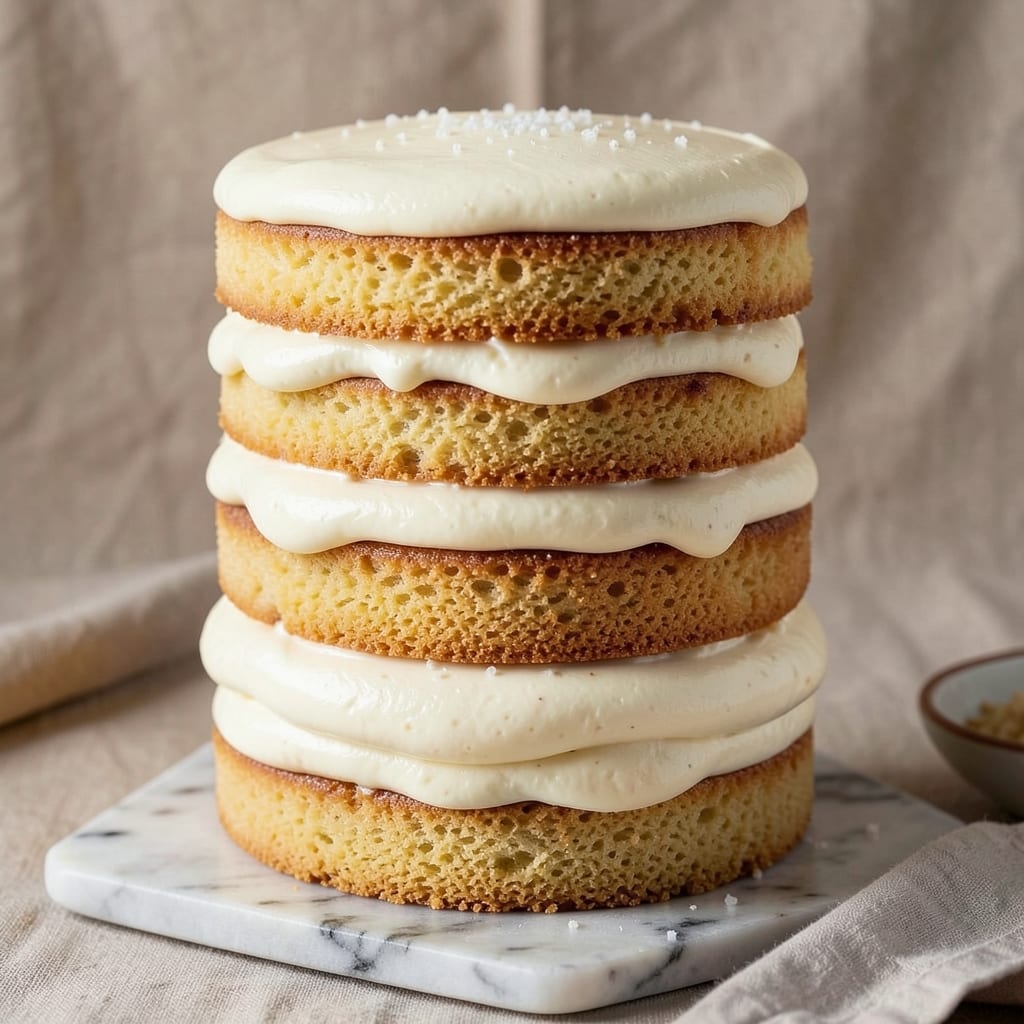
This 4-layer vanilla cake recipe delivers the perfect balance of moist, tender layers, velvety vanilla bean buttercream swirls, and a satisfying crunch from toasted almonds on top. The secret lies in precise baking times and chilling periods—critical for even layers that hold together beautifully. I’ve baked this cake for everything from birthdays to holiday celebrations, and it never fails to impress.
The cake itself is light and fluffy, thanks to a simple yet effective recipe that relies on proper mixing and baking techniques. The vanilla bean buttercream isn’t just sweet—it’s rich, aromatic, and swirled into each layer for that restaurant-quality look. And the toasted almond topping? It adds a delightful contrast in texture and a nutty depth that complements the vanilla perfectly.
What makes this recipe stand out is how foolproof it is once you master the basics: baking the layers evenly, letting them cool completely, and assembling with confidence. The result is a cake that’s as stunning to look at as it is delicious to eat—each slice offering the perfect combination of soft cake, creamy filling, and crunchy top. It’s the kind of dessert that makes any occasion feel special.
Whether you’re a seasoned baker or just starting out, this recipe is designed to deliver professional results without the fuss. The key is patience—especially with chilling times—and attention to detail when swirling the buttercream. Trust me, the effort is worth every bite.
Ingredients for 4 layer vanilla cake
Twelve essential ingredients for a showstopping 4-layer vanilla cake with professional swirls and crunchy almond topping.
| Ingredient | Amount | Notes |
|---|---|---|
| All-Purpose Flour 🌾 | 4 cups | Sifted for light texture |
| Unsalted Butter 🧈 | 2 cups | Room temperature, European preferred |
| Granulated Sugar 🍚 | 2 ½ cups | Divided for cake and buttercream |
| Vanilla Extract 🌿 | 2 tbsp | Pure Madagascar or Tahitian |
| Large Eggs 🥚 | 8 whole | Room temperature, separated |
| Baking Powder 🧂 | 2 tsp | Aluminum-free preferred |
| Salt 🧂 | ½ tsp | Fine sea salt |
| Whole Milk 🥛 | 1 cup | Room temperature |
| Vanilla Bean Seeds 🌿 | 2 whole | Scraped from 1 vanilla bean |
| Heavy Whipping Cream 🥛 | 2 cups | Cold for buttercream |
| Sliced Almonds 🌰 | 2 cups | Toasted for topping |
| Powdered Sugar 🍚 | 3 cups | For buttercream |
The butter and flour are the foundation—European-style butter has more fat content for that tender crumb, and King Arthur or Gold Medal all-purpose flour bakes evenly. I always buy vanilla beans from Trader Joe's or specialty spice shops; the seeds are worth the extra cost for that authentic vanilla aroma. Toast your sliced almonds in a dry pan until golden—3-4 minutes on medium heat—for maximum crunch. Room-temperature eggs and dairy are non-negotiable; cold ingredients make for dense cake layers.
No vanilla bean? Pure vanilla extract plus a pinch of sugar works in a pinch, though the flavor won't be as complex. Substitute almonds with toasted pecans or hazelnuts if needed, but the texture contrast is key. For a lighter buttercream, add 1 tsp cornstarch to the powdered sugar before whipping. The cake layers should be baked until a toothpick comes out clean but still has moist crumbs—25-30 minutes at 350°F—never overbaked. If your buttercream curdles, melt it gently in a double boiler and re-whip.
Assemble the cake immediately after baking while layers are still warm—this prevents cracking. Chill between layers for 30 minutes in the fridge to set the buttercream properly. Store leftovers covered at room temperature for 2 days or freeze the fully assembled cake for up to 3 months. For a restaurant-quality finish, dust the finished cake with a little powdered sugar before serving—it catches the light beautifully.
Why You'll Love This Recipe
- Minimal Mixing Needed: I swear by this recipe because it’s about as hands-off as cake gets. Cream butter and sugar, toss in eggs and vanilla—no overworking the batter, no guesswork. The layers stay light and fluffy because you’re not beating it to death, and honestly? That’s half the battle won.
- Vanilla Overload (In the Best Way): Between us, this cake is ridiculously good because it’s drenched in vanilla—not just a drop, but enough to make you close your eyes when you take a bite. The buttercream layers? Same deal. It’s like vanilla hugs every forkful, and I’ll take that over subtle any day.
- Birthday or Breakfast: Here’s what sold me—this cake works for everything. Frost it with chocolate ganache for a birthday showstopper, or serve it plain with whipped cream for a lazy Sunday breakfast. The layers hold up perfectly whether you’re feeding a crowd or just treating yourself.
- Leftovers That Don’t Suck: Between us, most cakes turn into sad, dry bricks by day two. Not this one. The buttercream keeps it moist, and the layers stay intact even when sliced. I’ve had it cold, room temp, and reheated—still delicious. Plus, it’s budget-friendly; you’re not using rare ingredients, just good basics done right.
Step-by-step instructions for 4 layer vanilla cake
Here's how to bake and assemble this showstopper cake with perfect layers and silky swirls.
Prepare the Cake Batter
Preheat your oven to 350°F and grease four 8-inch round cake pans, lining the bottoms with parchment paper. In a large mixing bowl, combine the 4 cups all-purpose flour, 2 tsp baking powder, and 0.5 tsp salt. Sift this mixture directly into the bowl to ensure a light, airy texture.
In a separate large bowl, cream together the 2 cups unsalted butter and 1 cup of the 2.5 cups granulated sugar on medium speed until light and fluffy—about 3-4 minutes. Add the 8 whole large eggs, one at a time, beating well after each addition. Mix in the 2 tbsp vanilla extract and 2 whole vanilla bean seeds. Gradually add the dry ingredients to the wet, alternating with the 1 cup whole milk, beginning and ending with the flour mixture. Beat just until combined—overmixing will make the cake dense.
Divide the batter evenly among the four prepared pans. Smooth the tops with a spatula and bake for 25-30 minutes, or until a toothpick inserted into the center comes out clean. Let the cakes cool in the pans for 10 minutes, then transfer to a wire rack to cool completely before assembling.
Make the Vanilla Bean Buttercream
In a stand mixer fitted with the paddle attachment, beat the 2 cups heavy whipping cream and the remaining 1.5 cups granulated sugar on medium speed until soft peaks form. Add the 3 cups powdered sugar and mix until fully incorporated. Scrape down the sides of the bowl as needed.
Increase the speed to high and beat for another 2-3 minutes until the buttercream is smooth, thick, and holds stiff peaks. Add the remaining 1 tbsp vanilla extract and 1 whole vanilla bean seed (scraped), mixing until fully combined. This buttercream should be smooth and glossy—if it's too soft, chill it for 15 minutes before using.
Toast the Almonds and Assemble the Cake
Spread the 2 cups sliced almonds evenly on a baking sheet and toast in the oven at 350°F for 5-7 minutes, stirring once, until golden brown and fragrant. Let them cool completely before using.
Place the first cake layer on a cake stand or plate. Spread a generous layer of the vanilla bean buttercream over the top, leaving a ½-inch border. Repeat with the remaining three layers, stacking them carefully and leveling each one with a serrated knife if needed. Chill the assembled cake in the refrigerator for 30 minutes to allow the buttercream to set slightly.
Create the Swirls and Add the Topping
Using an offset spatula, spread a thin layer of buttercream over the entire surface of the cake. Dip the spatula in warm water, then wipe it dry to create clean, smooth strokes. Pipe or spread the remaining buttercream in swirls across the top, using a piping bag fitted with a star tip for elegant swirls or a spatula for a rustic look.
Press the toasted almonds evenly over the buttercream swirls, covering the entire top. For extra flair, arrange a few extra almonds in a decorative pattern around the edges. Chill the cake again for 15 minutes before slicing to ensure clean layers. Serve at room temperature for the best texture and flavor.
Pro Tips For Making 4 Layer Vanilla Cake
- Measure Butter Cold: Take the butter straight from the fridge—no softening needed. I used to let it sit out, and the cake layers turned out dense and greasy. Cold butter creates air pockets when creamed with sugar, giving you that light, fluffy texture every layer deserves.
- Whisk Eggs First: Separate and whisk the eggs in a separate bowl before folding them into the batter. This keeps them from breaking when you add them later, and the extra air makes the cake rise higher. (Yes, even if you’re impatient like me—this is worth the 30 seconds.)
- Skip Overmixing Dry Ingredients: Fold the flour mixture into the wet ingredients just until combined—no more. Overmixing develops gluten, and your cake layers will turn out tough instead of tender. Stop when there’s one dry streak left; it’ll disappear when you fold.
- Cool Layers Fully: Let each cake layer cool in the pan for 10 minutes, then transfer to a wire rack to finish cooling. Rushing this step makes the frosting slide off or turn grainy. Patience here guarantees clean layers and a professional finish. (Your future self will thank you.)
Troubleshooting this recipe
Cracked Layers Fix
If your cake layers crack during baking, it’s usually from overmixing or opening the oven too soon. To prevent this, beat the batter just until combined—no more than 30 strokes after adding flour. Let the cakes cool in the pans for 10 minutes before removing them to avoid sudden temperature shifts. If cracks appear after baking, simply fill them with extra buttercream before assembling—no one will notice! 💫
Dense Cake Texture
Dense cake layers often result from overbaking or cold ingredients. Ensure your eggs, butter, and milk are at room temperature before mixing. Bake until a toothpick comes out with moist crumbs (not wet batter, not dry flour). If your cake turns out dense, try reducing the baking time by 2-3 minutes next time and checking for doneness earlier.
Buttercream Too Soft
If your buttercream isn’t holding its shape, it’s likely too warm. Chill the bowl in the fridge for 15 minutes before whipping, and use cold heavy cream (straight from the fridge). For extra stability, add 1 tsp cornstarch to the powdered sugar before mixing. If it’s already too soft, pop the bowl back in the fridge for 10 minutes and re-whip.
Layers Not Level
Uneven layers can make your cake wobble or look messy. Use a serrated knife to trim the tops of each cake layer before assembling—this ensures a smooth surface. Place the first layer on a cake stand or plate, then use a leveling tool or even a ruler to check for flatness. If needed, shave off a little from the thicker sides before adding buttercream.
Swirls Not Holding
Buttercream swirls can collapse if the cake isn’t chilled enough between layers. Let the cake rest in the fridge for 30 minutes after assembling before adding the final swirls. If your swirls still slide, try piping them directly onto the cake’s side instead of the top, or use a small offset spatula to gently press them into place. A light dusting of powdered sugar can also help them set faster.
Almonds Too Soft
Toasted almonds should be golden and fragrant, not pale or greasy. Toast them in a dry pan over medium heat for 3-4 minutes, stirring constantly, until they’re just turning golden. If they cool too quickly and lose crunch, spread them on a baking sheet and let them sit at room temperature for 5 minutes before pressing them onto the cake. For extra crunch, toast them in the oven at 350°F for 5-7 minutes instead.
Nutrition facts
Frequently asked questions
Can I substitute vanilla extract for vanilla bean seeds in this recipe?
Yes, you can! Use 2 tablespoons pure vanilla extract plus a pinch of sugar to mimic the depth of vanilla bean flavor. For best results, choose high-quality extract from Madagascar or Tahitian beans. The seeds add complexity, but good extract will still give you that classic vanilla taste in both the cake and buttercream.
How do I prevent my cake layers from sinking in the middle?
This usually happens from overmixing or underbaking. Mix the batter just until combined (about 30 strokes after adding flour), and bake until a toothpick comes out with moist crumbs—not wet batter. Let cakes cool in pans for 10 minutes before removing to maintain structure. Chill assembled layers for 30 minutes before adding final decorations.
Can I make this cake ahead of time?
Assemble the cake layers up to 24 hours ahead and refrigerate uncovered. The buttercream will develop a skin, so re-whip briefly before decorating. For longer storage, freeze the fully assembled cake (without almonds) for up to 3 months. Thaw overnight in the fridge before adding the toasted almond topping.
What's the best way to level my cake layers?
Use a serrated knife or cake leveler for clean, even cuts. Place the cake layer on a flat surface and gently press down with the knife at a slight angle. For extra precision, use a ruler or leveling tool to check for flatness before adding buttercream. Leveling prevents wobbly cakes and makes swirls look professional.
How do I fix buttercream that's too runny?
Chill the bowl in the fridge for 15 minutes to firm up, then re-whip. If it's still too soft, add 1 tablespoon powdered sugar at a time until it reaches the right consistency. For a quick fix, mix in 1 teaspoon cornstarch with the powdered sugar before whipping. Always use cold heavy cream for stability.