
Desserts
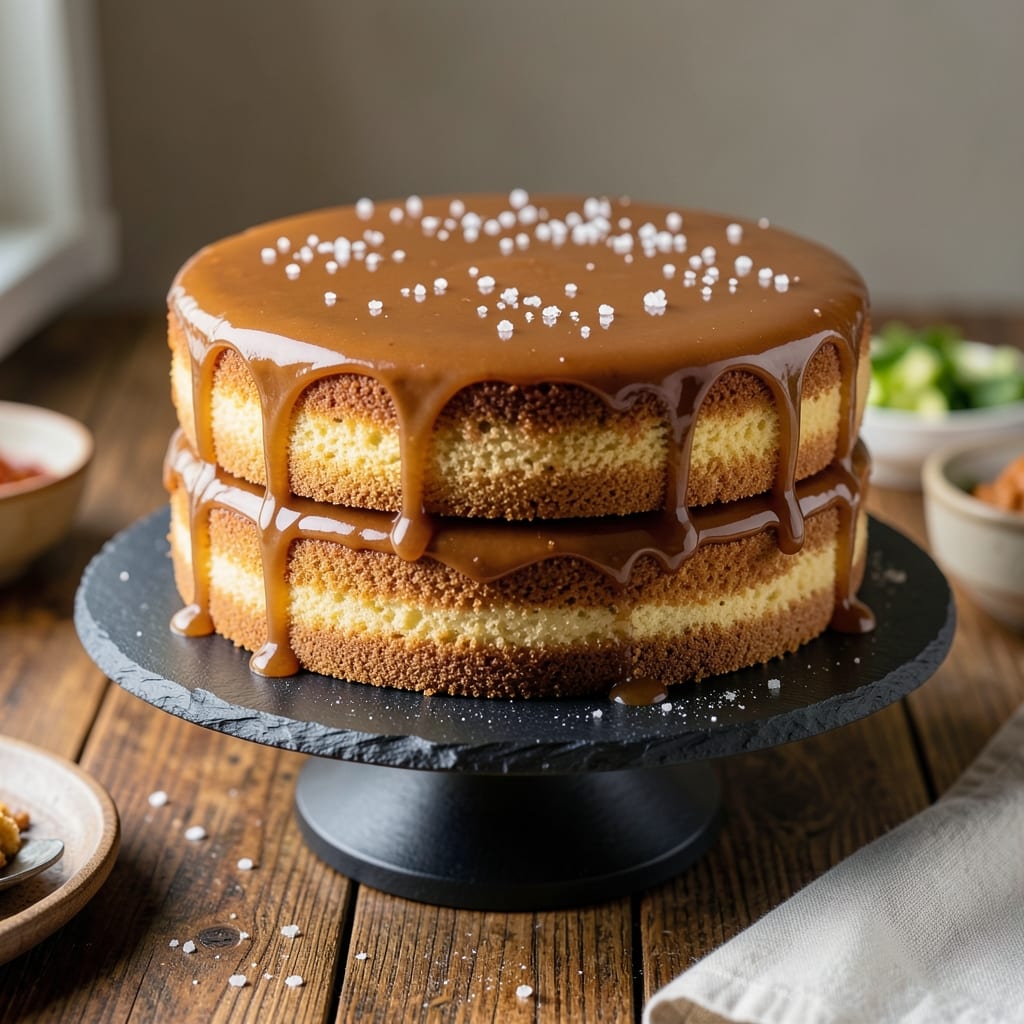
This 2-layer caramel cake recipe delivers the perfect balance of buttery cake layers and rivers of gooey caramel that make every slice unforgettable. The secret lies in a rich, moist cake base that holds up to generous caramel fillings without crumbling, while the caramel itself stays perfectly fluid and golden. I've perfected this technique through years of baking, ensuring each slice offers that signature caramel pull that turns simple dessert into an experience.
The foundation of this cake is a tender, buttery sponge that bakes to a golden finish while maintaining a moist interior—no dry crumbs here. Between the layers, we build a generous caramel filling that's thick enough to hold its shape when sliced but still maintains that signature gooey texture. The key is cooking the caramel to the right consistency: it should be thick enough to pipe neatly between layers but still fluid enough to create those dramatic rivers when cut.
What you'll end up with is a cake that looks as impressive as it tastes—golden layers framed by glossy caramel, with each bite offering a perfect harmony of cake and caramel. The caramel doesn't just sit between layers; it oozes out dramatically when sliced, creating that restaurant-worthy presentation. This cake is ideal for celebrations, date nights, or whenever you want to impress without spending hours in the kitchen.
The beauty of this recipe is its versatility. You can serve it warm with vanilla ice cream for a decadent dessert, or let it cool slightly for cleaner slices that still showcase the caramel rivers. The method stays true to classic techniques while incorporating modern shortcuts that ensure consistent results every time. Let's get baking!
Ingredients for 2 layer caramel cake
Buttery cake layers and golden caramel rivers start with these quality ingredients.
| Ingredient | Amount | Notes |
|---|---|---|
| Unsalted Butter 🧈 | 1 cup | Softened at room temperature |
| Granulated Sugar 🍚 | 2 cups | Superfine preferred for smoothness |
| Light Brown Sugar 🍚 | ½ cup | Packed firmly |
| Large Eggs 🥚 | 4 whole | Room temperature for even mixing |
| All-Purpose Flour 🌾 | 2 cups | Sifted for light texture |
| Baking Powder 🍞 | 2 tsp | Freshly opened for lift |
| Salt 🧂 | ½ tsp | Fine sea salt preferred |
| Vanilla Extract 🌸 | 2 tsp | Pure Madagascar preferred |
| Whole Milk 🥛 | 1 cup | Room temperature for blending |
| Granulated Sugar 🍚 | 2 cups | For caramel filling |
| Heavy Cream 🥛 | ½ cup | 35% fat for rich caramel |
| Unsalted Butter 🧈 | ½ cup | Cut into small pieces |
| Vanilla Bean Paste 🌸 | 1 tsp | For deeper vanilla flavor |
| Powdered Sugar 🍚 | 1 cup | For dusting layers |
The butter sets the tone here—European-style unsalted butter like Plugrá or Land O'Lakes makes all the difference. For the cake, room temperature butter ensures smooth mixing without lumps. The vanilla extract should be pure—Madagascar bourbon vanilla adds depth. If you're using vanilla bean paste, look for brands like Madagascar Vanilla Estate for that authentic flavor. The sugar matters too: superfine sugar dissolves better, but regular granulated works if you pulse it in a food processor. For the caramel, high-fat heavy cream (35% or higher) gives that luxurious texture. If you're in a pinch, half-and-half with an extra tablespoon of butter works, but you'll notice the difference.
No vanilla extract? Vanilla sugar or 1/2 tsp almond extract can stand in, though the flavor won't be identical. Running short on heavy cream? Whole milk plus 2 tbsp butter mimics the fat content. The caramel filling can be made ahead—just reheat gently before using. For the cake layers, if you don't have powdered sugar, sifted granulated sugar works in a pinch, though it won't dust as finely. The baking powder needs to be fresh: if your recipe box is older than 6 months, replace it—old baking powder loses its lift. And if you're worried about the cake being too rich, reduce the butter by 2 tbsp and add 2 tbsp milk to balance it out.
Store cake layers at room temperature in an airtight container for up to 2 days. The caramel filling keeps in the fridge for 1 week, though it thickens slightly—just reheat gently with a splash of milk to restore its fluidity. For make-ahead convenience, bake the cake layers 1 day ahead and store them separately. Assemble the cake just before serving to prevent sogginess. If you're prepping for a party, wrap the assembled cake in plastic and refrigerate—it'll still showcase those caramel rivers beautifully when sliced. Leftovers? Reheat individual slices in the microwave for 10-15 seconds to restore the caramel's gooey appeal.
Why You'll Love This Recipe
- I’ll be real: this recipe uses basics you already have. Butter, sugar, eggs, flour—no specialty items, no last-minute grocery runs. Plus, leftovers? They keep beautifully for days, so you can bake once and enjoy twice without the stress.
- No Mixer Needed: I swear by this—just cream the butter and sugars by hand until light and fluffy. No electric mixer, no fuss, and the texture comes out perfectly tender every time. That brown sugar? It’s the secret to keeping it moist without drying out.
- Caramel Overload: Honestly, the moment you pour that warm caramel between the layers and over the top? My mouth waters just thinking about it. The buttery richness from the brown sugar and melted butter makes it taste like a bakery’s dream—no fancy ingredients, just pure indulgence.
- Party or Pudding: Between us, this cake is my go-to for birthdays, holiday desserts, or even a cozy Sunday night. The layers stay sturdy enough to slice neatly, but the caramel keeps it decadent. (Yes, even my picky teenage nephew asks for seconds.)
Step-by-step instructions for 2 layer caramel cake
Here's how to build a cake with a buttery crust and rivers of gooey caramel between layers.
Prepare the Cake Batter
Preheat your oven to 350°F and grease two 8-inch round cake pans with the 1 cup unsalted butter, coating the bottom and sides thoroughly. Line the bottoms with parchment paper circles for easy removal.
In a large mixing bowl, combine the 2 cups granulated sugar and 0.5 cup light brown sugar with the 4 whole large eggs at room temperature. Beat on medium speed for 3-4 minutes until the mixture is pale and thick—you should see ribbons form when you lift the beaters. This step is crucial for a light, airy texture.
In a separate bowl, whisk together the 2 cups all-purpose flour, 2 teaspoons baking powder, and 0.5 teaspoon salt. Gradually add this dry mixture to the wet ingredients, alternating with the 1 cup whole milk, beginning and ending with the flour. Mix on low speed just until combined—overmixing develops gluten and makes the cake dense.
Finally, stir in the 2 teaspoons vanilla extract until just incorporated. Divide the batter evenly between the prepared pans, spreading it out smoothly. Bake for 25-30 minutes or until a toothpick inserted into the center comes out clean. Let the cakes cool in the pans for 10 minutes before transferring to a wire rack to cool completely.
Make the Gooey Caramel Filling
In a medium saucepan, combine the 2 cups granulated sugar with the 0.5 cup heavy cream and 0.5 cup unsalted butter cut into small pieces. Place the saucepan over medium heat and bring to a boil without stirring. Once boiling, reduce the heat to medium-low and let it cook undisturbed for 5-7 minutes until it turns a deep amber color.
Be careful not to stir the caramel—this causes sugar crystals to form and ruins the smooth texture. If the caramel starts to crystallize, immediately remove it from heat and stir vigorously until smooth, then return to heat. Once the caramel reaches the desired color, remove it from heat and stir in the 1 teaspoon vanilla bean paste until fully incorporated.
Let the caramel cool slightly for 5 minutes—it will thicken as it cools. This is the moment when it transforms from a thin sauce into a rich, spreadable filling. The caramel should be thick enough to hold its shape but still pourable. If it's too thick, gently reheat it for 10 seconds to loosen it back up.
Assemble the Cake
Once both cake layers are completely cool, place the first layer on a cake stand or plate. Spread a thin layer of the caramel filling over the top—just enough to create a seal. This prevents the caramel from leaking out the sides when you cut the cake.
Spread the remaining caramel evenly over the first layer, leaving about ½ inch border around the edges. Place the second cake layer on top and gently press down to create a smooth top. The caramel should ooze slightly at the sides—this is what creates those beautiful rivers when you slice the cake.
Chill the assembled cake in the refrigerator for at least 4 hours or overnight. This allows the caramel to fully set and the layers to meld together. The longer it chills, the more pronounced the caramel rivers will be when you slice into it.
Dust and Serve
Before serving, dust the top and sides of the cake generously with the 1 cup powdered sugar using a fine-mesh sieve. This creates that classic cake decor and adds a delicate sweetness that complements the rich caramel.
Slice the cake carefully with a sharp, hot knife—dip the knife in hot water and wipe it dry between cuts to ensure clean slices. Serve immediately so the caramel remains warm and gooey. Each slice should reveal rivers of caramel oozing through the layers, creating a dramatic presentation that tastes just as good as it looks.
Pro Tips For Making 2 Layer Caramel Cake
- Cream Butter First: I learned this the hard way—melt the butter just until it turns liquid, then let it cool to 110°F (43°C) before mixing with sugars. Warm butter blends smoother and prevents a greasy cake, especially when using unsalted butter. (Yes, even if you're impatient like me.)
- Weigh Your Flour: Spooning flour into cups leaves air pockets—your cake will be dense and dry. Use a kitchen scale for precision: 1 cup all-purpose flour is exactly 125 grams. I skip this when I'm lazy, but the layers rise higher and stay moist when I don’t.
- Don’t Overmix the Caramel: The caramel layer is where most people mess up. Whisk the warm caramel into the batter gently—just until combined. Overmixing turns it grainy and ruins the silky texture. (Your future self will thank you.)
- Rotate the Pan: The oven’s hot spots are real, and caramel cake’s edges burn before the center sets. After 20 minutes, rotate the pan 180 degrees and swap top and bottom racks halfway. This guarantees even baking—no dry top, no gooey middle.
Wine and beer pairings for this dish
Red Wine Pairings
A rich, buttery caramel cake pairs beautifully with Bordeaux-style reds like Cabernet Sauvignon or Merlot. The tannins in these wines cut through the cake's richness while complementing the caramel's sweetness. I love a Napa Valley Cabernet with its velvety texture—it stands up to the cake's decadence without overpowering it. 🍷
For a lighter option, try a Pinot Noir from Oregon or Burgundy. Its bright acidity and red fruit notes balance the caramel's sweetness while keeping the palate fresh. A Willamette Valley Pinot with its earthy undertones adds an unexpected depth that enhances the cake's buttery layers.
White Wine Options
Surprisingly, Chardonnay works wonders with this cake, especially a buttery, oak-aged version from California or Australia. The wine's natural creaminess mirrors the cake's texture, while its acidity prevents the caramel from feeling too heavy. Look for a Sonoma Coast Chardonnay with its bright citrus notes. 🍷
For a crisp alternative, a dry Riesling from Germany or Alsace provides the perfect contrast. Its mineral finish and slight tartness cut through the caramel's sweetness, creating a refreshing balance. A Mosel Riesling with its zesty acidity is my go-to for a lighter pairing.
Beer Pairings
A Belgian-style witbier like Hoegaarden or Stella Artois is a fantastic beer match. The citrusy notes from coriander and orange peel in these beers complement the caramel's sweetness while cleansing the palate between bites. The effervescence also helps cut through the cake's richness. 🍺
For a darker option, try a Belgian dubbel like Rodbrugg or Westmalle Dubbel. The caramel and malt flavors in the beer mirror the cake's sweetness, while the beer's slight bitterness balances the dessert's richness. Serve it slightly chilled for the best experience.
Coffee or Liqueur
If you prefer something stronger, a small glass of Grand Marnier or Cointreau works beautifully. The orange liqueur's citrus notes enhance the caramel's sweetness while adding a sophisticated finish. I like to serve it alongside the cake at room temperature. ☕
For coffee lovers, a strong espresso or dark roast with notes of chocolate pairs wonderfully. The bitterness in the coffee balances the cake's sweetness, creating a harmonious contrast. A single-origin Ethiopian Yirgacheffe with its floral notes adds an unexpected but delightful pairing.
Nutrition facts
Frequently asked questions
Can I make this caramel cake in a different pan size?
Yes, but you'll need to adjust baking times and caramel amounts. For 6-inch pans, reduce batter by 50% and bake for 20-25 minutes. For 9-inch pans, increase batter by 50% and bake for 30-35 minutes. Always check with a toothpick. The caramel filling should be scaled proportionally—use 1 cup caramel per 8-inch layer as a guideline.
Why did my caramel crystallize?
Caramel crystallizes when stirred too early or when moisture gets in. To fix it, immediately remove from heat and stir vigorously with a silicone spatula until smooth. If it's already set, gently reheat the caramel with 1 tablespoon water or cream while stirring constantly. For prevention, use a clean, dry saucepan and avoid any water contact.
How do I prevent the cake layers from getting soggy?
Sogginess happens when moisture seeps through. First, ensure your cake layers are completely cool before assembling. Second, spread a thin "seal" of caramel only on the top layer before adding the main filling. Finally, chill the assembled cake for at least 4 hours (overnight is best) to let the caramel set properly.
Can I make this cake without an oven?
While challenging, you can adapt this for a microwave cake. Mix the batter as directed, then divide into greased microwave-safe dishes. Cook on high for 3-4 minutes, checking at 1-minute intervals—microwaves vary! The texture will be denser than oven-baked, but still delicious. The caramel filling remains the same, but you'll need to assemble immediately after microwaving.