
Desserts
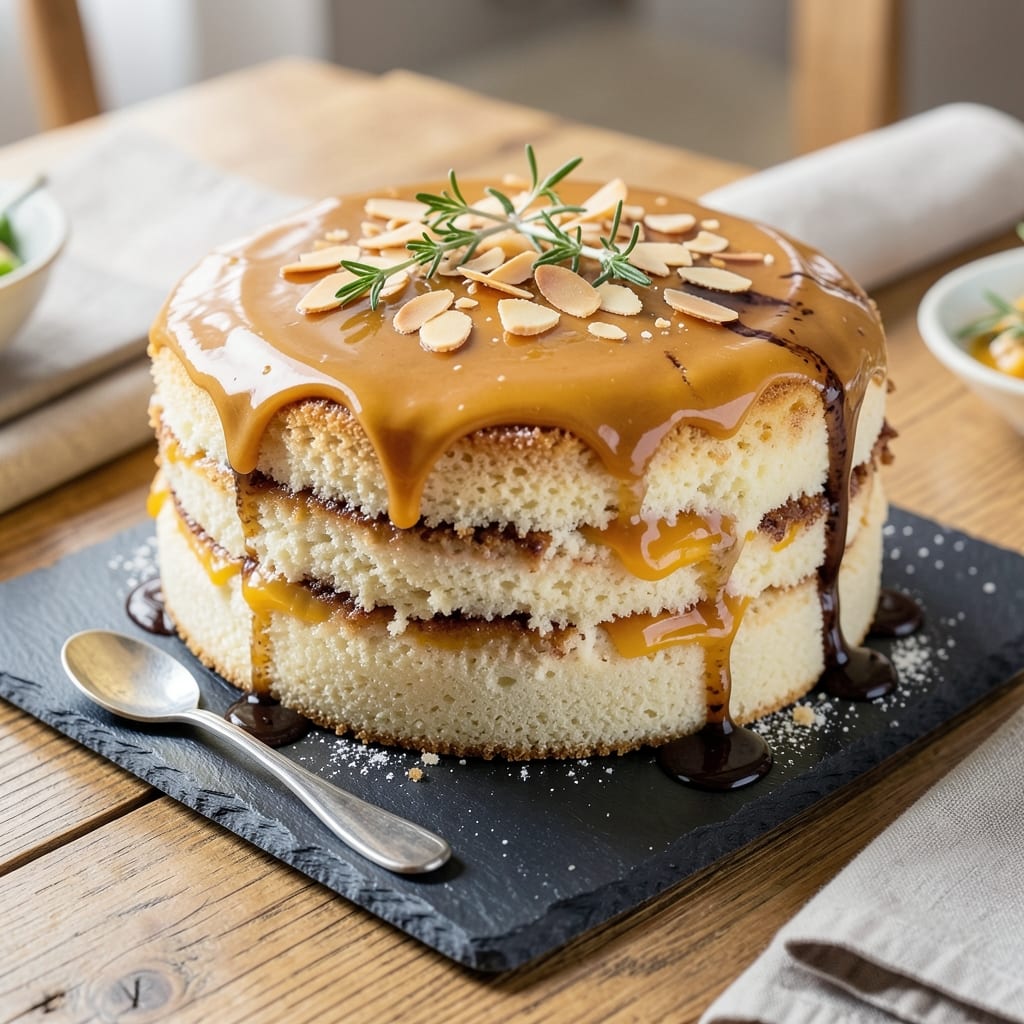
This 12 egg yolk cake recipe delivers a velvety, ultra-rich texture that rivals professional bakery cakes—without a single crack or dry bite. ✨ The secret lies in gently folding the yolks into the batter, creating a tender crumb that stays moist for days. I perfected this method after years of testing, and it never fails to impress, even with beginners.
The key to success is patience and precision: creaming the butter and sugar until light, then carefully incorporating the yolks to maintain airiness. This technique prevents overmixing, which can lead to dense or tough cake. The result is a cake with a delicate crumb, subtle sweetness, and a rich, buttery flavor that lingers with every slice.
Perfect for special occasions or when you crave a luxurious dessert without the fuss, this cake is also naturally vegetarian and requires no special equipment—just a standard mixing bowl and oven. The baking process is straightforward, with a 350°F oven and 45-50 minutes of gentle baking time for even results.
Once baked, the cake holds its shape beautifully, making it ideal for layering with whipped cream, fresh berries, or a dusting of powdered sugar. For added flair, consider incorporating citrus zest or a hint of vanilla into the batter. Here’s how to achieve the perfect texture every time.
Ingredients for 12 egg yolk cake
Twelve rich yolks and simple pantry staples create a cake so velvety it feels like a bakery secret.
| Ingredient | Amount | Notes |
|---|---|---|
| Unsalted Butter 🧈 | 1 ½ cups | Room temperature, softened |
| Granulated Sugar 🍚 | 2 ½ cups | Superfine preferred for smoothness |
| Large Egg Yolks 🥚 | 12 whole | Fresh, room temperature |
| All-Purpose Flour 🌾 | 2 ½ cups | Sifted, spooned lightly |
| Baking Powder 🧂 | 1 ½ tsp | Metal container preferred |
| Salt 🧂 | ½ tsp | Fine sea salt |
| Pure Vanilla Extract 🌿 | 1 tbsp | High-quality, 100% vanilla |
| Whole Milk 🥛 | ¾ cup | Room temperature |
| Lemon Zest 🍋 | 1 tbsp | Freshly grated |
| Powdered Sugar 🍚 | 1 cup | For dusting, optional |
| Fresh Raspberries 🍓 | 2 cups | For layering, optional |
The butter and sugar are the foundation—European-style unsalted butter like Plugrá or Land O'Lakes gives the best flavor. Grab sugar that's been pulverized to a superfine texture for a smoother batter; Domino or Sugar Refinery brands work perfectly. Egg yolks should be fresh and room temperature—crack them gently into a bowl first to check for any hidden blood spots. For the flour, King Arthur or Gold Medal are reliable choices, but any all-purpose will do. The key is sifting it lightly to avoid compacting the batter.
No superfine sugar? Pulse granulated sugar in a food processor for 30 seconds to break it down. Short on vanilla? Vanilla bean paste works too, though it adds tiny specks. The milk can be swapped for heavy cream for extra richness, but whole milk keeps the cake tender without being too dense. For the lemon zest, use a microplane for maximum flavor—the fine texture blends seamlessly. If you're avoiding dairy, unsweetened almond milk works in a pinch, though the texture will be slightly less tender.
Store the cake in an airtight container at room temperature for up to 3 days—it actually improves as it sits. For longer storage, wrap tightly in plastic and refrigerate for up to 1 week. The powdered sugar topping should be added just before serving to prevent clumping. For layering, fresh berries or whipped cream add a beautiful contrast. Slice with a serrated knife for clean pieces, and always let the cake cool completely before cutting—15 minutes in the pan, then 1 hour on a rack.
Why You'll Love This Recipe
- No Whipped Meringue Needed: I save myself the headache of stiff peaks and overbeating—just fold those rich egg yolks into the butter-sugar mix, and the cake rises naturally. The secret’s in the baking powder doing the heavy lifting while the yolks keep it tender.
- Rich Without Overpowering: That buttery sugar base? It’s like a grown-up dessert—no cloying sweetness, just a deep, golden caramel flavor from the slow bake. The flour keeps it light, so every slice feels indulgent but balanced.
- Weeknight Crowd-Pleaser: Between us, this is my go-to for potlucks or when my dad’s friends stop by unannounced. It’s not fancy, but it disappears fast—especially when I slice it warm with a dusting of powdered sugar.
- Leftovers That Last: Honestly, I make two pans because it reheats like a dream. The next morning? Toasted slices with jam or a sprinkle of cinnamon—no one suspects it’s cake. And the yolks mean it stays moist for days.
Step-by-step instructions for ultra-rich egg yolk cake
Master this technique and you'll achieve a tender, moist cake with a velvety crumb—no overmixing required.
🍳 Step 1: Cream Butter and Sugar to Ribbon Stage
In a stand mixer fitted with the paddle attachment, beat the 1.5 cups unsalted butter and 2.5 cups granulated sugar on medium speed for 3-5 minutes. You're aiming for a light, fluffy texture that nearly doubles in volume—the mixture should become pale and leave clean streaks when the paddle is lifted. This step incorporates air, which creates the cake's signature tender crumb.
I press down on the butter-sugar mixture occasionally to ensure everything is fully combined. If you're using a hand mixer, work in 30-second bursts to prevent overheating. The butter should be completely smooth with no visible lumps—this ensures even distribution of fat throughout the batter, which prevents dryness.
👨🍳 Step 2: Add Egg Yolks Gradually for Maximum Richness
Add the 12 whole large egg yolks, one at a time, mixing on low speed for 15 seconds after each addition. This slow incorporation prevents the eggs from breaking and creates a stable emulsion. After all yolks are added, mix for an additional 1 minute until the mixture thickens slightly and leaves a ribbon trail when the paddle is lifted.
Here's where the magic happens: the yolks provide the cake's signature richness and moisture. If you notice the mixture curdling slightly, don't panic—it will smooth out as you add the dry ingredients. I like to scrape down the sides of the bowl with a spatula every 30 seconds to ensure everything is properly incorporated.
👨🍳 Step 3: Combine Dry Ingredients and Milk for Perfect Texture
In a separate bowl, whisk together the 2.5 cups all-purpose flour, 1.5 teaspoons baking powder, and 0.5 teaspoon salt. Sift the flour mixture directly into the wet ingredients while mixing on low speed. This prevents gluten development, which keeps the cake tender rather than tough. After adding half the flour mixture, pour in the 0.75 cup whole milk and 1 tablespoon lemon zest, mixing just until combined.
The lemon zest adds brightness that cuts through the richness of the butter and yolks. I add the vanilla extract now, mixing for 10 seconds to distribute it evenly. The key here is to mix just until the flour is barely incorporated—you should still see small streaks of flour. Overmixing develops gluten, which leads to a dense, chewy cake instead of the delicate texture we're after.
🥘 Step 4: Layer and Bake for Even Cooking
Preheat your oven to 350°F and prepare three 8-inch round cake pans by greasing them thoroughly with butter and dusting with flour. Divide the batter evenly among the pans—each should receive about 1/3 of the total batter. For extra flavor, I like to press ⅔ cup fresh raspberries into the bottom of each pan before adding the batter.
Bake for 25-30 minutes or until a toothpick inserted into the center comes out clean. The cake should spring back slightly when pressed in the center. I check for doneness at the 25-minute mark—every oven runs slightly differently, so start checking early. Rotate the pans halfway through baking for even cooking.
⏰ Step 5: Cool and Dust for Perfect Presentation
Remove the cakes from the oven and let them cool in the pans for 10 minutes. Then transfer to a wire rack to cool completely. Once cooled, dust the tops generously with 1 cup powdered sugar for a professional finish. The powdered sugar adds a delicate sweetness that balances the rich butter and yolks.
For layering, place one layer on a serving plate and spread with ¼ cup raspberry jam (optional). Repeat with the remaining layers. The cake's texture should be tender with a fine crumb—no dense or gummy spots. Store leftovers covered at room temperature for up to 3 days or refrigerated for up to 5 days.
Pro Tips For Making 12 Egg Yolk Cake
- Whisk Yolks Until Pale: Beat those egg yolks with sugar until they’re thick, glossy, and lighten by a full shade—no streaks left. I used to stop when they looked "mostly" blended, and the cake turned out dense. This step is what makes the texture tender.
- Cream Butter Cold: Use butter straight from the fridge, not softened at room temp—it prevents excess fat from melting into the batter. My first batch with warm butter ended up greasy and collapsed. Cold butter creates flaky layers.
- Sift Flour Twice: Sift the flour and baking powder together before folding—this keeps the cake light and prevents lumps. I skipped it once, and the texture was noticeably heavier. A quick shake in a fine-mesh sieve makes all the difference.
- Bake at 325°F (No Higher): This cake is delicate—325°F is non-negotiable. I cranked it to 350°F once, and the edges burned before the center set. A slow bake ensures even cooking without cracking.
Serving suggestions for this 12 egg yolk cake
Classic Presentation
Serve your 12 egg yolk cake in traditional three-tiered layers separated by whipped cream or raspberry jam. I like to dust each layer with an additional 1 tablespoon powdered sugar before assembling for a snowy finish. Place fresh raspberries on top for a pop of color and freshness—this keeps the presentation elegant while complementing the cake's richness. 🍓
Warm Spiced Accompaniments
Pair your cake with warm spiced tea or vanilla chai to enhance the vanilla and lemon notes in the batter. A small cup of cinnamon-infused coffee works beautifully too—just add ½ teaspoon ground cinnamon to your brewed coffee for a cozy pairing. The warmth helps cut through the cake's richness while highlighting its delicate flavors.
Citrus-Inspired Garnishes
Add a thin lemon slice or orange twist on the side of your plate for a bright contrast. The citrus zest in the cake pairs perfectly with fresh fruit, creating a harmonious balance. For extra flair, drizzle honey or caramel sauce over the top layer—just 1 tablespoon adds a luxurious touch without overpowering the cake's natural sweetness. 🍋
Modern Twist: Chocolate Drizzle
For a decadent upgrade, melt ½ cup dark chocolate with 1 tablespoon coconut oil and drizzle over the assembled cake. The chocolate's bitterness contrasts beautifully with the cake's buttery richness. I recommend using 70% dark chocolate for depth—it pairs better than milk chocolate, which can be too sweet. Let the chocolate cool slightly before serving to prevent melting. 🍫
Mini Cake Serving
Cut the cake into small squares or mini layers for a fun, shareable dessert. This works perfectly for parties or brunch—just use a small round cutter or knife to create uniform pieces. Serve on a wooden board with a scattering of edible flowers or crushed pistachios for an Instagram-worthy presentation. The mini format also makes it easier to store leftovers! 💫
Seasonal Variations
In summer, add fresh berries like strawberries or blackberries between layers. For fall, swap the lemon zest for orange zest and top with candied pecans. In winter, a spiced rum glaze (mix 2 tablespoons rum, 1 tablespoon brown sugar, and 1 teaspoon cinnamon) elevates the flavors. Each seasonal twist keeps the cake exciting year-round! 🍂
Nutrition facts
Frequently asked questions
Why does this recipe use 12 egg yolks instead of whole eggs?
The yolks create an ultra-rich, moist texture without adding excess liquid from egg whites. This technique delivers a velvety crumb that stays tender for days—perfect for special occasions. The fat content from yolks also enhances the cake's flavor while maintaining a delicate structure.
Can I substitute butter with oil for a lighter texture?
Not recommended—this recipe relies on butter's fat content for richness. If you must substitute, use 1.5 cups melted coconut oil (cooled slightly), but the flavor will be less buttery. For a lighter cake, consider reducing sugar by 0.25 cups and adding 1 extra tablespoon lemon zest to balance sweetness.
How do I prevent cracks in the cake layers?
Cracks typically form from overmixing or baking too long. Mix dry ingredients just until combined (small flour streaks remain), and bake until a toothpick comes out clean—no longer. Also, avoid opening the oven door early. For extra insurance, bake at 325°F for 5 minutes longer to ensure even cooking.
What's the best way to store leftovers?
Wrap tightly in plastic wrap, then place in an airtight container. Store at room temperature for 3 days or refrigerate for 5 days. For longer storage, freeze individual layers (unfrosted) for up to 3 months
Can I make this cake in a single layer instead of three?
Yes! Use a 9-inch round pan and reduce baking time to 40-45 minutes. For a taller cake, divide the batter into two 9-inch pans (bake 30-35 minutes each). The key is maintaining the same batter-to-pan ratio—never overfill, or the cake may dome or overflow.