
Desserts
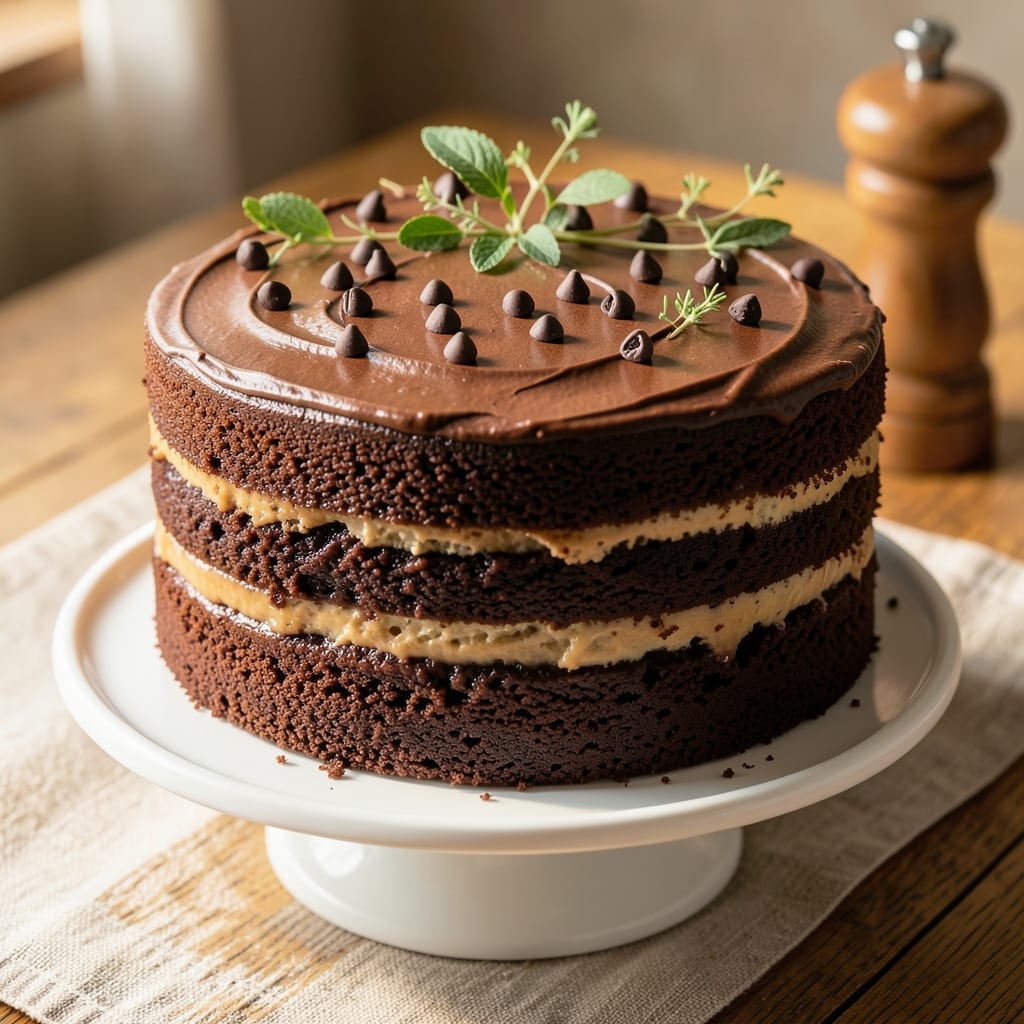
An 11-inch chocolate cake with a perfectly balanced fudgy core and velvety buttercream frosting is the ultimate crowd-pleaser. This recipe delivers rich, moist layers that stay tender while the frosting adds just the right amount of sweetness—no dry crumbs or overly sweet glaze here. The secret lies in precise ingredient ratios and baking techniques that ensure a foolproof result every time.
What sets this cake apart is the buttery frosting that complements the deep chocolate flavor without overpowering it. We’ll use a simple two-step mixing method for the batter—first creaming the butter and sugar, then folding in melted chocolate for maximum richness. The frosting, made with a perfect balance of butter, powdered sugar, and vanilla, is light enough to spread smoothly but sturdy enough to hold decorative details.
Baking at 350°F for about 30-35 minutes guarantees a golden top with a fudgy interior, while the frosting technique ensures a flawless finish. Whether you’re celebrating a birthday, holiday, or just craving a decadent treat, this cake delivers restaurant-quality results with minimal effort. The layers are dense yet moist, and the frosting stays perfectly in place—no melting disasters here.
Ready to impress? This recipe scales easily for gatherings or keeps beautifully for leftovers. We’ll also cover troubleshooting tips to handle common baking challenges, like cracking or uneven layers. Let’s get started on a cake that’s as satisfying to make as it is to eat.
Ingredients for 11 inch chocolate cake
Precision-measured ingredients for a restaurant-quality 11-inch chocolate cake with perfect fudgy layers and velvety buttercream.
| Ingredient | Amount | Notes |
|---|---|---|
| Unsalted Butter 🧈 | 1 ½ cups | Room temperature for creaming |
| Granulated Sugar 🍚 | 2 ¼ cups | Superfine preferred for smooth texture |
| Semisweet Chocolate Chips 🍫 | 1 ½ cups | 60% cacao minimum for rich flavor |
| Large Eggs 🥚 | 4 whole | Room temperature for even baking |
| All-Purpose Flour 🌾 | 2 ½ cups | Sifted for light texture, spooned not scooped |
| Baking Powder 🧂 | 1 ½ tsp | Aluminum-free for consistent rise |
| Cocoa Powder 🍫 | ¾ cup | Natural unsweetened for depth |
| Vanilla Extract 🌿 | 2 tsp | Pure Madagascar bourbon preferred |
| Salt 🧂 | ½ tsp | Diamond Crystal kosher preferred |
| Milk 🥛 | 1 cup | Whole milk for optimal moisture |
| Powdered Sugar 🍚 | 4 cups | Sifted for smooth frosting |
| Heavy Cream 🥛 | 1 cup | Cold for stable buttercream |
| Unsalted Butter 🧈 | 1 cup | Room temperature for frosting |
| Vanilla Bean Paste 🌿 | 1 tbsp | For authentic vanilla flavor |
The chocolate chips and cocoa powder are non-negotiable for depth. Ghirardelli 60% cacao baking chips and Valrhona cocoa powder elevate this cake, but Hershey's Special Dark and Dutch-processed cocoa work in a pinch. Butter should be European-style (like Plugrá) for higher fat content—this ensures tender crumbs. For the vanilla, Madagascar bourbon extract adds complexity, but pure vanilla extract works if you're on a budget. The milk should be whole for optimal moisture, but 2% works if that's what you have. All ingredients must be room temperature—cold butter creates dense layers.
No powdered sugar? Confectioners' sugar from a canister is ideal, but if you must make your own, blend granulated sugar with 3 tbsp cornstarch per cup for proper texture. Short on heavy cream? Whipped cream at full fat works, but the frosting won't be as stable. The vanilla bean paste can be swapped for 1 tbsp vanilla extract plus 1 tsp vanilla sugar if you're improvising. For the flour, King Arthur or Gold Medal brands are ideal, but any all-purpose works. The baking powder should be fresh—if it's over a year old, replace it entirely. The frosting ratio is precise: 1 cup butter to 4 cups powdered sugar creates the perfect consistency for piping or spreading.
Store cake layers wrapped in plastic at room temperature for up to 3 days or refrigerate for 5 days. The frosting can be made 2 days ahead and refrigerated—bring it to room temperature before using. For longer storage, freeze unfrosted layers for 3 months and frost when ready to serve. The frosting itself keeps for 1 week refrigerated. To refresh stale cake, rewarm slices in a 300°F oven for 5-10 minutes—this restores moisture without drying it out. Always bring ingredients to room temperature before mixing for even baking.
Why You'll Love This Recipe
- No Mixer Needed: I swear by this—just cream butter and sugar by hand until light and fluffy. The eggs and melted chocolate blend in like butter, and the flour gets folded in so gently the batter’s velvety. Honestly, my arms get a workout, but the result? A cake that’s actually tender, not dense.
- Chocolate Overload (Good Kind): That 11-inch pan is packed with semisweet chips melted right into the batter, so every slice has pockets of gooey, fudgy goodness. The butter keeps it rich but not greasy, and the sugar caramelizes just enough to give it that almost cakey, almost brownie vibe. (Yes, even on a Tuesday night.)
- Party in a Pan: This cake is my go-to for birthdays, potlucks, or just because—it’s big enough to feed a crowd but not so massive it’ll overwhelm a fridge. Between us, I’ve used it for dessert and breakfast (trust me, the coffee pairs perfectly), and it’s always the first thing to disappear.
- Leftovers That Don’t Suck: The best part? This cake stays moist for days, so you’re not scrambling to bake another. I’ll be real: I’ve reheated slices in the microwave with a splash of milk, and they taste like they just came out of the oven. Plus, the ingredients are cheap—just butter, sugar, chocolate, eggs, and flour—and stretch far enough to make it my budget-friendly guilty pleasure.
Step-by-step instructions for 11-Inch chocolate cake
Master the perfect balance of rich chocolate cake and velvety frosting with these precise techniques.
Cream Butter and Sugars for Maximum Fluffiness
In a stand mixer fitted with the paddle attachment, beat the 1.5 cups unsalted butter and 2.25 cups granulated sugar on medium speed for 5-7 minutes. The mixture should become light, fluffy, and nearly double in volume. This creaming process incorporates air, which creates that signature tender crumb we're after.
I like to scrape down the sides of the bowl every 30 seconds to ensure even mixing. You'll know it's ready when the butter-sugar blend is pale and ribbons fall slowly from the beaters. This step is critical—under-creaming leads to dense cake, while over-creaming develops gluten and makes it tough.
Incorporate Eggs and Dry Ingredients for Even Texture
Add the 4 whole large eggs, one at a time, mixing on low speed after each addition until fully incorporated. Then add 2 tsp vanilla extract and mix for 30 seconds. The batter should be smooth with no visible streaks of egg.
In a separate bowl, whisk together the 2.5 cups all-purpose flour, 1.5 tsp baking powder, 0.75 cup cocoa powder, and 0.5 tsp salt. Sift the dry ingredients directly into the wet mixture and mix on low speed for 30-45 seconds until just combined. Overmixing develops gluten, which ruins the tender texture we want.
Fold in Chocolate and Milk for Rich Moisture
Remove the mixer bowl and gently fold in the 1.5 cups semisweet chocolate chips and 1 cup milk using a silicone spatula. The batter will be thick but should hold its shape when dropped from a spoon. This is where the cake gets its signature fudgy core—don't skip this step or you'll compromise the texture.
Divide the batter evenly between two 11-inch round cake pans lined with parchment paper. Tap the pans gently on the counter to remove any air bubbles. The batter should fill the pans to about ⅔ full—this prevents overflow during baking.
Bake to Perfect Doneness
Preheat your oven to 350°F and bake the cakes for 30-35 minutes, or until a toothpick inserted in the center comes out with moist crumbs but no wet batter. The edges should be set while the center remains slightly springy—this ensures a fudgy core.
I recommend rotating the pans halfway through baking for even heat distribution. Let the cakes cool in their pans for 10 minutes, then transfer to a wire rack to cool completely. This gradual cooling prevents cracking and maintains moisture.
Prepare the Buttercream Frosting
In a stand mixer fitted with the paddle attachment, beat the 1 cup unsalted butter and 4 cups powdered sugar on medium speed for 3-4 minutes until light and fluffy. Add the 1 cup heavy cream, 2 tsp vanilla extract, and 1 tbsp vanilla bean paste, mixing until smooth and fully combined.
The frosting should be thick but pipeable—if it's too soft, chill for 15 minutes before using. Spread between the cooled cake layers, then cover the entire cake. For extra decadence, I like to add a sprinkle of cocoa powder or chocolate shavings on top before serving.
Pro Tips For Making 11 Inch Chocolate Cake
- Melt Chocolate Slowly: I learned this the hard way—dumping chocolate chips straight into hot butter makes a greasy mess. Instead, place a heatproof bowl over a pot of barely simmering water (no direct contact) and stir until smooth. The gentle heat keeps the texture rich without burning the sugar.
- Weigh Your Butter: Yes, even if you’re impatient like me, grab a kitchen scale for this. Packed butter varies wildly—using 1 cup by volume can throw off the fat-to-flour ratio, leading to a dense or dry cake. Stick to 227 grams for the recipe; it’s the difference between a tender crumb and a brick.
- Stop Mixing at "Dough": Overworking the batter after adding flour turns your cake into a chewy disaster. Once the flour just coats the wet ingredients (no streaks, but not a smooth dough), stop. A few lumps are fine—they’ll disappear when baked. I used to beat it until it looked perfect, and my cakes suffered for it.
- Chill the Batter: This isn’t the prettiest method, but it’s the tastiest. After mixing, refrigerate the batter for 30 minutes before baking. The flour absorbs moisture, and the eggs firm up slightly, preventing a sunken center. I skip this when I’m lazy, but the difference in texture is noticeable.
Pro cooking tips for this dish
Butter Temperature Matters
The secret to a perfectly tender crumb lies in using room-temperature butter—not cold, not melted. I recommend letting your butter sit out for 60-90 minutes before creaming, or microwave it in 10-second bursts until just soft. Cold butter creates dense layers, while melted butter can cause the cake to sink. Test it by pressing your finger into the butter—it should leave a slight indentation but hold its shape. 🧈
Superfine Sugar Wins
For a silky-smooth texture, use superfine sugar (like Domino brand) instead of regular granulated sugar. The finer particles dissolve more evenly, creating a lighter crumb. If you only have granulated sugar, pulse it in a food processor for 30-60 seconds until it reaches a superfine consistency. This small swap makes a noticeable difference in cake tenderness.
Don't Overmix the Batter
Once you add the dry ingredients, mix just until combined—no more than 30-45 seconds on low speed. Overmixing develops gluten, which leads to a tough, chewy cake instead of the tender crumb we want. I like to use a silicone spatula to gently fold in the chocolate chips and milk at the end to preserve that delicate texture. 💫
Layer Cooling Technique
Let the cakes cool in their pans for 10 minutes before transferring to a wire rack. This gradual cooling prevents cracking and helps maintain moisture. If you remove them too soon, the sudden temperature change can cause the layers to shift or develop cracks. For extra insurance, I place a damp towel over the pans while they cool—this keeps the tops from drying out.
Frosting Consistency Check
Your buttercream should be thick enough to hold its shape but still pipeable. If it's too soft, chill the bowl for 15 minutes before using. For a quick test, spread a small amount on a plate—it should hold a peak without sliding. If it's too stiff, add 1-2 teaspoons of heavy cream at a time until it reaches the perfect consistency. This ensures smooth spreading and professional-looking results. ✨
Even Baking Rotation
Rotate your cake pans halfway through baking (after about 15-18 minutes) to ensure even heat distribution. Ovens often have hot spots, and this simple step prevents one side from baking faster than the other. I also recommend placing the pans on the middle rack—this gives the best overall heat circulation for consistent results. 🌡️
Nutrition facts
Frequently asked questions
Can I make this cake in a different sized pan?
This recipe is specifically designed for 11-inch pans to achieve the perfect height-to-width ratio. For a 9-inch pan, reduce baking time by 5-7 minutes and use half the batter. For a 13-inch pan, increase baking time by 5-10 minutes but monitor closely—larger pans bake slower. Always adjust for your oven's quirks!
How do I fix a cracked cake?
Cracks usually happen when cakes cool too quickly or shrink unevenly. To fix them, gently press the cracked edges together with a thin layer of frosting. For a seamless look, use a spatula to smooth the frosting over the cracks. Pro tip: Let cakes cool in pans for 10 minutes before removing to prevent this issue.
Can I substitute cocoa powder with melted chocolate?
No—this recipe relies on the chemical leavening properties of cocoa powder for proper rise. However, you can replace ½ cup of the chocolate chips with melted chocolate (60% cacao or higher) for extra richness. Just ensure the batter remains thick enough to hold its shape when dropped from a spoon.
How long should I chill the cake before slicing?
Chill the fully frosted cake in the refrigerator for 30-60 minutes before slicing. This allows the frosting to set and prevents messy crumbs. For a firmer texture, chill for 2 hours—ideal for warm weather or when transporting the cake.
What’s the best way to store leftovers?
Wrap individual slices in plastic wrap and store in an airtight container at room temperature for 2 days. For longer storage, refrigerate for up to 5 days or freeze for 3 months. To refresh stale slices, rewarm in a 300°F oven for 5-10 minutes—this restores moisture without drying out the cake.