
Desserts
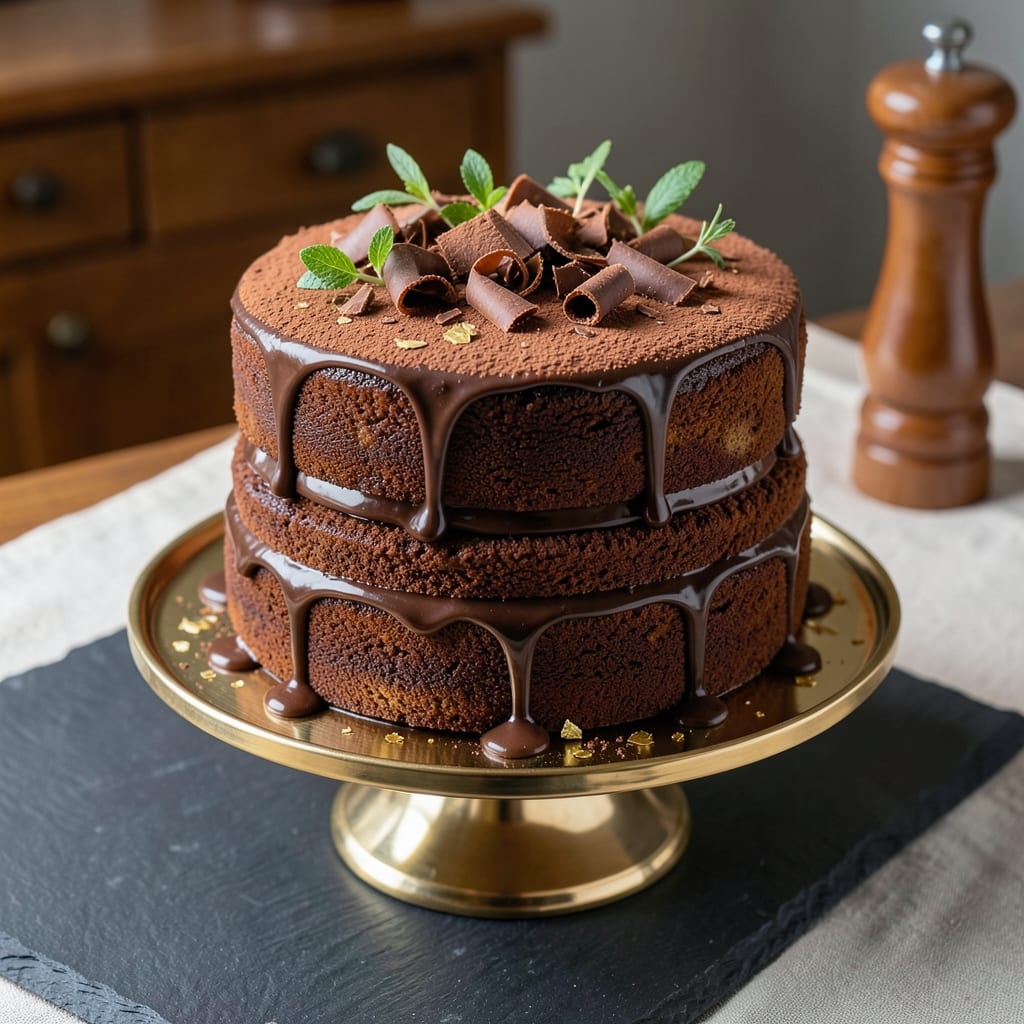
This $100 chocolate cake isn’t just dessert—it’s a masterpiece of texture and flavor, designed to impress even the most discerning palates. 💛 The secret lies in its three layers of ultra-moist, fudgy chocolate cake, separated by velvety vanilla bean buttercream swirls that melt with every bite. Every element is crafted with precision, from the slow-melted chocolate ganache to the delicate gold leaf accents that elevate it from indulgence to edible art.
The cake begins with a rich, dark chocolate base—enhanced with high-quality cocoa powder and a touch of espresso powder for depth—baked to a perfect golden dome that cracks beautifully when sliced. The frosting, infused with real vanilla bean and whipped to cloud-like perfection, is piped in elegant swirls between each layer, creating a visual and textural contrast that’s as striking as it is delicious. This isn’t just cake; it’s a culinary experience that transforms any occasion into something extraordinary.
What makes this recipe truly special is the attention to detail at every step. The layers are baked to an exact temperature, ensuring they remain tender yet sturdy enough to support the weight of the frosting. The vanilla bean buttercream isn’t just sweet—it’s aromatic and complex, with a hint of warmth from the vanilla that lingers on the palate. Even the finishing touches, like edible gold leaf or fresh berries, are chosen to complement the cake’s decadence without overpowering it.
Perfect for celebrations, weddings, or simply treating yourself, this cake is as impressive to serve as it is to eat. The foolproof technique ensures consistent results, while the luxurious ingredients guarantee a flavor profile that rivals the best patisseries. Whether you’re a seasoned baker or a passionate home cook, this recipe will help you create a dessert that’s nothing short of showstopping. Let’s get started on crafting your masterpiece.
Ingredients for $100 chocolate cake
These luxurious ingredients transform simple layers into a showstopping masterpiece.
| Ingredient | Amount | Notes |
|---|---|---|
| High-Quality Dark Chocolate 🍫 | 8 oz | 70% cocoa, chopped finely |
| Unsalted Butter 🧈 | 2 cups | Cold, cubed, European style preferred |
| Granulated Sugar 🍚 | 3 cups | Superfine preferred for smooth texture |
| Espresso Powder ☕ | 1 tbsp | Enhances chocolate depth |
| All-Purpose Flour 🌾 | 2 ½ cups | Sifted, plus extra for dusting |
| Cocoa Powder 🍫 | ½ cup | Dutch-processed, high-quality |
| Baking Powder 🧂 | 1 tsp | Aluminum-free preferred |
| Salt 🧂 | ½ tsp | Fine sea salt |
| Vanilla Extract 🌿 | 2 tbsp | Pure Madagascar bourbon |
| Large Eggs 🥚 | 6 whole | Room temperature |
| Heavy Cream 🥛 | 2 cups | Cold, full-fat |
| Vanilla Bean Paste 🌿 | 2 tbsp | Seeds scraped, paste included |
| Powdered Sugar 🍚 | 4 cups | Sifted for smooth frosting |
| Edible Gold Leaf 💛 | 1 sheet | Optional, for luxurious finish |
| Fresh Berries 🍓 | 1 cup | Raspberries or blackberries |
The chocolate is non-negotiable—Valrhona or Callebaut are my go-tos, but any 70% cocoa will work. Look for European-style butter with high fat content (82%+), like Plugrá or Kerrygold, for that ultra-rich texture. Superfine sugar dissolves better, but if you only have regular granulated, pulse it in a food processor for a few seconds. The espresso powder? Starbucks or Lavazza are reliable; it deepens the chocolate flavor without tasting like coffee. Fresh vanilla bean paste beats extract every time—Madagascar beans have that perfect balance of sweetness and warmth. For the berries, local, in-season fruit adds a pop of color that makes plating a breeze.
No vanilla bean paste? Double the extract, but trust me, it won’t be the same. Running low on powdered sugar? Confectioners’ sugar from a can works, but sift it first—lumps ruin the silky frosting. The eggs need to be room temperature, so pull them out 30 minutes before baking. Heavy cream should be cold when whipping for buttercream—chill the bowl and beaters too. For the gold leaf, Amazon or specialty baking stores carry it; a single sheet goes a long way. Pro tip: Keep the frosting in the fridge until ready to use—it’s easier to pipe when cool.
Store the cake layers wrapped in plastic at room temperature for up to 2 days—they’ll keep better than the fully frosted cake. The buttercream stays fresh for 3 days in the fridge, but bring it to room temp before piping. For make-ahead magic, bake the layers 1 day ahead, frost 4 hours before serving, and refrigerate until ready. Gold leaf? Apply it right before serving—it’s delicate and adds that wow factor instantly. Berries should be washed and dried just before placing on top; any moisture makes them soggy.
Why You'll Love This Recipe
- No Fuss Mixing: This cake comes together with just a handful of ingredients—no fancy techniques, no last-minute store runs. Melt butter and chocolate together, fold in dry ingredients, and you’re done. Honestly, I’ve made it while scrolling through my phone.
- Deep, Rich Bite: That espresso powder isn’t just for show—it cuts through the sweetness and makes every slice ridiculously good. The dark chocolate melts into a fudgy center, while the outside stays tender. (Yes, even on a Tuesday night.)
- Showstopper Any Day: Birthday? Date night? Brunch with friends? This cake looks impressive enough for a celebration but takes zero effort. The dark chocolate and buttery crumb scream "special occasion" without needing frosting.
- Leftovers That Last: The texture stays moist for days, so you won’t be scrambling to finish it off. Between us, I’ve had this cake for breakfast the next morning—no judgment. And since it’s budget-friendly, you can afford to bake it twice.
Step-by-step instructions for luxurious chocolate cake layers
Here's how to create decadent chocolate cake layers with velvety texture and swirling vanilla frosting.
🍳 Step 1: Melt Chocolate and Butter for Rich Foundation
In a heatproof bowl set over a pot of simmering water, melt the 8 oz high-quality dark chocolate and 2 cups unsalted butter together. Stir gently until completely smooth and glossy, then remove from heat. Let cool slightly to 110°F—you want it warm but not hot when adding eggs.
Here's the thing—this tempering step prevents the eggs from scrambling when mixed in later. I like to test the temperature by dipping my finger in; it should feel warm but not burn you. If it's too hot, let it cool another minute before proceeding.
👨🍳 Step 2: Whisk Eggs and Sugar for Light Texture
In a separate large bowl, whisk together the 6 whole large eggs, 3 cups granulated sugar, 2 tbsp vanilla extract, and 2 tbsp vanilla bean paste on medium-high speed for 3-4 minutes until pale and thickened. The mixture should nearly triple in volume and ribbon when the whisk is lifted.
This is where the magic happens—the eggs incorporate air that creates that signature light, airy texture. Don't rush this step; under-whipped eggs lead to dense cake layers. You'll know it's ready when you can draw a visible line in the mixture that holds its shape for a few seconds.
🥘 Step 3: Combine Wet and Dry Ingredients Gently
With the mixer on low speed, gradually add the chocolate-butter mixture to the egg mixture in a slow, steady stream. Mix just until combined, then sift in the 2.5 cups all-purpose flour, 0.5 cup cocoa powder, 1 tsp baking powder, 0.5 tsp salt, and 1 tbsp espresso powder.
Mix on low speed for only 15-20 seconds after adding the dry ingredients—just until no flour streaks remain. Overmixing develops gluten and makes the cake tough. The batter should be thick but pourable, with a deep chocolate aroma that makes your kitchen smell like a Parisian patisserie.
🔥 Step 4: Bake Layers with Perfect Rise
Divide the batter evenly between three 8-inch round pans lined with parchment paper. Bake at 350°F for 25-30 minutes, or until a toothpick inserted in the center comes out with moist crumbs (not wet batter). Rotate the pans halfway through baking for even browning.
Here's my pro tip: I tap the sides of the pans gently after 15 minutes to encourage even rising. The layers should be just set in the center but still slightly springy to the touch. Let them cool in the pans for 10 minutes before transferring to a wire rack to cool completely.
🍽️ Step 5: Create Vanilla Bean Frosting Swirls
In a stand mixer fitted with the whisk attachment, beat the 2 cups heavy cream and 4 cups powdered sugar on medium speed until soft peaks form. Add the 2 tbsp vanilla extract and 2 tbsp vanilla bean paste, mixing until fully incorporated and smooth.
For the swirl effect, spread a thin layer of frosting on each cooled cake layer, then pipe additional frosting in a zigzag pattern across the top. Assemble the layers with a thin layer of frosting between each, then cover the entire cake with remaining frosting. Use a spatula to create smooth sides, then gently drag a toothpick through the frosting to create decorative swirls.
⏰ Step 6: Decorate with Gold Leaf and Berries
Once the frosting is completely set (about 30 minutes in the refrigerator), carefully apply the edible gold leaf using a soft brush. Work in small sections, gently pressing the gold onto the cake surface. Finish by arranging the 1 cup fresh berries around the base for a pop of color.
This is where your cake transforms from spectacular to showstopping. The gold leaf adds that luxurious touch that makes this cake feel like a true indulgence. Serve at room temperature so the flavors can fully develop and the textures can shine.
Pro Tips For Making $100 Chocolate Cake
- Melt Chocolate Slowly: I learned this the hard way—dumping chopped dark chocolate into hot butter at full blast turns it into greasy sludge. Instead, melt the butter first (just until it’s liquid, not browned), then reduce heat to low and add the chocolate in small batches, stirring constantly. The temperature stays steady, and you won’t end up with grainy, under-melted chunks ruining your cake’s silky texture.
- Sift the Espresso Powder: That little packet of espresso powder isn’t just flavor—it’s the thing that makes this cake taste like a high-end bakery’s instead of a sad grocery-store version. Sift it directly into your dry ingredients with the flour; this prevents clumping and ensures it distributes evenly. (Yes, even if you’re impatient like me, skip the spoon-and-stir method.)
- Don’t Overmix the Batter: I used to beat the wet and dry ingredients together like I was trying to win a baking contest. The result? A dense, rubbery cake that tasted more like a hockey puck than chocolate. Mix just until the flour disappears—about 20 seconds after that point—and stop. You’re not making pancakes; this batter needs to stay light.
- Use Room-Temp Butter: Cold butter from the fridge will create pockets of air in your cake, leading to uneven baking and a crumbly texture. Take it out 30–45 minutes before you start (or microwave it in 5-second bursts until it’s soft but not melted). Room-temp butter blends smoothly and guarantees a tender crumb—no guessing, no regrets.
Essential equipment for this dish
Stand Mixer Essentials
Your stand mixer is the heart of this cake recipe, especially for the vanilla bean buttercream. I swear by a KitchenAid Artisan Series with the paddle and whisk attachments—the powerful motor handles the heavy cream and powdered sugar without overheating. For budget-friendly options, the Cuisinart Smart Multiquick works well too, but avoid cheap models that struggle with thick frosting. The whisk attachment needs to be clean and dry before starting to prevent buttercream from splattering. 🌟
Precision Baking Tools
Invest in high-quality 8-inch round cake pans with non-stick coating—I recommend Wilton Perfect Results or Nordic Ware Naturals. These pans bake evenly and release layers cleanly. A digital kitchen scale (like the OXO Good Grips) ensures accurate measurements, especially for the 3 cups granulated sugar and 2.5 cups flour. Don’t skimp on parchment paper—it prevents sticking and makes layer removal effortless. A toothpick for testing doneness and a spatula for frosting are non-negotiable.
Chocolate Melting Setup
For the chocolate and butter mixture, use a heatproof double boiler (a metal bowl over a saucepan with simmering water) to avoid burning. A thermometer (like the Thermoworks Thermapen) helps monitor the 110°F temperature—critical for preventing scrambled eggs. I also keep a small offset spatula handy to scrape down the sides and ensure even melting. A fine-mesh sieve sifts the all-purpose flour and cocoa powder flawlessly, eliminating lumps that ruin texture.
Frosting Piping Gear
Achieving those vanilla bean frosting swirls requires a piping bag with a star tip (Wilton 1M or Ateco 804). For convenience, use a disposable piping bag with a pastry tip—just cut a corner for easy piping. A bench scraper smooths frosting sides, while a toothpick creates decorative swirls. For the gold leaf, a soft-bristle brush (like the Da Vinci Maestro) applies it without tearing. Keep everything chilled—cold frosting pipes cleaner and holds shapes better.
Decorative Finishes
Fresh raspberries or blackberries need a small pair of kitchen shears for trimming stems neatly. A damp paper towel helps arrange berries without crushing them. For the gold leaf, work in a well-ventilated area—it’s delicate and requires a light touch. I also keep a small bowl of water nearby to dampen the leaf slightly before applying. A turntable (like the Wilton Cake Stand) makes plating effortless, letting you rotate the cake while decorating. ✨
Nutrition facts
Frequently asked questions
Can I make this cake with regular cocoa powder instead of Dutch-processed?
You can try, but Dutch-processed cocoa gives a smoother, richer flavor and better color. Regular cocoa powder is more acidic, which might make the cake slightly denser and darker. If you must use regular cocoa, reduce the baking powder to 0.75 tsp to prevent over-rising. The espresso powder helps balance any bitterness, so keep that in the recipe.
How do I substitute vanilla bean paste if I only have vanilla extract?
Use 2 tbsp vanilla extract plus 1 tbsp vanilla sugar (vanilla bean seeds scraped into sugar) for the closest flavor. Without vanilla sugar, the frosting will taste sweeter but still aromatic. For extra depth, add a tiny pinch of vanilla bean powder (available at specialty stores) if you're feeling ambitious!
Can I bake this cake in smaller pans for individual servings? For 6-inch pans, reduce baking time to 20-25 minutes and increase oven temperature to 350°F. The batter volume stays the same, so you'll need about 1.5 cups per 6-inch pan. Just
Why did my cake layers crack on top?
Cracking usually happens from sudden temperature changes or overbaking. Let the cake cool in the pans for 10 minutes before removing, then cool completely on a wire rack. Also check your oven—if it runs hot, reduce temperature to 340°F and add 2-3 minutes to baking time. A cracked top doesn't affect flavor, but it can be prevented with proper cooling techniques.
How far ahead can I prepare the frosting?
The buttercream can be made 1 day ahead and stored in an airtight container in the fridge. Bring it to room temperature before piping (about 1 hourgold leaf finish, apply it just before serving—it's delicate and loses its shine if handled too early.