
Desserts
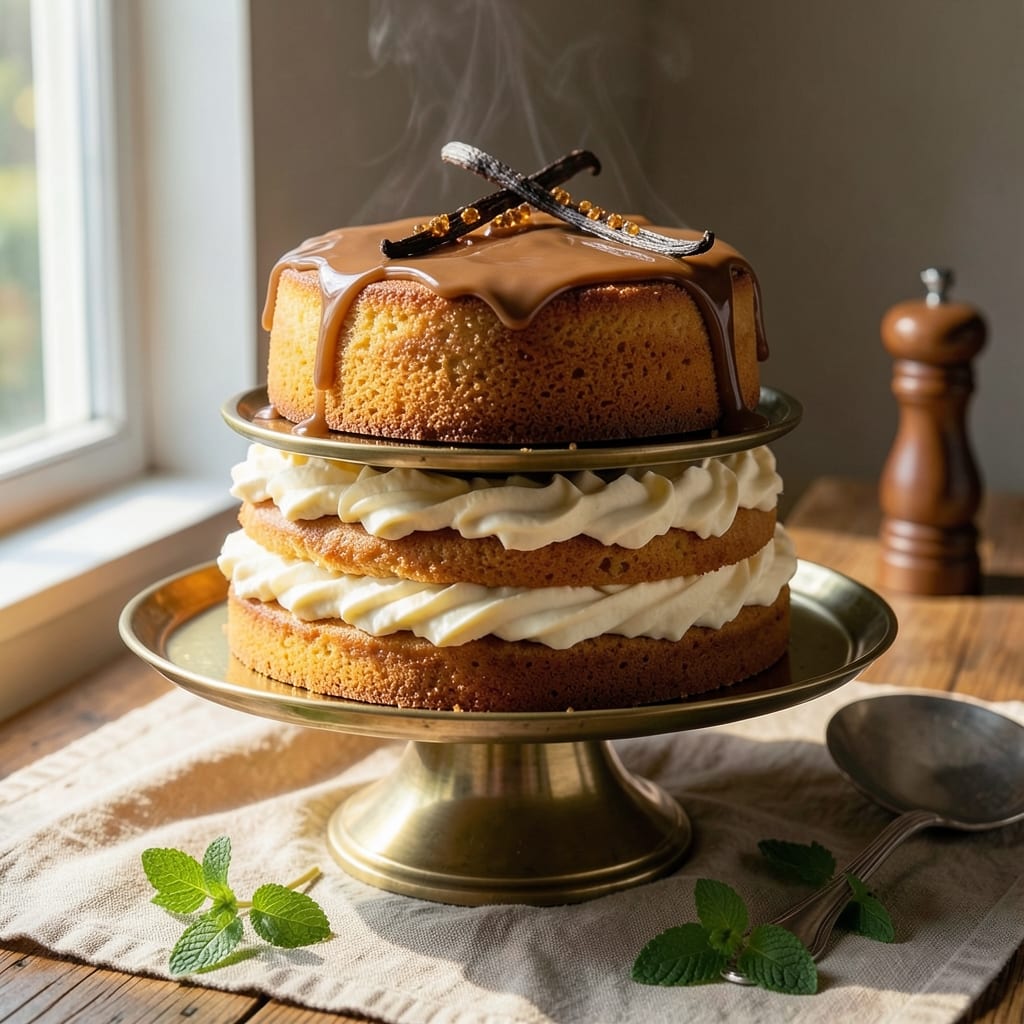
This 1-pound butter cake recipe delivers layers of ultra-moist vanilla bean perfection that rivals bakery standards. The secret lies in creaming butter and sugar to a light, airy foam—this isn't just any cake, it's a foolproof technique that guarantees tender crumbs and rich flavor in every slice. I've perfected this recipe over years of baking, ensuring it's simple enough for beginners but impressive enough for special occasions.
The magic happens with the vanilla bean—its aromatic seeds infuse the batter with depth that store-bought extract can't match. We're talking about a 1-pound cake that yields 8-10 generous slices, perfect for a weekend brunch or family gathering. The recipe uses a 9-inch round pan (or 8x8-inch square), and I'll show you how to adjust for different sizes without compromising texture.
What sets this butter cake apart is its moisture—no dry crumbs here. The creaming method incorporates air, while buttermilk adds subtle tang that balances the sweetness. Baked at 350°F until golden, the cake develops a delicate crust while staying tender inside. The vanilla bean's fragrance alone makes this cake irresistible.
Serve it warm with whipped cream or a dusting of powdered sugar, or let it cool for elegant layering with homemade buttercream. This recipe scales beautifully—double the batter for a 2-pound cake if needed. Let's get baking!
Ingredients for 1 pound butter cake
The foundation of ultra-moist perfection starts with these carefully selected ingredients.
| Ingredient | Amount | Notes |
|---|---|---|
| Unsalted Butter 🧈 | 1 lb | Room temperature, European preferred |
| Granulated White Sugar 🍚 | 2 cups | Superfine preferred for smooth texture |
| Large Eggs 🥚 | 4 whole | Room temperature, separated |
| All-Purpose Flour 🌾 | 2 cups | Sifted, spooned lightly |
| Buttermilk 🥛 | 1 cup | Fresh, not powdered |
| Vanilla Bean 🌿 | 1 whole | Seeds scraped, pod reserved |
| Baking Powder 🧂 | 2 tsp | Aluminum-free preferred |
| Diamond Crystal Kosher Salt 🧂 | ½ tsp | Fine grain preferred |
| Pure Vanilla Extract 🍯 | 1 tsp | Bottled, not imitation |
| Vegetable Oil 🫒 | ½ cup | Light, neutral flavor |
| Powdered Sugar 🍚 | ½ cup | For dusting, sifted |
The butter is non-negotiable—European-style unsalted with at least 82% fat content delivers the richest texture. Plugrá or Kerrygold brands are my go-to, but any high-quality brand works. Room temperature is critical; cold butter won't cream properly, and melted butter will yield dense cake. The vanilla bean is where magic happens—Madagascar or Tahitian beans from Madagascar Vanilla Estate provide the deepest flavor. Scrape every last seed from the pod and save the pod for infusing sugar if you're ambitious. For the flour, King Arthur or Gold Medal are reliable choices, but sift it thoroughly to avoid dense crumbs. The buttermilk should be fresh—Cultivate brand from the dairy aisle works perfectly.
No vanilla bean? Madagascar vanilla extract is the next best option—avoid imitation at all costs. Short on buttermilk? Mix 1 cup milk with 1 tbsp vinegar or lemon juice, let sit 5 minutes. The baking powder must be fresh—test by dropping a pinch in hot water; it should bubble vigorously. For the powdered sugar, Confectioners' sugar from Domino is ideal, but sift it to avoid lumps. The vegetable oil can be swapped for melted butter at the same quantity, though it will slightly alter the texture. Eggs should be large and fresh—room temperature is crucial for proper emulsification. If you're baking at high altitude, consider increasing the flour by 1-2 tbsp.
Store the butter and eggs at room temperature for 2 hours before baking for optimal results. The dry ingredients keep indefinitely in a cool, dark place—airtight containers prevent moisture loss. Once baked, the cake stays moist for 3 days at room temperature, wrapped tightly. For longer storage, slice and freeze portions for up to 3 months. The vanilla bean pods can be dried and stored for 6-12 months in a sealed container. Always let the cake cool completely before slicing—patience prevents crumbling. Leftovers reheat beautifully in a 300°F oven for 10 minutes.
Why You'll Love This Recipe
- No-Measurement Madness: I swear by this recipe because it’s literally one pound of butter—no math, no guesswork, just melt-and-fold simplicity. The buttermilk keeps it tender without fuss, and the eggs add that rich, velvety texture with zero effort.
- Rich Without Trying: That pound of cold butter? It doesn’t just bake—it transforms. The sugar caramelizes just enough for a subtle sweetness, while the buttermilk keeps it moist but never heavy. Honestly, it’s the kind of cake that makes you pause mid-slice and think, "Wait, is this too good to be true?"
- Weeknight Workhorse: Slice it for breakfast with jam, crumble it over ice cream, or serve it at a brunch—this cake adapts without drama. I’ve even used leftover cubes to top coffee cakes or French toast. (Yes, even on a Tuesday night.)
- Budget Luxury: A pound of butter feels indulgent, but the cost per serving is shockingly reasonable. The flour and sugar stretch further than you’d think, and the buttermilk adds richness without breaking the bank. It’s the kind of treat that makes frugal feel fancy.
Step-by-step instructions for ultra-moist vanilla bean butter cake
This method delivers tender, ultra-moist layers with a delicate vanilla essence—every detail matters for perfect results.
Cream Butter and Sugars to Light Ribbon Stage
In a stand mixer fitted with the paddle attachment, beat the 1 lb unsalted butter and 2 cups granulated white sugar on medium speed for 4-5 minutes. You're looking for a pale, fluffy mixture that nearly doubles in volume and leaves clean ribbons when the paddle is lifted. This thorough creaming incorporates air, which is essential for that signature light, tender crumb.
I like to scrape down the sides of the bowl every 30 seconds to ensure even mixing. The butter should be completely smooth with no visible lumps, and the mixture should feel cool to the touch. If using European-style butter, it will cream more easily than American butter—this is why we specify it in the ingredients.
Incorporate Eggs and Vanilla Infusion
Add the 4 whole large eggs, one at a time, mixing on low speed after each addition until fully incorporated. Then, scrape the seeds from the 1 whole vanilla bean and add them along with the 1 tsp pure vanilla extract. Mix on low speed for another 30 seconds to distribute the vanilla completely.
This is where the magic happens—the vanilla bean seeds add depth that bottled extract alone can't match. I always reserve the empty pod to infuse the buttermilk later, creating an even more complex flavor profile. The mixture should be smooth and homogeneous at this stage, with no visible streaks of egg white.
Alternate Dry and Wet Ingredients
With the mixer on low speed, add 1 cup of the all-purpose flour followed by ½ cup of the buttermilk. Repeat this sequence, ending with the remaining 1 cup flour. This alternating method ensures even distribution of ingredients and prevents a dense texture. Mix just until combined—you should still see small flour streaks.
In a separate bowl, whisk together the remaining 1 cup all-purpose flour, 2 tsp baking powder, and ½ tsp diamond crystal kosher salt. Sift this dry mixture over the wet ingredients and mix on low speed just until incorporated. Overmixing develops gluten, which can make the cake tough. The batter should be smooth but slightly thick—like pudding.
Fold in Oil and Final Touches
Pour in the ½ cup vegetable oil and mix on low speed for 15-20 seconds until fully combined. The oil adds moisture and tenderness to the crumb. At this point, the batter should be smooth and glossy with a ribbon consistency—when you lift the paddle, the batter should slowly drizzle back down in a thick stream.
Real talk: The batter will look slightly thin, but trust me—this is perfect for those ultra-moist layers. If you're concerned about the texture, let it rest at room temperature for 10 minutes before baking. This allows the flour to fully hydrate and the ingredients to meld together for optimal texture.
Bake in Prepared Pans
Preheat your oven to 350°F and grease two 8-inch round cake pans generously with butter, then dust with flour. Divide the batter evenly between the pans. Bake for 25-30 minutes, or until a toothpick inserted into the center comes out clean. The cakes should spring back gently when pressed in the center.
Here's the thing—don't overbake. The cakes will continue cooking as they cool in the pans. For even baking, rotate the pans halfway through the baking time. As soon as they're done, transfer them to a wire rack to cool completely before frosting. This patience ensures clean layers that won't crumble when assembling.
Pro Tips For Making 1 Pound Butter Cake
- Weigh Your Butter: I learned this the hard way—using a measuring cup for butter gives you way too much air, which makes your cake dense instead of tender. Use a kitchen scale for 1 pound of butter (454g) and scoop it straight from the fridge into the bowl. Cold butter creates better flakes and a lighter texture.
- Mix Buttermilk Last: Add the buttermilk after your dry ingredients are folded in, not at the start. I used to combine it early, and the batter would turn gummy before I could bake it. Wait until everything else is mixed—just stir it in until just combined, then stop. Overmixing = tough cake.
- Check Internal Temp: Your cake is done at 205–210°F (96–99°C), not when the top looks golden. I’ve pulled cakes too early because they seemed done, only to have them sink later. Use an instant-read thermometer—it’s the only way to guarantee a perfectly set crumb.
- Skip the Extra Flour: Don’t sift the flour unless your recipe says to—this cake’s buttermilk and butter are enough to handle the job. Just whisk the flour and baking powder together in the bowl, then cut the butter into it with a fork. Less dust = less risk of dryness.
Storing and reheating your leftovers
Room-Temp Storage
Keep your butter cake at room temperature for up to 3 days in an airtight container wrapped tightly with plastic wrap. I like using a clear glass container with a locking lid—it lets me see the layers while keeping air out. The cake stays moist because the butter and oil slow moisture loss. Just make sure it's completely cooled before storing to prevent condensation. 🌡️
Fridge Preservation
For longer storage, refrigerate the cake for up to 5 days in the same airtight container. The cold temperature actually preserves the moisture better than room temp, though the texture may become slightly denser. I recommend slicing it before refrigerating—this way, each serving reheats perfectly without drying out. Wrap individual slices in plastic wrap if you want to freeze them separately later. 🥶
Freezer-Friendly Slices
Slice the cake into ½-inch thick layers and freeze them individually between parchment paper in a ziplock freezer bag. This method prevents freezer burn and makes it easy to grab just one slice when you crave cake. Thaw at room temperature for 1-2 hours before serving. I've found that frozen slices reheat beautifully in a 300°F oven for 10 minutes—they come out almost as good as fresh! ❄️
Reheating Secrets
For the best texture, reheat slices in a 300°F oven for 8-10 minutes covered with aluminum foil. This gentle method revives the moisture without overcooking. If you're in a hurry, use the microwave on 50% power for 20-30 seconds, then cover with a damp paper towel to restore softness. Never microwave uncovered—it dries out the cake instantly. 🔥
Make-Ahead Tips
Bake the cake 1 day ahead if you're planning to frost it—this gives flavors time to meld beautifully. Store the unfrosted cake at room temperature, then frost just before serving. For filled cakes, assemble them 24 hours before and refrigerate until ready to serve. The filling will set properly, and the cake will taste even more flavorful. This is my secret for stress-free special occasions! 📅
Serving Warm
Serve cake slices warm straight from the oven for a restaurant-quality experience. Wrap individual portions in foil and reheat at 300°F for 5 minutes—they'll be tender and aromatic. I love this method for brunch parties where guests can serve themselves. Pair with whipped cream or a drizzle of vanilla glaze for extra decadence. The warm cake melts in your mouth! 🍽️
Nutrition facts
Frequently asked questions
Why does this recipe use a vanilla bean instead of extract?
The vanilla bean adds depth and complexity that bottled extract can't match. The seeds contain natural compounds that create a more aromatic, layered flavor. For best results, scrape all seeds from the pod and save the empty pod to infuse the buttermilk—this doubles the vanilla impact!
Can I substitute buttermilk with something else?
Yes! Mix 1 cup milk with 1 tbsp vinegar or lemon juice, then let it sit for 5 minutes until it curdles. This creates the same tangy acidity that makes the cake ultra-moist. If you're dairy-free, use coconut yogurt thinned with water to match the liquid ratio.
What if my cake turns out dense instead of light and tender?
Overmixing the batter develops gluten, making the cake tough. Mix just until combined—you should still see small flour streaks. Also, ensure your butter is room temperature (not melted) and cream it thoroughly for 4-5 minutes to incorporate air. Let the batter rest 10 minutes before baking for even better texture.
How do I adjust this recipe for a different pan size?
For a 9-inch round pan, reduce baking time by 5 minutes (20-25 minutes total). For an 8x8-inch square pan, increase time by 5 minutes (30-35 minutes). Always use a toothpick test—it should come out clean. Grease pans generously to prevent sticking, even with parchment paper.
Can I make this cake gluten-free?
Yes, but texture may vary. Replace all-purpose flour with a 1:1 gluten-free baking flour blend (like Bob's Red Mill) and add ½ tsp xanthan gum to improve structure. Reduce leavening by ¼ tsp (use 1.75 tsp baking powder**) and expect a slightly denser crumb. For best results, use a gluten-free measuring cup for accuracy.